The Labyrinth
Back To King’s Quest Chapter 4
In the puzzle room walk to the right and talk to Alexander. You’ll meet the Sphinx and be taken to the Labyrinth to solve its puzzles. If you have any trouble with any of the puzzles you can watch the video above which gives you the full solutions to all of the puzzles in Chapter 4.
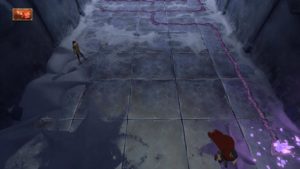
Puzzle 1
This one’s easy. Walk backwards until you see the beginning of the purple path. Start from the beginning and walk along the purple to the doorway.
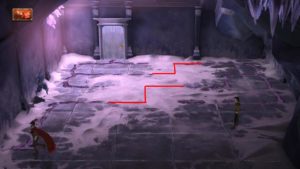
Puzzle 2
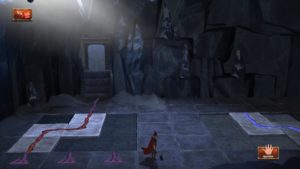
The second puzzle is just the same but some of the path is covered over with snow. See the picture below for the path you need to take or just use trial and error to find the correct path to the door.
Puzzle 3
Start from the beginning of the purple path and make your way through the open area. Crystal shards will block your path when you take a wrong turn so there’s really no way to make mistakes in this puzzle. Just continue through the only path you can take until you reach the door and open it.
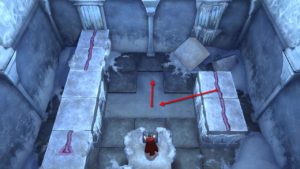
Puzzle 4
To complete the path in this puzzle bring the first block with the purple path into the nook in the center. Move the two plain blocks all the way to the right and then bring the purple path block into place on the left. Move the plain blocks back to the left and then repeat the process for the second purple path block, bringing it into the center nook and then across to the left.
Puzzle 5
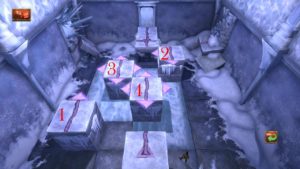
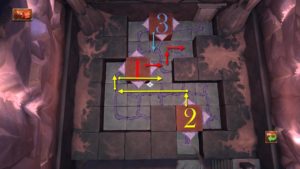
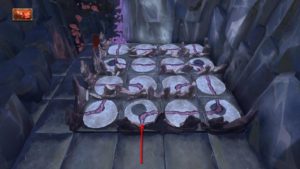
This labyrinth puzzle may look a little tricky but it’s actually really easy and you can probably figure it out just by trial and error. There are numerous ways to complete the purple path. The following instructions are just one way to do it. I’ve numbered all the blocks in the pic below.
Block 1 – Up, Right
Block 2 – Down, Left
Block 3 – Right, Down
Block 4 – Up
Block 2 – Up
Block 3 – Left
Walk along the path and open the door to reach the next puzzle.
Wedzel Wolves
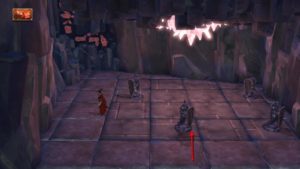
When you go through the next door you’ll be chased by Wedzel Wolves. Start running as soon as you can or they’ll catch up. Follow the path Alexander takes. Remember that when he calls out left or right run in the opposite direction as you’re viewing the scene from in front of them.
Arrow Puzzle
As far as I know Alexander will always miss the target no matter how accurately you tell him to shoot the arrow. Walk along the path and open the door to the next room.
Puzzle 6
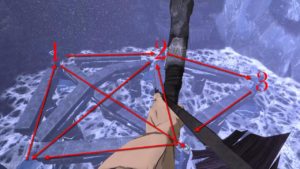
The Bridge Puzzle is very easy to complete. Shoot the buttons on top of the pillars to make Alexander run in that direction. He’ll pull the lever as he goes across each bridge. Send him across each bridge once to pull all the levers and bring all of the purple path blocks into place. Follow the arrows in the picture below, starting at point 1. Once you get past point 3 you can take either path up or to the left to complete the puzzle.
Puzzle 7
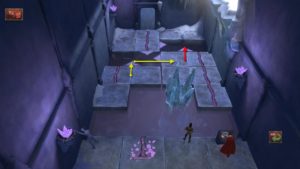
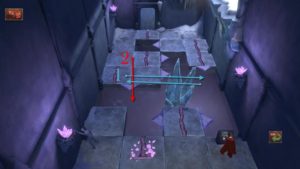
This puzzle is a little bit trickier but you can get Alexander to help you out. There are different sized blocks that need to be moved into the right place. If you bring the single block back and place it in front of Alexander he will melt the ice crystals making the puzzle much easier to complete.
To bring the single block back move the top right double block up once. The left double block up once and to the right twice. You can now bring the single block from the top down 4 times and right once so Alexander can melt the ice.
You can now easily move all of the pieces into their right places to make the purple path and get across to open the door.
Puzzle 8
You have two cubes that must be dropped into place with the correct side facing upwards to make the path across. Here are the instructions.
Straight Line Cube – Forwards, Left, Forwards, Left, Back, Right, Forwards, Left, Forwards
Curved Line Cube – Forwards, Forwards, Forwards, Right, Right, Forwards
Walk along the path and open the door to the next room.
Puzzle 9 (Beaver Statue Head)
After the cut-scene Graham will be in a room with two doors. One on the ground floor and one up above. I’ll check out the top door first. In this puzzle room you have three red blocks that you need to move out of the way so Graham can make it across the purple path. Once again I’ve labelled the red blocks so you can easily follow the instructions to complete the puzzle.
Block 1 – Right, Up, Right
Block 2 – Up, Left, Left, Left, Up, Right, Right
Block 3 – Down
Now you can walk across the path to the door where you’ll find the Beaver Statue Head.
Puzzle 10 (Beaver Statue Body)
Pull the lever on the right to lower the wall. Pick up all of the puzzle pieces from both sides and place them down in the correct places shown in the picture below. The wall acts like a mirror but only the pieces that match up will shine as you walk across them.
Pull the lever to lift the wall up and then walk across to the door for the Beaver Statue Body.
In the large room both statue pieces on the pedestal and another door will appear. Go through the door into the next room.
Puzzle 11
This is the same puzzle you had with Alexander but this time he’s not here to melt the ice crystals. The first thing you want to do is bring the small single piece from the top down to the bottom to get it out of the way.
Move the 2-tile blocks back to the left to their starting position. Now move the 3-tile block up as far as it can go. The 2-tile blocks need to be switched around. You can do this by moving the bottom one to the right twice, the top one down twice and then the first one back to the left twice.
Bring the 3-tile block down twice, the top 2-tile block right and up once. The 3-tile block then goes up once and left twice. With the single tile block at the bottom you should have completed the path to the door.
Puzzle 12
The next puzzle is played out on three levels. The statues can’t be moved but they can be turned around. Use the rocks on the top left to climb all the way down to the bottom floor. Turn the statues so that they will make a path to the door as in the picture below.
Climb up to the middle floor. As you walk on the tiles they will rotate. You need to start from where the door is on the first level and work your way backwards to the beginning of where the path is. You can see shadows on the floor to help you find the right path. There are rocks in the way of some of the paths but don’t worry about these, they won’t stop the purple path from working. Walk backwards and forwards until the path is all lined up. It should look like the diagram below.
Now climb to the top floor and start from the purple path in front of the first statute. You’ll slide along all the way to the door. Open it to find the Riddle Room.
Next Part: Riddle Room


