
Fallout
 Fallout 1 is an epic role playing game set in a post nuclear world. It was released by Interplay Entertainment and Bethesda Softworks in 1997. Widely regarded as one of the best role playing games available, this first episode sets the scene for the entire Fallout franchise.
There are many paths to victory in this game. I will show you the path that I took and hopefully reveal all of the quests and some of the items along the way. The game starts with character creation and this plays an important role in how you play and win the game.
Character Creation
The pre-set characters are not very good so it’s definitely recommended that you create your own character from scratch. I’ll show you the character that I won the game with but you could do equally well with a character of your choosing. These are my starting stats.
Strength: 6
Perception: 9
Endurance: 6
Charisma: 5
Intelligence: 8
Agility: 8
Luck: 5
Traits: Fast Shot and Gifted
Skills: Small Guns, First Aid and Lockpick
Gifted improves all of your base stats by 1 but reduces all of your skills by 10%. You also lose 5 skill points per level. You can make up for this by adding at least 3 of the bonus character points into Intelligence which increases the skill points you get per level.
Intelligence also affects the dialogue options you have in conversations with NPCs so it’s fairly important.
Have a look at the skills and traits and see which ones fit your character. There’s no right or wrong but some characters may be easier to play than others.
Vault 13 Cave Entrance
The Vault 13 residents are running out of drinking water and you’ve been sent out to find another Water Chip. Examine the corpse outside of the vault door and pick up the 10mm AP ammo and Knife.
Arm yourself with either your pistol or knife. Ammo may be in short supply during the very early part of the game. Kill all the rats for 500 experience points and head out of the caves to the lower west and into the Wastes.
Shady Sands
You’ve been given the location to Vault 15 but before you reach it you’ll come across Shady Sands, a quaint little town.
Talk to Katrina at the entrance and exhaust all possible dialogue options with her. This will give you a bonus 250 experience points.
Speak to Seth and he’ll tell you about the Radscorpion problem and offer to take you to the caves. You may want to look around first but the Radscorpions aren’t too difficult to deal with. You can always come back here and complete this quest if you’re not confident now.
Make sure you buy a Rope here from Seth. Alternatively you can buy one in the General Store in the Hub. You’ll need it in Vault 15.
Shady Sands Quests
Cure Jarvis of Radscorpion Poison – Speak with Seth.
Improve Shady Sands’ Agriculture – Speak with Curtis in the Shady Sands Garden.
Make Poison Antidote – Speak with Seth.
Recruit Ian – Give him 100 caps or persuade him to join.
Rescue Tandi from the Raiders – After she’s been kidnapped talk to Aradesh.
Stop the Radscorpions – Seth will take you to the caves.
Talk to Katrina – Complete all dialogue options with Katrina.
Vault 15
Just like Vault 13 there’s lots of rats in the caves so kill them before heading into the vault. Inside the vault you’ll find Mole Rats and Pig Rats as well but these are almost as easy as regular rats so don’t worry too much about it. You can always practice using your First Aid skill and Doctor skill to heal yourself and gain extra experience.
Use the Rope on the elevator to descend down to the lower levels. There’s no Water Chip here but in the lockers on the third level you’ll find some Dynamite, a couple of Frag Grenades and a SMG.
You need to walk to the south eastern corner to gain some experience and to be informed that the Water Chip is not in this vault.
Radscorpion Caves
Head back to Shady Sands, talk to Seth and let him take you to the Radscorpion Caves. Killing all of the Radscorpions in the cave will give you 500 XP and increase your reputation by 6.
You can also blow up the entrance to the cave with the Dynamite you found in Vault 15. This will give you an additional 300 XP. Make sure you collect the Radscorpion Tails.
Shady Sands
Talk to Dr. Razlo and tell him you have a sample of Radscorpion poison. He’ll use it to make an Antidote. You’ll get 250 XP for this. Use the Antidote on Jarvis, the man behind the curtain to complete the Cure Jarvis quest and get another 400 XP.
It’s possible that Ian will join you. He’s in the Guard House. Either pay him 100 caps or if your intelligence is 6 or above you have the dialogue option to offer him a piece of the action and he’ll join for free. Recruiting Ian gives you a further 100 XP.
Junktown
There’s quite a few quests in the Junktown so I’ll just mention the main ones. You can only enter Junktown during the day so you’ll need to sleep till morning if you arrive after dark.
Go to Darkwater’s General Store and talk with Killian Darkwater, the self proclaimed mayor of Junktown. While speaking with him an assassin will try to kill him. Help fight off the assassin and Killian will give you the quest to Get Gizmo’s Confession.
Go to the Casino and speak with Gizmo while you have the Tape Recorder from Killian in your inventory. You can plant a bug on Gizmo but I found it easier just to talk to him. Offer yourself to Gizmo to kill Darkwater and get his confession. Take the recorder back to Killian Darkwater and help run Gizmo out of town.
You can get Dogmeat as a companion here by giving him some Iguana Bits or an Iguana on a Stick (sold at the Hub).
Enter the Skum Pit between 18:00 and 04:00 hours to witness an event with a Skulz member harassing an employee. This opens up another side quest to eliminate or fight the Skulz gang. Talk to Lars (Chief Guard at the Junktown entrance) about fighting them or Sherry (one of the Skulz members) about giving evidence.
Tycho can be found in the Skum Pit and may join your group if you have helped Killian get rid of Gizmo.
Junktown Quests
Bust the Skulz Gang – Speak with Lars.
Get Gizmo’s Confession – Speak with Killian Darkwater.
Help Saul – Talk to Trish.
Kill Killian – Given by Gizmo.
Kill Neil – Given by Vinnie after stealing the urn.
Recruit Tycho – Speak with Tycho.
Rescue Sinthia – Spend the night in the Crash House Hotel to start the quest.
Save Killian’s Life – Speak with Killian
Save Trish – Visit Skum Pit between 4 and 6 o’clock.
Solve Phil’s Canine Conundrum – Give Iguana Bits or an Iguano on a Stick to Dogmeat to have him as your companion.
Steal Neal’s Urn – Speak with Vinnie.
Stop Gizmo – Speak with Killian and Lars.
The Hub
 The first thing you will be greeted with in the Hub are people getting ready with their caravans. You can get a job in the Hub escorting the caravans to various places but there’s lots to explore here before heading off to another city.
The Hub is a fairly large place to explore. It’s the largest trading center in the region. The central square has a General Store and Weapons Shop which you might find quite handy.
The various merchant groups will tell you of the caravans which have been going missing. To complete the Find the Missing Caravans quest talk to Butch and Rutger from the Far Go Traders in the Downtown section of the Hub. Then go and talk to Beth, the own of the Weapons Shop. She’ll tell you about Harold. You can find Harold in Old Town. Talk to Harold and then talk to the madman, Slappy, out the front of his house and ask him to take you to the Deathclaw’s Lair.
Deathclaws are nothing to take lightly, even towards the end of the game. They have a ton of health and will tear you to pieces if you’re not careful. It’s best to take them out from a distance and target them in the eyes. Find the Dying Mutant and he’ll give you a Holodisc. Take the disc back to Butch for 1000 XP and 800 caps.
I’ll list all of the quests below but there’s one thing you should definitely do while you’re here. In Old Town near the entrance is a building with Rough Guards inside. These guys have plenty of firepower so watch your step. They will fire on sight so save your game before you get close. Talus is being held prisoner in a back room. Kill the guards and release him. You’ll be given a worthwhile reward later in the game.
Hub Quests
Ask Water Merchant to Help – Adds 100 days to Water Chip quest.
Blackmail Iguana Bob – Speak to Gretch in the Junktown hospital.
Clean out the Loan Shark – Kill Lorenzo Giovani and his guards.
Dispose of Jain – Speak to Lorenzo about a job.
Dispose of Merchant – Same as above.
Find the Missing Caravans – Talk to Butch.
Guard the Caravans – Take a job with the Water Merchants, Far Go Traders or the Crimson Caravan.
Help Irwin – Speak with Irwin and kill of the raiders on his farm.
Rescue Initiate from the Hub – Rescue Talus from the Rough Guards.
Steal Necklace from the Merchants –
Take Down Decker – Accept or finish the Dispose of Jain or Merchant quests above and then talk to Sheriff Greene.
Shady Sands
Talk to Seth, at the entrance, or Aradesh and they’ll tell you that Tandi, Aradesh’s daughter, has been kidnapped by the Khans, a group of raiders south east of Shady Sands.
The Khans
Visit the Khans to the south east and either negotiate with their leader, Garl, or kill the entire group to free all of the slaves. Every slave you free will give you 200 XP. Take Tandi back to Shady Sands and talk to Aradesh for your reward.
Raiders Quests
Join the Khans – Talk with Garl.
Free the Slaves – Earn 200 XP per slave freed.
Necropolis
You’ve come all this way but still haven’t completed the very first quest you were given, to find the Water Chip! Luckily you’re getting close now.
There are Ghouls here at the Necropolis. They have poor awareness but will attack if you walk right up next to them. Head down one of the manholes into the sewers.
Explore the sewers and you’ll come across a group of friendly Ghouls. They’ll tell you that their water pump is broken and they’re using a Water Chip instead. Continue working your way north. If you climb up the ladders near here you’ll find yourself in a different above ground area.
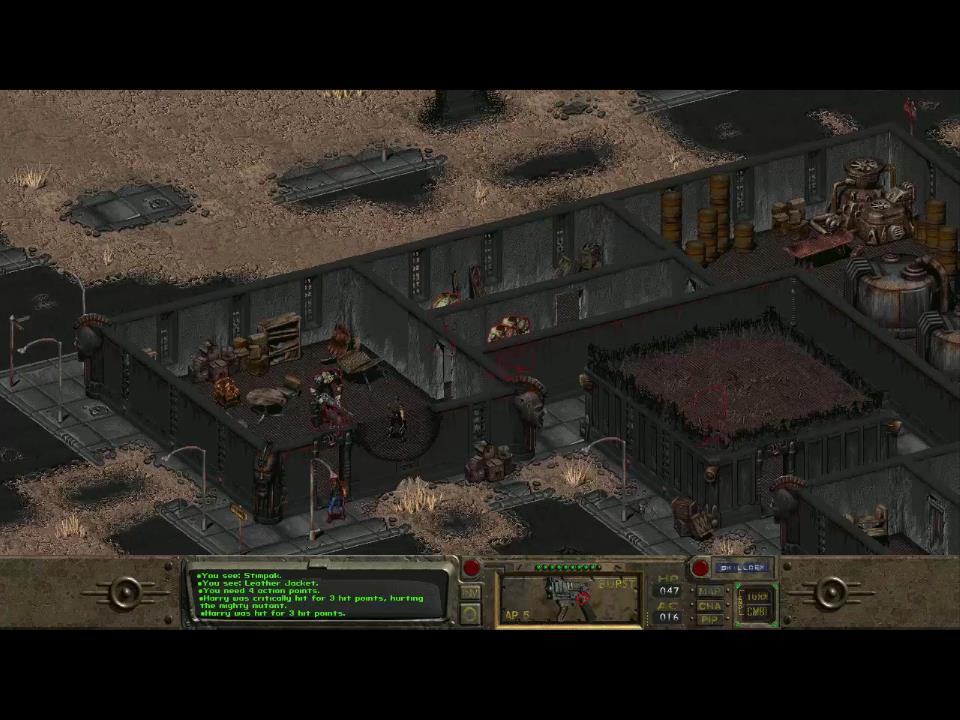 This is the Watershed area and it will be your first run-in with Super Mutants. Harry, the Super Mutant, is guarding the Watershed. He’ll try to take you to see his boss. Refuse and fight him instead. He has three friends around the corner so take them all out.
Once the Mutants are dead you can repair the Water Pump but you’ll need to have found some Junk first.
You can find Junk in the eastern side of the Necropolis Sewers in the Watershed area or in a crate in the south eastern side of the Jacob’s Weapons Shop in Old Town.
Necropolis Quests
Destroy the Super Mutants at the Watershed – Speak with Set in the Halls of the Dead in Necropolis.
Fix the Necropolis Water Pump – As above.
Free the Ghoul Prisoner – Free the ghoul captured in the watershed.
Vault 12
Down in Vault 12 you’ll find the Glowing One’s. Don’t stop to ask questions just shoot to kill. Head down to level 3 and look at the computer in the south east. This is a water processing control computer. Click on it to get the Water Chip and gain 1500 XP.
Vault 13
Depending on how much time you have you may need to bring the Water Chip straight back to Vault 13. If you’ve got plenty of time you can continue on to join the Brotherhood first.
Vault 13 Quests
Calm Rebel Faction – Speak with the upset Vault 13 residents.
Destroy the Mutant Leader – Speak with the Overseer.
Destroy the Source of the Mutants – Speak with the Overseer.
Find the Water Chip – Speak with the Overseer.
Find the Water Thief – Speak with Vault 13 residents.
Brotherhood of Steel
The Brotherhood of Steel is west and slightly north of Junktown. You won’t be able to get inside right away. Instead you’ll be given a quest to visit the glow and prove somehow that you’ve been there. Before you go to the Glow make sure you have Rad-X.
Brotherhood of Steel Quests
Become an Initiate – Visit the Glow and bring back the holodisk.
Convince the Elders to Send Help – After visiting the Mutant Military Base.
Dr. Lorri’s Surgeries – Visit Dr. Lorri.
Fix the Broken T-51b Power Armor – Speak with Kyle.
Receive Training from Thomas – For an increase in unarmed and melee skill.
Receive Your Weekly Issue – Speak with Michael for armor and ammo.
Rescue the Initiate from the Hub – Rescue Talos in the Hub.
Scout the Northern Wastes – Speak with John Maxson.
The Glow
Stop just before you reach the glow and take your Rad-X so you’ll have resistance to the radiation. Go to the Glow and use your rope on the beam to get down. The proof you need for the Brotherhood can be found on the first level but there’s much more to do here.
The Paladin in the Power Armor has a Holodisc and a Yellow Pass Key. The yellow key gives you access to the first elevator and gets you deeper into the glow. In all there are three keys to find and a quest to Turn On Power for the Glow.
The Glow Quests
Turn on Power for the Glow – Access the computer on level 5.
Boneyard
The main quests in the Boneyard are to free Adytum from the Regulators, get weapons for the Blades and clear out the Deathclaws for the Gun Runners. You may want to get the Power Armor from the Brotherhood of Steel before you attempt these quests.
The Blades in the north are being harassed by the Regulators and ask you to bring them weapons. The Gun Runners are to the east of the Blades but a nest of Deathclaws is in between them.
Sneak over to the Gun Runners and talk to Gabriel who will give you the quest to exterminate the Deathclaws. Kill all of the Deathclaws including the Mother Deathclaw underneath the house. Make sure you destroy any unbroken eggs as well. Report back to Gabriel and ask for weapons for the Blades.
Head back to the Blades and talk to Razor. The battle for Adytum will begin. If you’ve managed to take out the Deathclaws this battle should be a breeze for you.
Boneyard Quests
Exterminate the Deathclaws – Speak with Gabriel from the Gun Runners.
Fix the Hydroponic Farms in Adytum – Speak with Miles.
Free Adytum from the Regulators – Provide weapons for the Blades first.
Get Weapons for the Blades – Speak with Razor, leader of the Blades.
Kill Razor – Given by Zimmerman.
Recruit Katja – Speak with Katja and tell her you won’t be staying long.
Brotherhood of Steel
Return to the Brotherhood and talk to Cabbot. After seeing the Holodisk he’ll let you in as a new initiate. The first thing you should do here is speak to Talus in the training area and he’ll give you the reward for rescuing him. You did rescue him in the Hub didn’t you? He’ll offer you a choice of either a Laser Pistol, Rocket Launcher, Super Sledgehammer or Power Armor.
The other way to get Power Armor here is to fix the T-51b Power Armor. Speak to Kyle on level 3 about repairing it. You’ll need a part that you can either steal from Rhombus’ room or persuade Michael to give you. Either way take the part back and use it on the Power Armor.
Dr. Lorri on level 2 can perform surgeries for a fee that will skill up your character stats. They are very expensive surgeries though so make sure you come here cashed up.
John Maxson is the High Elder of the Brotherhood and can be found on level 4. Talk with him and he’ll tell you about a source of Super Mutants in the north. He asks you to explore this area and bring back information.
Military Base
 Head to the north west until you find the Mutant Military Base. There are Mutant patrols around here so save your game often. One critical hit can end the game for you very quickly!
Once you have found the military base return to the Brotherhood and report back to John Maxson. Convince the Elders to send Paladins to help you in your quest.
Run back to the Military Base and meet the Paladins. The Paladins will take out the Mutants outside the base easily. Once inside you’re on your own.
As you enter you’ll be confronted by 3 Super Mutants! Take them out and work your way to the elevator in the top left. You can walk through the red force fields but you will take a little bit of damage. The yellow/green force fields can be turned off briefly by repairing them.
Head down to level three and then take the second elevator in the south part of the complex. This elevator takes you down to level 4. From here kill the Lieutenant and Van Hagan.
Return to the computer room. Use the computers and “Display security codes”. If you have the skill you can attempt to hack the firewall and get more data about the security codes. Click on the security code to initiate the 3-minute self destruct without setting an alarm then get out of there as fast as you can.
Cathedral
You will need two keys to find the Master and win the game. The first is on the followers in the main cathedral area. You can steal one, kill them, or speak with Nicole in the Boneyard to get the password (Red Rider) and tell it to Laura who will let you through to the tower.
Once into the tower area you’ll need another key/badge to get through to the underground area. Head up the stairs to the very top and kill the Nightkins and Morpheus. He’ll drop a key to the underground vault.
Head underground and click on the secret door. It’s in the south east of the room.
 Now that you’re in the vault go to the third level and open the door to the very east. This will take you down a secret fleshy corridor that leads to the Master. Don’t worry about the Floaters either side of the Master, they won’t attack unless they’re hit.
I found it easiest to get up close to the Master and flamer him to death. He’ll spawn Super Mutants behind you but all you need to focus on is killing the Master.
There is a warhead hidden on the fourth level which is initiated once the Master is dead. Get out of there quick to win the game.

I decided to play Fallout 1 with the release of Fallout 4 because the original has widely been regarded as one of the best role playing games ever produced. I must say I really enjoyed this game and can see why it’s regarded so highly.
Fallout was released by Interplay Entertainment in 1997. It features a rich story in a post apocalyptic world. You start out by creating a new character or using a pre-made one. There are 18 skills to develop, 7 character attributes and numerous traits and perks.
Fallout has an intriguing quest system that means you never have to play the game the same way twice. Some quests cancel each other out and others will affect the way NPCs interact with you.
