Monkey Island 2: LeChuck’s Revenge
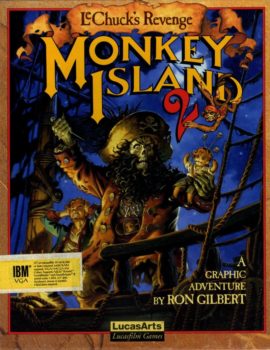 Monkey Island 2: LeChuck’s Revenge is the sequel to The Secret of Monkey Island and follows the adventures of Guybrush Threepwood as he hunts for the treasure known as the Big Whoop. Guybrush soon bumps into Largo LeGrande who has revived LeChuck, and now he wants revenge.
Monkey Island 2 was first published by LucasArts in 1991. A remake was made in 2010 for the PC and released later in 2017 for the Xbox One. The remake features HD graphics and a more user-friendly interface.
Even though Monkey Island 2 sold poorly on release it was awarded the year’s best adventure game. It features challenging puzzles, an interesting storyline and atmospheric music. The full walkthrough for Monkey Island 2: LeChuck’s Revenge can be found below.
Monkey Island 2 Walkthrough
Part 1: The Largo Embargo
You begin just outside the town of Woodtick. If you try to leave the screen, either by going to the map to the right or across the bridge to the left, you’ll be stopped by LeGrande, the local bully, who’ll take all of your coins.
Take the Shovel from the sign and walk across the bridge to the left. Enter the second ship from the right at the top of the screen to meet the cartographer, Wally. After you’ve spoken to him about everything wait for him to rub his eyes. When he does he’ll put his Monocle down. Pick it up and then take a piece of Paper from the pile of paper at the bottom of the screen. Leave the store.
Go down the hatch across from Wally’s store that leads to the Bloody Lip tavern. Speak with him about everything until Largo show up and spits on the wall. Use the Paper with Largo’s Spit and then leave the tavern. Enter back through the open window on the side of the boat to the kitchen. Take the Knife and then crawl back out through the window.
Continue walking along the pier to the west until you see the laundry with the clothes hanging up. Speak with the three men of low moral fiber. Ask about the wooden leg until one of the men asks you to buy polish for him. He’ll give you some money. Try to pick up the Bucket. The men will try to stop you. Ask them if the bucket belongs to them. It doesn’t, so Guybrush will grab it.
Continue to the left and walk into the hotel. Use the Knife on the rope holding the little creature. It will escape and the innkeeper will chase after him. Take some Cheese Squigglies from the little creatures bowl and then open the only other door in the hotel to Largo’s room. Take the Toupee from the dresser and quickly leave the room.
Walk all the way back to the east until you see the map. Head to the swamp and use the Bucket with the swamp water to get a Bucket o’ Mud. Use the coffin and row it all the way to the east, into the mouth. You’ll be lifted up to the Voodoo hut. Take the Small String from the table and walk to the east to speak with the Voodoo Lady. Ask her about making a Voodoo Doll of Largo. She’ll tell you what kind of ingredients you need. Give her the Toupee and Largo’s Spit. You still need to find two more ingredients so row back to the island.
Go back to the map and head to the beach. All you need here is the Stick so pick it up and go back to the map. Go to the Cemetery and walk up to the graves on the hill. Look at the gravestones to find out which one belongs to Marco Largo LeGrande and use the Shovel on it to pick up one of Largo’s ancestor’s Bones.
Make your way back to Woodtick and enter the hotel. Go into Largo’s room and close the door. Place the Bucket o’ Mud on top of the door. Hide behind the dressing screen and wait for Largo to come back. Largo will get mud all over him and run off to the laundry to get his clothes washed.
Head over to the laundry to see Largo arguing with the laundry attendant, Mad Marty. Go back to Largo’s room, close the door, and take the Laundry Claim Ticket from the back of the door. Go back to the laundry and show Mad Marty the Laundry Claim Ticket to get Largo’s clothes, a Pearly-White Bra.
Go back to the Voodoo Lady and give her the items she needs to make a voodoo doll, Largo’s Spit, the Toupee, Bone and the Bra. Go back to Largo’s room. Before he throws you out use the Pins on the Voodoo Doll. After Largo runs off you’ll be back with the Voodoo Lady.
Take the coffin back to the island and walk to the peninsula in the bottom left corner. Enter the houseboat and speak to Captain Dread. Give him the Monocle and he’ll agree to captain the ship for you.
Part 2: The Four Pieces
After the cut-scene with LeChuck you’ll be on the boat with Captain Dread. Take the Parrot Chow and enter the cabin. Speak with Captain Dread and ask him to take you to Phatt Island.
When you arrive on the island you’ll be spotted by the guard and taken to the mayor who will throw you in prison. Pull the mattress to find a Stick. Use the Stick on the skeleton to get one a Bone and then use the Bone on Walt the dog. The dog will come closer to grab the bone and drop the Key. Pick up the Key and use it to unlock the cell door.
Pick up the Gorilla Envelope and the Manilla Envelope from the shelf. Open both envelopes to find your items and a Banana and Organ. Leave the prison, walk to the right. Go into the first alley on the left just before the library and watch the man spinning the wheel. When the contestant wins follow him out of the alley and into the next alley beyond the library.
Knock on the slit in the door and ask for the roulette number. You’ll need to pass the test before he gives you the number. He’ll hold up a number of fingers. The first time he holds up a number of fingers is the answer to the question. Repeat this three times and he’ll give you the winning roulette number. Go back to the first alley and after the contestant wins play the game. Use the winning number and select the Invitation as your prize.
Go back to the boat and sail to Booty Island.
Enter the small shop to the left and buy the Old Saw, Ship’s Horn and Beware of Parrot Sign. Place the Parrot Chow on the hook that held the sign and the parrot will turn around to have a feed. Now you can buy the Mirror. Ask to buy the Map Piece but he won’t sell it to you. He’ll only offer it for a trade.
Leave the store and go into the Costume Shop. Give the Invitation to the salesman and he’ll give you your Dress. Leave the store and speak to the Woman in the Big Hat. She’s offering tours on her ship for a price. Walk to the left to the path and go to the Governor’s Mansion.
On the way you’ll be stopped at the guard house. Show the guard your Invitation and then get changed into your Dress. Follow the path to the mansions and then walk around the right side of the house to the back. Read the sign next to the door and then push the garbage can. When the chef comes out to chase you run around to the front of the house and loop back around to the back. Enter the kitchen and pick up a Fish. Leave and go around to the front of the house.
Open the door and go inside. Look at the Map Piece and then take it. Leave the mansion. The dog will sniff out that you’ve taken something from the house and the gardener will take you to see Elaine. After talking to her she’ll throw the Map Piece out the window. Leave and enter the room again. Elaine will be gone. Take the Oar hanging on the wall and leave the mansion.
Try to pick up the Map Piece and it will eventually get blown onto the edge of a cliff. Pick up the Dog, go to the woods and then head back to your ship. Sail to Phatt Island.
Enter the library, open the model lighthouse and take the Model Lighthouse Lens. Open the card catalog and look at the ‘C – D’ drawer and search for Disaster “Great Shipwrecks of Our Century”. Click on the dialogue option “I’ll have to remember that.” Go to the ‘PQR’ drawer and find “Recipes, Voodoo “The Joy of Hex”. Remember this one also. Choose one other title, it doesn’t matter which one, and remember it as well.
Speak with the librarian and get a Library Card. It doesn’t matter what personal information you give her. Ask for the three books that you found and she’ll go and get them for you. Leave the library and read the first two books.
Speak with the fisherman and boast about what a great fisherman you are. When he challenges you to a competition show him the Fish you took from the mansion. He’ll give you his Fishing Pole.
Walk up the steps and use the Leaflet on the wanted poster. Walk to the left and go up the path. The Woman whose face is on the leaflet will arrive and be taken to prison. Return to the wharf and enter the jail. Use the Small Key to open the cell door and release the woman. Take the Vanilla Envelope from the shelf and then open it to find a Bottle o’ Near-Grog.
Leave the jail, walk back to the path and go to the mansion. Open the gate and go through the front door. Speak to the guard blocking the stairs and tell him there’s a fire in the kitchen. Head upstairs and use the third book you lent from the library on the book on Governor Phatt’s bed. Guybrush will switch your book with the Famous Pirate Quotations book. Leave and go back to your ship. Sail to Booty Island.
Walk to the path and go to the Big Tree in the north of the island. Use the plank in the tree and then use the Oar on the next hole in the tree. Guybrush will try to climb up but fall down and bump his head. During the vision you’ll hear a song. Guybrush will be so excited about it that he’ll write down the Lyrics. You’ll need these later.
Pick up the Broken Oar, head back to your ship and sail to Scabb Island. Walk along the jetty and enter the first shop which is the Woodsmiths. Give him the Broken Oar and he’ll reinforce it for you.
Leave and go down the hatch. You’ll see a monkey playing the piano. Use the Banana with the metronome and he’ll stop. Pick up the Monkey. Speak with the bartender and ask for a drink. Show him your Library Card and order a Yellow Beard’s Baby. You’ll also get a Crazy Straw. Order another drink. This time order a Blue Whale.
Open your inventory and use the Yellow Drink with the Blue Drink to make a Green Drink. Go back to the upper deck and walk along the jetty to the men of lower moral fiber. Use the Old Saw on the Peg Leg of one of the men. Go to the Woodsmiths and pick up the Hammer and Nails. Go back to your ship and sail to Booty Island.
Walk to the right and enter Stan’s shop. Tell him you’re looking for a coffin. End the conversation and he’ll give you a Hankie. Enter the shop again and ask about the coffin once more. This time when he gets in the coffin use the Nails with the coffin to nail him inside. Take the Crypt Key and leave the store. Walk to the path to the right.
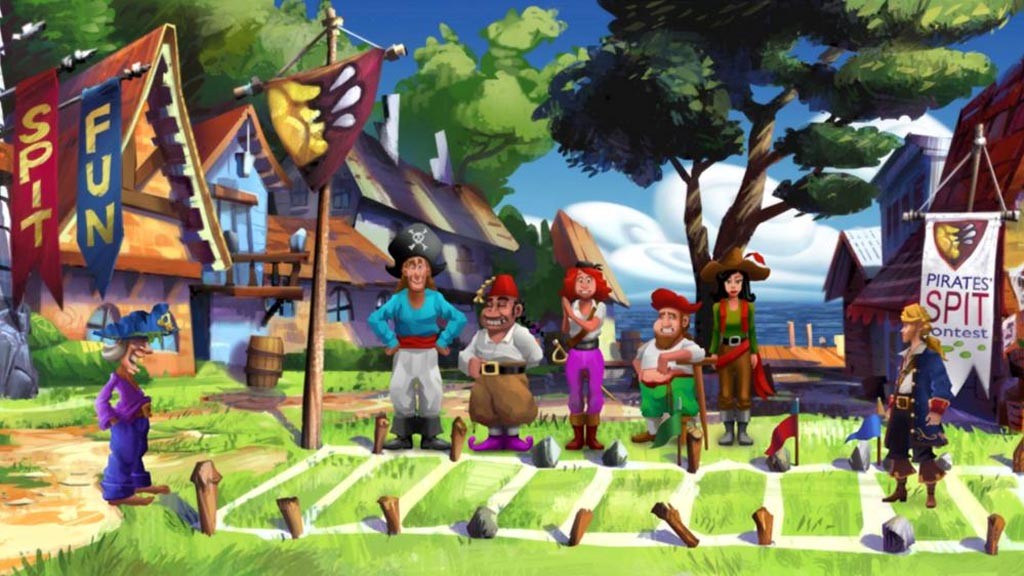
Walk to the right to the spit contest and speak with the Spitmaster. Enter the competition and you’ll fail. Blow the Horn to distract everyone and use the flags to move them a little closer. Talk to the Spitmaster to have another go. This time use the Crazy Straw with the Green Drink. This time you’ll do better but not good enough. Speak to the Spitmaster once more. Use the Crazy Straw with the Green Drink but this time wait until the wind is blowing the ladie’s scarf before spitting. You’ll win first place and receive a Plaque.
Go back to the Antique Dealer and give him the Plaque. He’ll agree to give you 6,000 Pieces of Eight for it. Return to Kate, the woman with the leaflets, and read the book about Shipwrecks to find the location of where the Mad Monkey capsized. Charter a ship and move the cursor to the right coordinates on the map and dive into the sea. When you reach the wreck pick up the Monkey Head. Use the rope to be lifted back up to the surface.
Back on dry land return to the Antique Dealer and give him the Monkey Head. In exchange he’ll give you a Map Piece. Leave, walk to the path and go to the cliff. Use the Fishing Pole on the map piece and Guybrush will pull up the second map piece but it will get taken away by a seagull.
Leave and go to the Big Tree. Use the plank to stand on it and then use the Reinforced Oar on the next hole. Take the Plank and use it on the hole further up. Continue until Guybrush gets the hang of it and makes his way up the tree by himself.
Once you’re up the top walk to the lookout and take the Telescope. Enter the hut and use the Dog on the pile of paper and he’ll find the second Map Piece. Leave and go back to Dread’s ship. Sail to Phatt Island.
Walk left to the path and go to the waterfall. Walk up to the top of the waterfall and use the Monkey on the pump to stop the flow of water. Walk back to the bottom of the waterfall and enter the Newly Discovered Gaping Hole.
Walk to the left until you come out of the tunnel and then head up to the small cottage. Enter the cottage and speak to the old man, Rum Rogers. Tell him you’re looking for the map and then challenge him “I’m Guybrush Threepwood. Prepare to die.” He challenges you to a drinking contest. He’ll leave to get a Mug o’ Grog for you. When he leaves to get his mug pick up your Mug o’ Grog and pour it onto the tree. Fill up your mug with the Near-Grog you stole from Kate when she went to jail. Now when the challenge begins you’ll be fine but Rum Roger will pass out.
Use the Mirror that you picked up from the Antique Dealer with the mirror frame on the wall. Go outside and open the window just to the left of the door. Place the Telescope in the monkey statue’s hand. The sun will shine a spot on the far wall of the cottage. Enter the cottage and push the brick with the spot on it. Guybrush will fall down a trapdoor. Pick up the third Map Piece and leave through the hole. Go back through the cave and go to your boat and sail to Scabb Island.
Go to the path and head to the cemetery. Use the Crypt Key to open the middle crypt. Read the book you picked up from the library, “Famous Pirate Quotations“. The quote you need to remember is the one by Rapp Scallion. Look at all the coffins, find the one with the quote by Rapp Scallion and open it. Take some Ash and go back to the Voodoo Hut.
Pick up the Ash-2-Life book from the shelf and then talk to the Voodoo Lady. She’ll give you a potion of Ash-2-Life. Go back to the crypt and use the Ash-2-Life potion on the ashes. They’ll turn back to life. Once you convince him that he’s dead he’ll ask you to return to his restaurant and turn off the gas. He’ll give you the Restaurant Key.
Walk back to the path and go to the beach. Use the Restaurant Key to open the door to the small restaurant. Turn off the gas stove and return to the crypt. Use the potion on the ashes again and Rapp will give you the fourth Map Piece.
Leave and go to Woodtick. Enter the second shop and speak with Wally, the map maker. Give him the Model Lighthouse Lens so that he can see. Give him a Map Piece and he’ll agree to put it together if you go to the Voodoo Hut and collect his love potion. Head over to the Voodoo Lady and ask for the Love Potion. She senses that Wally’s in trouble. Go back to the map maker. He’s gone but he’s left a message carved into his table.
Go back to the swamp and open the crate. Use the crate to climb inside. The delivery crew will take you over to LeChuck’s Fortress.
Part 3: LeChuck’s Fortress
After the cut-scene walk to the right, go up the stairs and through the door. You’ll emerge inside the fortress. There’s a path to the right which leads to where Wally is being held in a jail cell and a back tunnel which circles around and comes back to where you started.
Look at the Spit Encrusted Paper where Guybrush wrote down the lyrics of the song. This gives you the clues to which doors to open. The verses are generated randomly so yours might be different. Here’s an example.
“The arm bone is connected to the head bone
The head bone is connected to the rib bone
The rib bone is connected to the leg bone”
Find the door that has an arm, head and rib from top to bottom and open that door. Repeat for the next three verses. Once you’re through the door puzzle push open the huge door and take the Voodoo Key. When you try to take it LeChuck will catch you and hang you alongside Wally over an acid pit.
After LeChuck stops talking use the Crazy Straw with the Green Drink. Spit on the pan in the foreground once and then on the shield hanging up to the right twice. You and Wally will escape and end up in a dark room. Open your inventory and open the Juju Bag to find some Matches and a Love Bomb. Use the Matches. After the explosion you’ll end up on Dinky Island.
Part 4: Dinky Island
Pick up the Bottle, the Crowbar and the Martini Glass and then use the Martini Glass on the ocean water. Use the Martini Glass with ocean water on the still machine. Open the barrel and Guybrush will find a Cracker. Herman is here also and you can talk to him if you want but it’s not necessary.
Walk to the left to enter the jungle. Take the next left and follow the path to a bag hanging from a tree. Smash the Bottle on the tree and then use the Broken Bottle to slash a hole in the bag. Pick up the Box that fell from the bag and use the Distilled Water on the Box to get another 2 Crackers.
Walk back to the intersection and this time go right to a chest by a pond. Take the Rope and then use the Crowbar on the chest. Take the Dynamite from the chest.
Go back to the beach and give the parrot a Cracker. It will give you directions. Follow the directions and you’ll find the parrot again. Give it another Cracker and proceed to the next location. Do this once more and you’ll find a Big X on the ground.
Use the Shovel on the Big X to dig a big hole. Light the Dynamite with the Matches and then throw the Dynamite in the big hole. The explosion will get Elaine’s attention and Guybrush will end up on a ledge in the hole.
Tie the Rope to the Crowbar and use it with the twisted metal rods above you. Guybrush will jump across to reach the chest as the ledges crumble. Elaine shows up and this is where the story began at the beginning of the game. The rope will break and Guybrush falls down into a dark room. Move the cursor around until you find a light switch and then push it. LeChuck is standing in the room! Talk to LeChuck and he’ll tell you that he and Guybrush are brothers.
LeChuck uses a voodoo doll of Guybrush that’s meant to send him to a different dimension but only sends him to a different room. From here you’ll have to hunt around to find the items needed for a voodoo doll while trying to avoid LeChuck.
Once you’re free from LeChuck walk north to the medical room. Pick up the Skull from Dad’s remains. Open the trash can and pick up the Surgical Gloves. Open the medical drawer and take the Hypodermic Syringe. LeChuck may teleport you around so it’s hard to give exact directions for the next items.
Find the room with the broken grog machine and use both the Surgical Gloves with the helium tank. In the room with the hole in the roof and the crumbled chest on the floor take the Ticket. In the room filled with boxes open the ones on the floor to find a Doll and a Balloon. Go back to the room with the helium tank and fill up the Balloon with helium.
Use the grog machine and a coin will roll out. Wait for LeChuck to show up and pick up the coin. When he does he’ll bend over revealing his underwear. Quickly take his Underwear. The next time LeChuck shows up give him the Hankie and he’ll sneeze on it.
Find the elevator and use the call button to go inside. When LeChuck shows up pull the Lever. Part of his beard will get chopped off by the doors. Take the Crispy Beard Bits. go through the door which leads back out to the alley on Melee Island.
Put the Crispy Beard Bits, Voodoo Doll, Skull, Underwear and the Used Hankie in the Juju Bag. This makes a Voodoo Doll of LeChuck. Go back down the elevator and wait for LeChuck to show up. When he does use the Syringe on the Voodoo Doll. He runs off but follow him and use the doll again. During the chat choose the dialogue option to “tear the leg off the voodoo doll”. Enjoy the final cut-scene.
Congratulations on completing Monkey Island 2: LeChuck’s Revenge!