Alone in the Dark
 Alone in the Dark is a horror adventure game where you must explore a haunted mansion while trying to survive against the many undead monsters. This is the first in the series and you have the choice of playing one of two characters, Edward Carnby or Emily Hartwood.
The story is based on the novels by H. P. Lovecraft. Edward Carby is a private detective commissioned to investigate an antique piano which remains in the loft of a mansion. You begin the game in the loft but it’s not long before the undead monsters notice your presence.
Press [Enter] to select your action. You can Push and Pull items, Open, Search, Use Items and Fight. Once you’ve selected an action press [Space] to perform the action.
How to Fight: Make sure Fight is selected in the options screen. Hold down [Space] and then press the arrow keys to punch and kick. The Left and Right Arrows throw punches and the Up and Down keys kick.
Alone in the Dark Walkthrough
Top Floor
The Loft
Before looking around you’ll need to secure the room. Push the Wardrobe in front of the window to prevent a monster from breaking through. Then push the Chest on top of the trapdoor. Now you have a bit of time to look around. If you want to run double tap the Up Arrow key.
Search behind the Piano to find a Letter. You can drop the Letter to not clutter up your inventory. Open the Wardrobe for an Indian Cover and the Chest for a Rifle. Pick up the Oil Lamp from the table and then go down the stairs in the corner of the room.
Storeroom
Pick up the Bow from the floor on the left and then search the shelves on the left for an Oil Can. Use the Oil Can on your Oil Lamp to fill it up. You can drop the empty Oil Can as you won’t be needing it any more. Go through the door on the right as you come down the stairs.
Upstairs Hallway
If you try to walk too far down the hall you will crash through it and die. Explore the room on the left as you’re looking down the hall.
Sitting Room
Search the rolltop desk to find a Key and then use the Key to open the Chest. Inside the chest is an Old Cavelry Saber. You can use it as a weapon but it will break after a few swings. Keep it in your inventory, even if it’s broken as you’ll need it to open a secret hatch later. Leave the room the way you came and go through the door on the opposite side of the hall.
Dressing Room
Turn around and close the door before a Zombie follows you into the room. There’s nothing in here to find so leave the room through the other door to the left of the window.
Bedroom
Walk over to the nightstand on the left side of the bed to pick up a Vase. Turn around and get ready to fight a Zombie Dog that jumps through the window. Two shots of the Rifle will kill it. Throw the Vase to break it and then pick up the Key that was inside. Exit through the door back to the hall and go in the door opposite.
Bathroom
Search the cabinet to find a First Aid Kit. Open the First Aid Kit to find a Flask. Drink the Flask for 10 Health Points. Leave the bedroom and go through the door at the end of the hall.
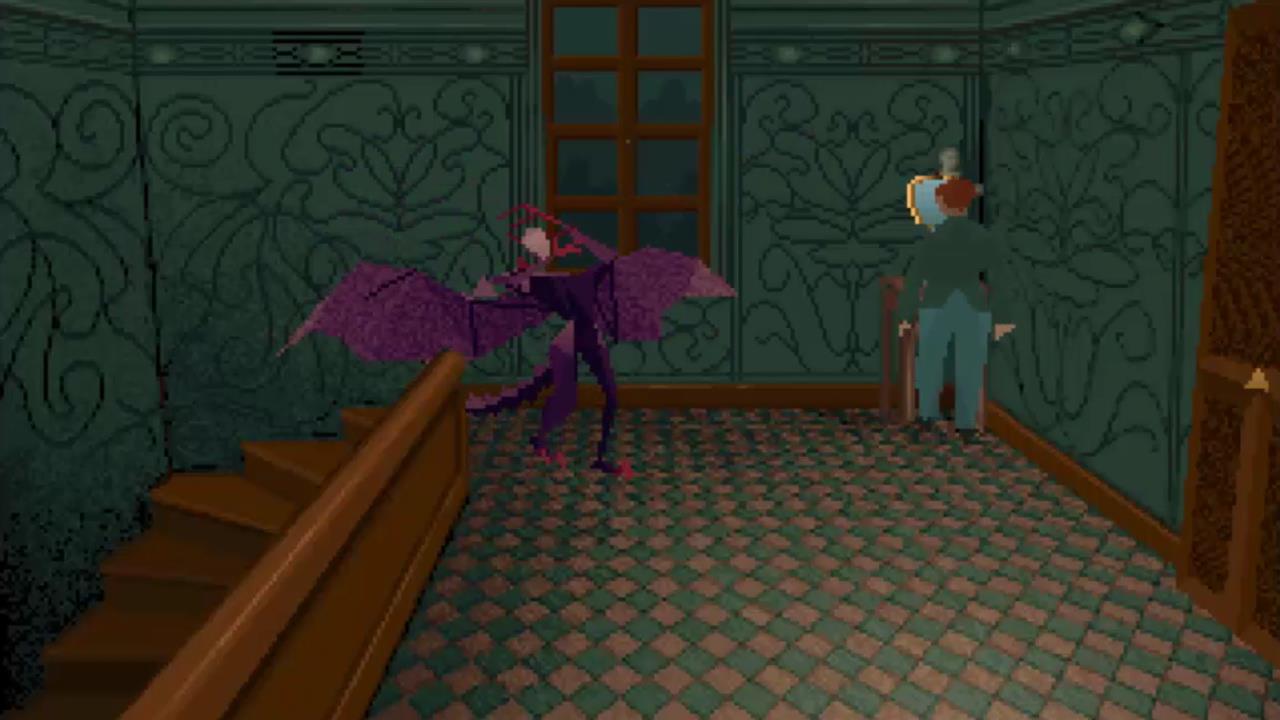
Upper Lobby
Stay away from the Winged Zombies and place a Mirror on each of the stands in the corner. The monsters will catch sight of each other and die. Now you’re free to go down the stairs.
Middle Floor
Lower Lobby
Stay clear of the Suit of Armor and walk to the right. Open the door and go through to the sitting room.
Sitting Room
There’s a Ghost sitting on the chair. If you get close enough to touch the ghost it will wake up and kill you so keep your distance. Search the cabinet for Cartridges for your Rifle. Take the Gramophone from the small table and the Poker and Matches from the left side of the fireplace. You can search the Small table in the corner for a Photo as well but it’s not necessary.
Leave the room and walk across to the other side of the Lower Lobby. Open the door on the other side and go through the first door straight ahead.
Bedroom
Take the Notebook from above the fireplace and turn around to fight a Zombie Dog. You can drop the Notebook once you’ve read it. Leave and open the next door down the hall.
Bathroom
There’s a monster in the tub that can’t be killed. You’ll need to run into the bathroom, pick up the Jug and then quickly run out again. Run back in and Search the cabinet for a First Aid Case. Run out again and Open the First Aid Case for a Flask. Drink the Flask for 10 Health. Throw away the Empty Flask and First Aid Case. Walk down the hallway to the next door.
Dark Bedroom
Use the Matches and you’ll light the Lamp. Drop the Lamp on the floor so you can have a look around. Take the Heavy Statuette and Book from the table and Search the nightstand next to the bed for Bullets. Read the Book and then throw it away.
Pick up the Lamp and leave the room. Select the Search function to put the Lamp away. Run back to the Lower Lobby.
Lower Lobby
Stand in front of the Suit of Armor and throw the Heavy Statuette at it. The Suit of Armor will collapse, leaving behind the Sword. Go through one of the doorways under the stairs to go to the ground level.
Ground Floor
Front Lobby
Drop the Gramophone at the base of the stairs to leave room in your inventory for other items. You can pick it up later. Walk to the right, open the closed door and go through.
Kitchen
Pick up the Pot of Soup and open the door to the first pantry in the corner. Walk in and take the Key from the wall. Search the cupboards for a Box of Biscuits. Eat the Biscuits for +5 Health and drop the Empty Box.
Leave the pantry and search the kitchen drawers for 2 Knives. Head into the pantry in the other corner. Walk straight back out as you’ll be attacked by a Zombie from behind. Now’s a good time to practice using your sword.
Go back into the pantry, pick up the Oil Can and use the Jug on the barrel of water to fill it up with water. Use the Oil Can to fill up your Lamp and then drop the Empty Can. Search the pile of coal to find a Shoe Box. Open the Shoe Box to find a Revolver. Drop the Empty Box and leave the pantry. Go through the door just to the left of the pantry.
Hallway
Go through the door straight ahead.
Dining Room
There are a number of Zombies sitting around. They will start to stand up. Quickly run over to the table and place the Pot of Soup at the end of the table. The Zombies will sit back down. Wait for the one Zombie to find his seat. He won’t attack you unless you touch him. Go through the doorway on the other side of the table.
Smoking Room
Pick up the Lighter from the table and then use the Jug of Water on the smoking cigars to put them out. Search the cabinet on the left to find a Book and Record. Leave through the double doors to the left of the cabinet.
Hallway
Walk north back to the stairway and then go through the door on the right.
Courtyard
Quickly run to the statue and search it for 3 Arrows. Spiders will drop down from the roof. Run out of the room before they can reach you. Head back to the Front Lobby and go up the stairs.
Middle Floor
Lower Lobby
Walk to the left into the hallway and follow it around to the end door. Go through into the Gallery.
Gallery
Place the Indian Cover over the painting of the guy with an axe. He will through axes at you if you try to run down the gallery. Walk down the gallery to about the half-way point and use your Bow to shoot Arrows at the far painting. You’ll see a puff of smoke once the creature in the painting has been killed. If you go too close he’ll shoot arrows at you. Enter the doorway at the far end on the right.
Library
The Library is dark so take out the Oil Lamp and place it on the floor. Walk around to the upper left and follow the row of bookshelves until you come to a bookshelf that looks slightly different. walk past it a little way and search the bookshelf just to the right of it. This will reveal a Mechanism. Use the False Book and a secret passage will open up. While you’re doing this a creature will spawn that can only be killed with a specific dagger.
Secret Room
Enter the secret room, take the Talisman from the bench and search the shelves for 2 Books and 2 Parchments. One of the books will kill you if you read it, the gold one, the others can be read. Drop the books and parchments once you’re finished.
Library
Use the Dagger with the Gold blade and kill the creature. You only need to hit it once with this blade to kill it. Pick up the lamp, open the double doors on the other side of the library and go through back to the Lower Lobby.
Lower Lobby
Head through one of the doorways under the stairs to head down to the ground floor.
Ground Floor
Front Lobby
Pick up the Gramophone that you should have left at the base of the stairs and then use the Silver Key to open the locked door to the right. This leads down to the cellar.
Cellar
Walk down the stairs and run to avoid the Rats. On a bench towards the top of the screen you’ll find some Bullets. Run to the right and when you come to the two barrels pick up the Block just to the right of them and they will roll out of the way of a cave entrance. Make sure you’re not standing behind the block when you pick it up or the barrels will roll over you. Don’t go through the cave entrance. You’ll be coming back out this way later. Instead walk back up the stairs and leave the cellar.
Front Lobby
Run forwards down the hallway and then through the double doors to your right into the Dining Room.
Dining Room
Avoid the Zombies and go through the single door on the left.
Smoking Room
Use the Key to unlock the double doors on the other side of the room and go through.
Jeremy’s Study
Place the Old Cavalry Saber on the coat of arms hanging on the wall. If you’ve broken the Saber just put both pieces in the coat of arms. This will reveal a secret staircase leading down. Search the bookshelf for a Book which you can read and then throw away. Go back to the Smoking Room.
Smoking Room
Go through the double doors leading out into the hall and then through the next set of double doors.
Pirate’s Room
Use the Sword to fight the Pirate. He can’t be killed with ranged weapons. He will defend most of your blocks but if you can back him into a wall and swing repeatedly he should be pretty easy to kill. Once he’s dead pick up the Key to the Dance Hall that he drops. There’s also a book on the floor that you can read. Use the Key to the Dance Hall on the locked double doors and go through.
Dance Hall
Walk to an empty space in the corner and use the Record (Dance of Death). The Ghosts will start to dance with the music. If the Ghosts touch you you will die instantly. You need to retrieve the Key to the Pirates Chest from above the fireplace mantle while avoiding the Ghosts. Once you have it leave the way you came. Go back through the Pirate’s Room and into the study.
Jeremy’s Study
Now you have everything you need for the last part of this journey. Go down the secret staircase to the underground cave.
Underground
Cave
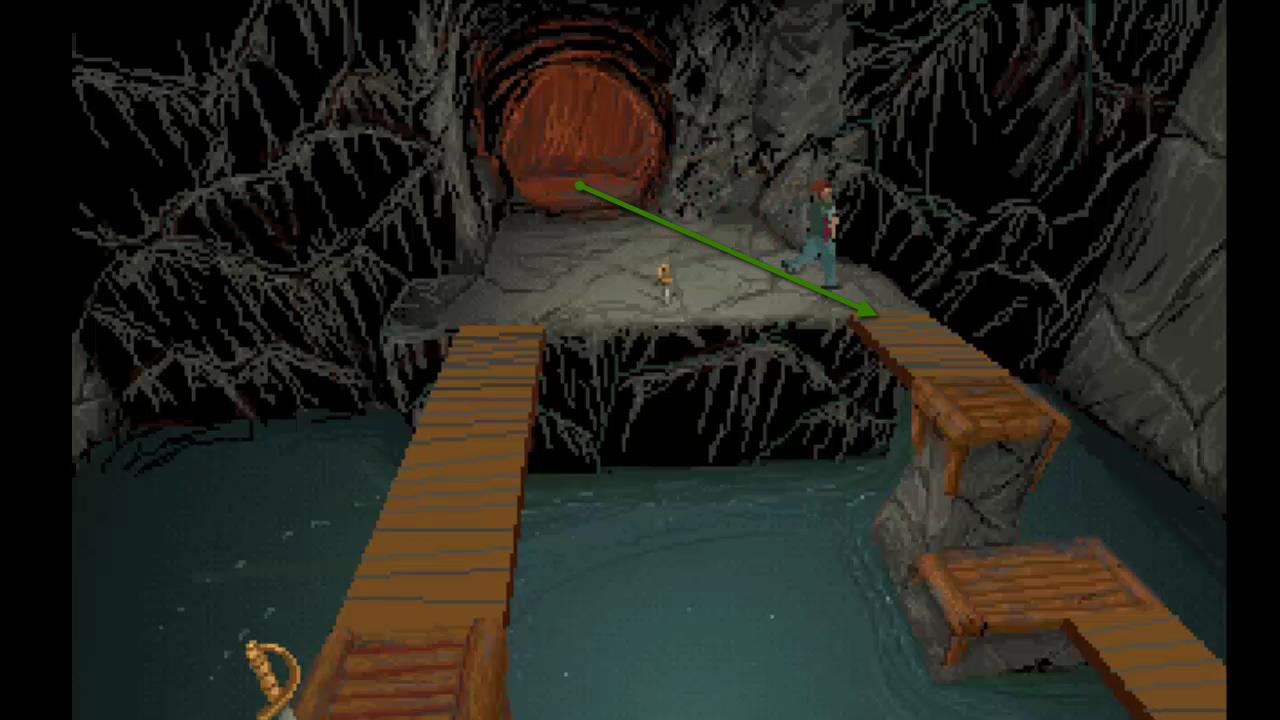
Run across the bridge as it collapses behind you. Pull out your Revolver or other weapon and run down the tunnel. Continue past the Giant Worm and follow the tunnel around to the right. Kill the Creature that attacks. It takes 2 shots from the Revolver. You’ll see the Giant Worm slither past you in the background.
continue running forwards until you come across the Giant Worm again. Immediately turn around and run away from it. Go back the way you came and turn right into the new tunnel that the worm has made. Drop down to the wooden ledge above the water and run around it. Stop just before you get to the lighter coloured plank. Go to your action menu and choose ‘Jump’. Continue to the end of the plank and climb up into the tunnel.
Use the Revolver or some other weapon to kill the Giant Rat creature. Walk to the end of the tunnel and jump across the pillars while avoiding the Flying Creature.
Jump into the tunnel at the other side and run through the tunnel. When you come to the intersection to the path to the right. Continue forwards to an open cavern with two paths. Take the right path.
Jump across the lighter coloured ledge and drop down the other side. Jump across all of the lighter coloured ledges and make your way across to the chest on the other side. Use the Key to open the chest and find a Gem and a Book. Read the Book and then you can throw it away.
Push the Rock behind the chest to reveal a secret passage and go through. Follow the path to the north and then drop down to a lower area. Ignore the opening to the left and continue forwards to a dark room. This is a maze. Light your Lamp and run as far as you can to the left, then to the bottom and then work your way to the right.
Eventually you’ll come to a closed door. Use the Gem to open the door. This will bring you to the source of evil under the mansion. Drop down into the water and run towards the tree.
Avoid the Water Creature and the Fireballs and approach the Altar to find a Hook. Place the Talisman on the Altar. Use the Lighter to light the Lamp and then throw the Lamp at the tree to destroy it.
Escape
With the source of evil destroyed the cavern will start to collapse. Quickly run to the small ledge on the left, climb up the rock and use the Hook to open the door. Run through and turn to the left. Continue forwards back into the maze which is now lit. Use the Hook on the door to your right and go through.
Turn left and drop down to the wooden ledge. Run back the way you came and climb up the other side. Run down the tunnel and continue past the new tunnel that the Giant Worm made in the beginning.
At the next intersection take the right path and crawl through to the Cellar. Head up the stairs back to the Ground Floor. Follow the hallway opposite the stairs to the front doors. Open and go outside to win the game.
Congratulations on completing Alone in the Dark! If you enjoyed this game make sure to check out Alone in the Dark 2 and Alone in the Dark 3.