King’s Quest 1 Walkthrough
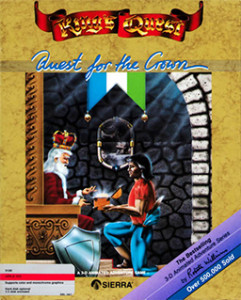
 King’s Quest 1: Quest for the Crown was released in 1983 by Sierra and captured the imagination of millions of fans all around the world.
King’s Quest 1 was the first game I ever played on a PC and it’s a game I remember very fondly. Having played this game for so many years it gives me great pleasure to put together a King’s Quest walkthrough for you.
The game is fairly short by today’s standards and can be completed in under an hour if you know what you’re doing. There was a remake of King’s Quest 1 released in 1990 as well as an AGD version released in 2001. This King’s Quest walkthrough relates to the EGA version which is slightly different than the remakes.
King’s Quest 1 Walkthrough
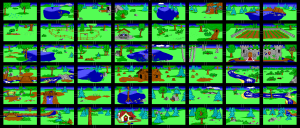
Exact phrases that you need to use are in pink. Click the image below for the full King’s Quest Map.
 From the starting position walk over the bridge to the west and open door. Follow the red carpet around until you are on the edge of the first step facing King Edwar. Bow king and then talk king.
King Edward will tell you about the quest to find the missing treasures. The magic mirror, magic shield and magic chest. You can find them in any order so you don’t need to follow the path that I have set out below.
Walk out of the castle and go to the west. Stand to the north of the rock and type push rock, look hole and take dagger.
Walk to the north and climb tree. Continue along the branch until you reach the nest with the golden egg. Take egg. Walk back down the branch.
To the east is the farm. Walk closer to the plants and take carrot.
Walk east. Walk east. This is the area the area where the fairy godmother comes out. Wait around for a while and she will appear and bless you with a protection spell. While the spell lasts no harm can come to you from the creatures of Daventry. It only lasts a little while but you can always come back for another protection spell.
Just to the north is a patch of clovers. Walk to the middle of the patch and take clover. From the clover patch walk south, east, south and east.
You’ll find a log and tree stump. Look in stump. Take pouch and then open pouch.
Head south, south, east and south until you see the gingerbread house. Eat house and then open door.
If you have the protective spell the witch will not be there. If you are not protected she may or may not be there. If she is run away and try again until she’s gone.
Go over to the oven and open oven.
Open cabinet and take cheese.
Go into the bedroom, take note and read note. The note tells you that “Sometimes it is wiser to think backwards.”
It is possible to wait for the witch to arrive while hiding in the bedroom and then push her into the over for extra points although I haven’t been able to do this yet because for me the witch didn’t turn up.
Exit the gingerbread house and go east and east. There is a large walnut tree here. Take walnut and then open walnut to discover a gold nut.
Head east and take bowl. Look bowl to see the words “fill” at the bottom. Fill and the bowl will fill up with a delicious stew.
Go north to the raging river. On the banks are some pebbles. Take pebbles.
Head west, west, north, west and enter the woodcutter’s house. Give bowl. They’ll be so grateful that they give you their fiddle. Take fiddle.
Leave the woodcutter’s house and go north, north and west. Open gate and show carrot when you are close to the goat. The old goat will start following you. Goats are enemies of trolls so head to one of the bridges.
Head south, south, south and west to get to one of the bridges. Move aside and let the billy goat knock out the troll.
Walk west and talk gnome. He’ll give you three guesses to guess his name and if you get it right he’ll give you something very valuable.
You may have guessed that this is a rumplestiltskin-type character but what is his name. The clue is in the witch’s gingerbread house. We must think backwards. Just typing in rumplestiltskin backwards does not work in the original version, although it does work in the remake.
We need to write out the alphabet backwards, from Z down to A and use the corresponding letters in the backwards alphabet to find his name.
a b c d e f g h i j k l m n o p q r s t u v w x y z
z y x w v u t s r q p o n m l k j i h g f e d c b a
As you can see R corresponds to I, U to F, M to N and so on. We end up with a name of IFNKOVHGROGHPRM.
If you guess his name right the gnome will give you some magic beans. If not, don’t worry, you’ll still get a key. Take beans or take key.
Walk south over the bridge, east, east and south. This is the area where a large bird visits from time to time. There is also a cave entrance here. Hang around outside the cave until the bird appears. At the right moment when it is close to you jump and it will carry you away.
The bird will drop you off at a normally inaccessible part of the map. Walk west and take mushroom. Walk back east and drop down the hole.
Walk along the cave until you come to a giant rat. Talk rat and he’ll tell you to give him one of your treasures. You can give him a treasure and he’ll let you past but you will lose the points associated with that treasure. It’s better to give cheese to rat and he will disappear into the wall.
Open door and meet the leprechauns. Play fiddle to have them dance about. All the leprechauns in the room to the south will also go off dancing.
To the south is the room of the leprechaun king. Now that all of his followers have left the king will leave too. Take sceptre and take shield. Congratulations! You’ve just recovered the first of King Edwards treasures.
Climb up the stairs and you’ll see there is a tiny cave exit. Much too small for you to get through. Eat mushroom and turn into a tiny little Graham. You can now exit the cave.
Walk west and west to the flowers. This looks like a good place to plant beans. A great beanstalk will grow high up into the sky. Be very careful climbing it as it’s very easy to fall off! The key is to make sure Graham’s feet are always touching the beanstalk. If you didn’t get the beans but were given the key, go to the door in the side of the cliff and unlock door, open door and climb up the stairs.
After finally making it up to the Land of the Clouds walk east, east, south, east and east until you come to a tree with a hole at the base of the trunk. Look hole and take sling.
To the north and west is a giant with one of the treasures of King Edward. There are a few ways to deal with him. You can wait until he sleeps, use the shield to protect yourself from him (although I’m not sure about this) or use the sling to kill him.
The easiest way to get the treasure is to use sling when the giant gets close. You can then take chest and open chest to see what’s inside.
Go to the west and west and climb all the way down the stairs. Go east. This is the area where an elf will appear. If he does talk elf and he’ll give you a ring of invisibility.
Walk south, west and west to the well. Cut rope with dagger to take the bucket. Lower rope to have the rope lower into the well. Climb rope and descend all the way to the bottom.
Swim before you drown and fill bucket.
Dive down and swim through the hole to the lower left side.
Faced with a fire-breathing dragon there are a few things we can do. You can throw dagger when you are close enough, although to get more points and to open the exit you need to throw water at dragon.
Take mirror and exit to the east, climb rope and get out of the well.
Go south, east, east and east to get back to the castle. Open door and bow king in front of King Edward. King Edward dies but not before handing you the kingdom!

King’s Quest 1 is one of the most beloved adventure games of all times. It was the beginning of many wonderful adventure games from Sierra. Roberta Williams was the creative talent behind many of the Sierra games and took her inspiration from fairy tales and stories.
There have been 9 games in the King’s Quest series with the latest, King’s Quest 2015, being released in July of 2015.


