Quest for Glory 4: Shadows of Darkness
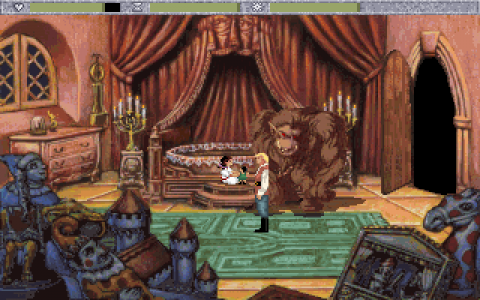
 Quest for Glory 4: Shadows of Darkness is the fourth in the series and continues on from Wages of War. You mysteriously land in a cave in the valley of Mordavia and must stop a Dark Cult from summoning an evil demon named Avoozl.
Quest for Glory 4 is the first game in the series to feature voice acting for all lines of dialogue. You can choose from one of 3 classes, Fighter, Wizard or Thief and they all have unique ways of completing various puzzles.
Once you escape the caves you’ll need to find the town which can be found to the north. The swamp area to the west has blocked all travel to and from Mordavia. You are trapped in this land until you find a way out.
Character Creation Tips
There are four classes in Quest for Glory 4. Paladins can only be created by importing a character from a previous game. If you start the game as a Fighter you have the option of turning him into a Paladin by performing noble deeds.
Fighter: Add points to Strength, Vitality, Agility, Weapon Use, Parry and Climbing. When you find the Adventurer’s Guild use the machine to exercise and force open the glass case on the wall to get the Sword.
Magic User: Add points to Intelligence, Magic Skill and Agility. Ask all the characters you meet about Magic and you might be given new spells.
Thief: Add points to Agility, Vitality and Luck. Practice Lock Picking, Climbing, Stealth and Acrobats as much as possible. You’ll want to visit the Thieves’ Guild which is under the Adventurer’s Guild.
Quest for Glory 4 Walkthrough
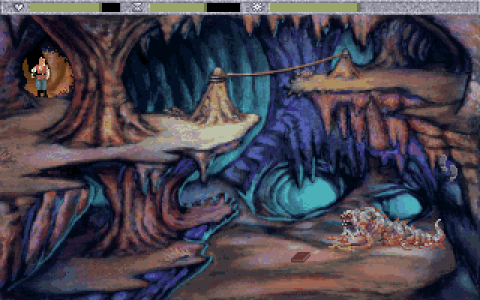
Caves
Walk to the right a little and you’ll fall over a corpse. You’ll automatically pick up a Dagger and some Coins. Search the other skeletons to find more Coins and Flint. Pick up the Torch from the altar and use the Flint to light it in your inventory. Walk towards the back of the cave and use the Hand icon to open the door.
Fighter: Pick up the Sword and Shield. Walk to the south and cross over the rope hand-over-hand.
Magic User: Pick up the Sheet and walk to the south. Use the Sheet on yourself and then cast Levitate. You’ll be blown across the chasm.
Thief: Examine the rock on the ground to discover the Thief Mark. Walk to the south and walk across the rope to the other side.
Walk to the north to leave the caves. As you walk down the ramp you’ll slide all the way down to the bottom. Katrina will be there and will have a brief chat before running off. Grab the Dark One Sign from the base of the arch.
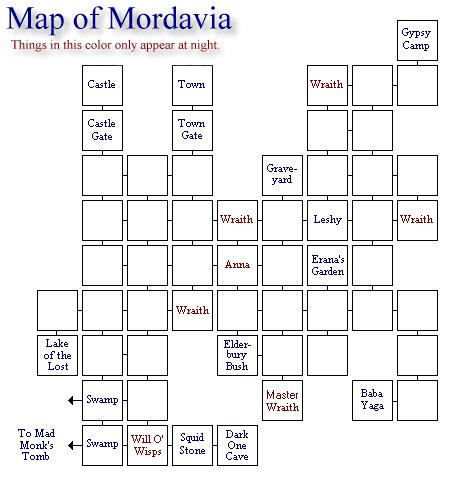
To get to the town walk west, north x 6, east and north. Look at the map below for directions.
Town of Mordavia
Outside the front gate take a Corn Cob near to the pumpkins. Search the tree stump for some Coins. If it’s night time either levitate or climb over the gate.
Once inside take a look at the staff. Try to take the staff for a secret message. Pick some Flowers. If you’re tired you can sleep here to recover vitality. From here you can walk to the north or east.
Head to the north first and talk to the Burgomeister about everything. Enter his office and talk to him again. He’ll give you the Key to the Adventurer’s Guild. Leave the office and enter the general store. Buy Rations, Garlic, Pie Tin and Candy. Thieves will also need Oil and a Shopping Bag. Paladins will need a Broom.
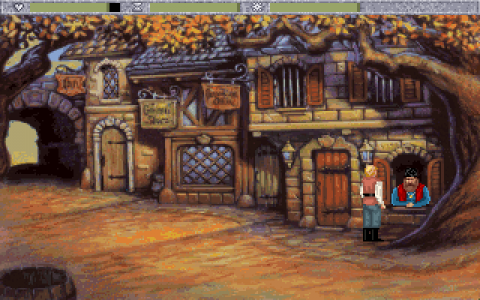
Leave the shop and enter the Inn. Talk to the Innkeeper and the Townsfolk about everything and then leave. If it’s night time you can sleep till morning. Leave and go north through the archway.
Talk to Igor and the use the Key to open the door to the Adventurer’s Guild. Sign the Logbook and read through it. Read the books in the bookcase.
Fighter: Grab the Rope and Grapnel and use it on the ring so you can practice climbing. Remember to take the grapnel with you when you leave. Smash open the glass case to get the Sword. Use the machine to build strength. Add weights when needed.
Magic User: Use the machine to the left to build up strength. Add weights when needed.
Thief: Look under the table with the logbook to find a Thief Mark. Take the Rope and Grapnel and use it on the hook to climb up to the ceiling where you’ll notice another Thief Mark. Use the coat hooks on the right. Move the 1st to point left, 2nd to point down, 3rd up and 4th right. Climb up through the hatch in the ceiling to enter the Thieves’ Guild.
Thieves’ Guild
Look at the poster on the back wall and take the Guild Card. In the grates on the floor you’ll find another Thief Mark and a Safe Knob. Look at the door at the back and use the Guild Card to open it. In the next room read the books to learn about traps. Place the Safe Knob on the safe. Open the safe by using the code FILCH. Search the desk for traps and then pick the lock. Read the book for a code. On the right wall move the picture frames to reveal 2 safes. Disarm the traps on each one and then crack them open. Move the barrel under the poster and use the code BBY, GGG and RGR. You’ll meet the Chief. Talk to him about everything and then leave the guild. Take the Grapnel when you are done.
Leave the Adventurer’s Guild and walk to the east. Talk to Nokolai and then pull on the rope outside Dr Cranium’s house. Repeat the sequence of bell chimes to open the door and go inside.
Open the door on the right to release the Baby Antwerps. Use the TRAP machine and answer the questions to identify a Baby Antwerp. They like avocados. You have Avocado Sandwiches for rations. Place a Ration in the TRAP machine and it will catch a Baby Antwerp.
Open the door to the left and the Baby Antwerp will be in the maze. Turn the maze left and right until the Baby Antwerp grabs the Key and gets out. Use the TRAP once more and identify a 6-legged Hexapod. Aside from Heroes they like to eat Garlic.
Open the door on the back wall and go into meet Dr. Cranium. Talk to him about everything. Grab 4 Empty Flasks from him and also a Healing Potion and Poison Cure Potion. Use the copy protection codes to enter the correct formula.
Alchemical Formula for Potions
ALKAZOTZ Pizza Pizza Fire Water Water
BETAZENE Water Fire Water Earth Fire
CRANOMEAL Earth Water Fire Pizza Earth
DESERTIX Earth Fire Earth Fire Water
ELKORN Pizza Earth Pizza Wind Wind
FLIEGNITZ Wind Pizza Fire Wind Pizza
GARGOIL Pizza Water Water Earth Earth
HINTLINE Earth Wind Pizza Wind Earth
ICKYUCKGOOP Water Earth Earth Water Pizza
JOLLENE Pizza Pizza Wind Pizza Pizza
KICKAPTUI Water Wind Water Pizza Earth
LAXABIFF Earth Earth Water Earth Water
MEXICALISH Fire Earth Pizza Fire Pizza
NOXIPYU Wind Fire Earth Wind Earth
OSSIPYE Earth Fire Pizza Earth Fire
PENTICKLE Wind Pizza Pizza Wind Water
QUIXOAT Water Wind Fire Pizza Wind
ROMBURN Fire Earth Fire Wind Earth
SUMTHIN Water Pizza Earth Wind Wind
TAMLIN Pizza Water Wind Earth Water
ULTIMO Fire Wind Pizza Pizza Pizza
VOLTOFFEN Wind Fire Earth Fire Wind
WHAMMBO Earth Fire Earth Wind Fire
XASPARIL Wind Wind Water Wind Water
YAMMER Wind Pizza Wind Water Pizza
ZOTZBRUE Water Fire Fire Wind Water
Magic User: Ask about “Magic” and he’ll give you the scroll for the Glide spell.
Leave and talk to Nikolai again. He’ll give you more information about Anna. Walk to the north and use the Dark One Sign on the Monastery door to safely open it and enter.
Thief: Climb up the wall and take the Blackbird Statue from the small recess above the door.
Give Garlic to the Hexopod and pull the poker on the right side to open a secret passage to the basement.
Fighter: Force open the desk and the use a Cure Poison Potion.
Magic User: Cast Open on the desk.
Thief: Disarm the trap by putting the same colors in a row.
Take the Diary from the desk and read it to learn about the six Blood Rituals.
Thief: Use the Shopping Bag to pick up the Squid Statue. Take this back to the Chief to cure him.
Look at the Cask on the wall that’s leaking. Drink from the cask and you’ll have a vision. After the vision the red wine will turn into a Scroll. Pick it up. This is the first Blood Ritual. Leave the Monastery.
At night
Thief: Sneak into Nikolai’s house by going through the window. His house is in the eastern part of town. Use oil on both doors of the wardrobe and grab whatever you can. Head downstairs, place the mug on the floor and then open the desk. Grab whatever you can and head out through the window.
Paladin: Go to Erana’s Staff at the town entrance and talk to a ghost named Paladin Piotyr.
Sleep at the Inn when night falls and continue on your journey in the morning.
Valley of Mordavia (Day)
Walk south from the gate, west twice and north to the Castle Gate. Talk to the gatekeeper Boris. Relay messages between Boris and Olga and eventually they’ll get back together. To tell someone about something use the Mouth icon on yourself.
From the Castle Gates go south three times, east, south, west twice and south. Talk to the Rusalka but don’t get near her. Give her flowers and talk to her again. This time she’ll share more information.
Paladin: Talk to her until she gives you Hair. Place the Hair on the broom. Go to the graveyard and sweep it with the broom. Return to the Rusalka and kiss her.
From the Rusalka go north, east twice and south three times to the Will O’Wisps. Pick up some Rocks from the ground along the way. Go east to the slime pool and use 2 Empty Flasks to pick Goo.
Fighter/Paladin: Throw rocks three times at the pile of rocks to the bottom right and then grab the Bush.
Magic User: Fast Force Bolt at the pile of rocks and then cast Fetch on the Bush.
Thief: Throw rocks at the bush. Climb up the path and use the Rope and Grapnel to grab the Bush.
Walk west, north and west. Pick up the Bone and then walk back east and south. Next you want to make your way across the swamp to the west.
Fighter: Wade through the swamp while avoiding the hands.
Magic User: Cast Glide and float over the swamp to the west while avoiding the hands.
Thief: Jump from clump to clump until you make it across the swamp.
Walk south four times and defeat the Chernovy. Place the Dark One Sign on the tomb. Click on the symbols of the rituals from top left going clockwise. They should be Mouth, Bones, Blood, Breath, Sense, Heart and Essence. You’ll be given the Sense Ritual.
Return to dry land the way you came. Make your way to the Elderbury Bush. From the Town Gates go 3 South, 1 East and 2 South. Stay away from the bush.
Fighter/Thief: Throw Rocks at the bush to dislodge a branch. Place the Rubber Chicken (from the Jester in the Inn after the 3rd night) on the ground. Walk around the bush to grab the Elderbury Berries.
Magic User: Cast Force Bolt at the Bush and some berries will fall off. Use Fetch to grab the Elderbury Berries.
When you’re done return to the town and sleep for the night or stay out to explore the forest after dark.
Valley of Mordavia (Night)
Walk south from the town gates and then east to meet the Ghost of Anna. At first she’s not aware that she’s a ghost. Talk to her, leave the screen and come back. Do this a few times and she’ll eventually realize she’s a ghost. Talk to her and she’ll ask you to tell Nikolai she loves him. Return to Nikolai during the day and tell him about Anna. Come back to Anna the next night. The two will be together and you’ll be able to pick up Nikolai’s Hat.
Just outside the gates after dark you may be able to meet Katrina. If she’s not there try again the next night. Talk to her about everything until she runs off. If you’re a Magic User she’ll teach you the Frostbite spell.
Make your way down south to the edge of the swamp with the Will o’ Wisps. Place the Candy on the ground to attract the Wisps. Use an Empty Flask on the Wisps to catch them. Walk east to the Squid Statue.
Place the Flask of Wisps on the statue to light it up. Then use the Dark One Sign on the statue. Use the dial to spell out the name “AVOOZL”. Make sure each letter is lit up in red before moving to the next letter. A compartment will open and you’ll get the Bone Ritual. Walk back to the west and release the Wisps.
On the third night go back to the town and enter the Inn. You’ll see a Jester ready to give a performance. Sit down on a chair and listen to his jokes. Once the performance ends ask him about everything. He’ll tell you to meet him in his room later.
Enter your room and leave. Now you can knock on the door at the end of the walkway. The Jester will let you in and you can talk to him again. He’ll tell you about the curse Baba Yaga put on him to remove his humor. Pick up the Rubber Chicken from the end of the bed and leave.
Baba Yaga
Before heading off to see Baba Yaga make sure you have a Pie Tin, Empty Flask, Corn, Bone, Elderbury Berries, 2 Flasks of Goo and Garlic. Make your way to the southeast corner of the map. From the Town Gate go 3 South, 2 East, 1 South, 3 East and 3 South.
Look at the bush and click the Mouth Icon on yourself to talk to it. Tell it the “Magic Phrase” and the bush will disappear. You learn the magic phrase from the Leshy. Walk west to Baba Yaga’s hut.
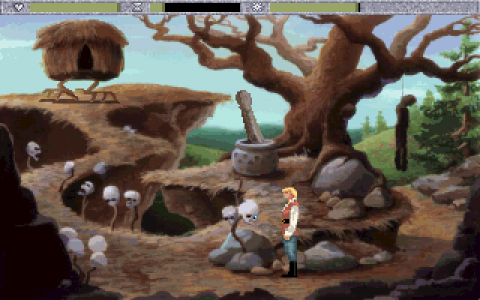
Talk to the skull with the jewel in one eye and give it Nikolai’s Hat. You can now safely walk up to the hut but it will move away. Place the Corn on the ground near the hut and it will sit down. Enter and talk to Baba Yaga. She agrees not to eat you if you can make her some Elderbury Pie. She then sends you outside.
Place the Bone in the mortar and use the pestle to crush it up. Use a Flask on the mortar and pestle to get the Bone Meal. Place the Bone Meal in the Pie Tin. Add the Goo and then the Elderbury Berries. The pie is ready but needs to be cooked. Give the pie to Bonehead and then the first skull along the path. They’ll cook it. Enter the hut and give Baba Yaga the Elderbury Pie.
Baba Yaga asks you for a reward. Tell her about the Gnome’s humor and you’ll get the Good Humor Bar. When she tips you out enter again. This time give her the Flask of Goo and ask for a ritual. She’ll give you the Breath Ritual.
Magic User: Enter one last time and give her Garlic. Ask for a spell as a reward and you’ll be given the Hide Spell.
The Gypsies
In the morning of the 5th day a group of villagers can be found outside the Burgomeister’s office. Igor has gone missing and a Gypsy was found outside the town and captured. Talk to the Burgomeister, enter his office and talk to him again. You can talk to the Gypsy behind the bars if you want but we won’t say much.
Leave town and from the gates go 2 south, 2 east and 1 north to the Graveyard. You’ll notice a tombstone has fallen over.
Fighter: Lift up the tombstone.
Magic User: Cast Open on the tombstone.
Thief: Climb up the tree and use the Grapnel on the tombstone. Pull on the rope to open it.
Return to the town and speak to the Burgomeister. Enter his office to see that the Gypsy has been released. Visit Igor and as you’re now friends he’ll give you the Crypt Key.
Go to sleep for the night and the next morning make your way to the Gypsy Camp. To get there from the Town Gates go 2 south, 3 east, 3 north, 2 east and 1 north.
The Gypsies will be friendly towards you and invite you in to have your fortune read. Speak to Magda and Davy about everything and then give Magda a Gold Crown to have your fortune read. When you say goodbye you’ll stay the night dancing with the Gypsies. In the morning you can enter the Gypsy cart again to learn more from Magda and Davy.
Leave and enter a third time. This time you can ask Magda about Erana. You’ll learn about the Destiny spell that’ll will be needed to save Tanya later.
Fairy Folk (Magic Users)
If you’re a Magic User visit the forest south of Erana’s Garden at night. You’ll see a glowing staff floating in the air. Reach up and grab it. Fairies will appear and give you a task to get Erana’s Staff. You’ll be back here after rescuing Tanya.
Rescuing Tanya
Sleep until around midnight and then enter the main room of the Inn. The Domovoi will be waiting for you. Ask it about Tanya and her Doll. Walk to the back and open the cabinet. You’ll find Tanya’s Doll.
Leave the town and make your way to the cemetery. Use the Crypt Key to open the crypt and go inside. When you’re down in the dark you can shake the Reaper’s hand to be let back out.
Take a loot at the mural on the floor. You need to spell out BORGOV by clicking on the various colours. Start with Blue, then Orange, Red, Green, Orange and Violet. A Key will appear. Use the Key on the statue to the far right with the lock in it to open a secret passage into the castle.
Thief: You will need to pick the lock of every door.
Inside the castle walk East 3 times and up the stairs. Turn the Crest on the bookshelf to open up a secret passage. Go North and up the next set of stairs. Go West and up another set of stairs. Try to open the door but the giant ape won’t let you in. Sleep until it’s night time and you’ll see Tanya in the room. Give the the Doll and she’ll let you in.
Talk to Tanya about everything but especially about the Destiny spell. She’ll go with you to town and the spell will be performed, turning her back into a little girl. You’ll be given Erana’s Staff in this time of need.
Wraiths (Fighter/Thief/Paladin)
Wandering around the forest at night you’ll run into Wraiths Burrows. Their locations are shown on the map above. Fight all 5 Wraiths and search their burrows. You’ll be given treasure but most importantly the Heart Ritual. Paladin’s will also find a Magical Sword.
Paladin: Give the Sword to the Burgomeister. He won’t accept it and instead gives you a Shield. Visit the Gypsies and ask about helping the Rusalka. Go to the Cemetery and look at all the headstones until you find the name Elyssa.
Go to the lake and speak with the Rusalka. Tell her that her name is Elyssa. Ask about “Hair” and she’ll give you some. Combine the Hair with your Broom and go to the Cemetery. Use the Broom to brush Janos’ Grave, the one next to Elyssa’s. Janos will appear. Fight him and return to the lake. Kiss Elyssa to free her.
Fairy Folk (Magic Users)
Return to the forest south of Erana’s Garden at night. The Fairies will appear and demand you give them Erana’s Staff. Cast Reversal, then Summon Staff. Now that you have the staff you can cast Resistance. It’ll protect you from the Fairy’s spells. You’re held in place so you can’t approach the Fairy Queen. Instead cast Frost Bite at the Queen until she’s defeated. Once the Fairies have been conquered you’ll be given the Heart Ritual.
The Castle
Go back to the Inn and sleep for the night. In the morning Katrina will leave you a note asking you to visit the castle. Make your way towards the castle and you’ll be confronted by Ad Avis. You can try to run away but you’ll still be captured.
Fighter: Break the chains.
Magic User: Cast Open on the chains.
Thief: Pick the lock on the chains to open them.
Pick up the Stake and Hammer and then walk up to the door. Listen at the door twice and you’ll learn about a secret passage. Open the iron maiden and go through to the Katrina’s bedroom.
Use the hand icon to open the case where Katrina is sleeping and touch her to wake her up. She tells you to find the 5 missing rituals and come back to the Castle within 3 days.
Seeing as you have all of the rituals you can immediately head back to the Castle. The gate will be open so go right in. Ad Avis and Katrina will take you back to the caves.
The Caves
At the bottom of the chasm you’ll see a book and a beast.
Fighter: Use the Grapnel to climb down. Fight the monster and take the Book. You’ll be given the Essence Ritual.
Magic User: Cast Calm on the beast and then Levitate to float down to the ground. Pick up the Book to get the Essence Ritual and Levitate back up.
Thief: Sneak and use the Grapnel to climb down. Pick up the Book and you’ll get the Essence Ritual.
Make your way over the bridge and enter the central chamber. The door on the right will be pulsating so go through to the first cave.
Bone Cave
Use the Torch to light the torch in the sconce and then place your Torch in the other sconce. Use the Dark One Sign on the altar and the use the Bone Ritual on the Altar.
Fighter: When the bones close around you break them.
Magic User: When the bones close around you cast Frost Bite at them, then Flame Dart and lastly Force Bolt.
Thief: Quickly jump before you’re caught in the bone trap.
Grab the Torch and go back out to the central chamber. The door to the left is pulsating so go through to the second cave.
Blood Cave
Make your way down and around to the altar and once you get up to it use the Blood Ritual.
Fighter: Use the Grapnel to climb up to the altar. After the ritual push over the boulder and climb back down.
Magic User: Cast Levitate to get up to the alter. After the ritual cast Frost Bite on the top pool of blood to freeze it for a while. Quickly run back down and cast levitate to get back.
Thief: Use the Grapnel to climb up to the altar. After the ritual jump over to the exit.
Go back to the central chamber. The back left door should be pulsating. Go through it to the next cave.
Breath Cave
Walk up to the altar and use the Breath Ritual on it. There are 6 tentacles coming from the altar although they are hard to see. Blow on them in this order: bottom right, bottom left, bottom middle and top middle. Wind will start to blow.
Fighter: Ask you walk past the hanging plant click on it.
Magic User: Wait until you’re sucked in. Cast Calm and then Open.
Thief: When you get blown forwards click on yourself.
Go back out to the central chamber. The door at the back right will be pulsating. Go through to the final cave.
Sense Cave
It’s completely dark in here. Walk to the bottom left, top left and then top right. You’ll light a torch in the cave. Use the Sense Ritual on the altar.
Fighter: Use the grapnel on the horseshoe shape stone at the top of the screen. Run back to the exit.
Magic User: Cast Lightning Ball on the dendrites to stop them attacking you as you make your way back.
Thief: Use the grapnel on the horseshoe shape stone at the top of the screen. Use the Grapnel on the large globe shape under the altar and swing to the exit.
Central Chamber/Heart Cave
Fighter/Thief: Use the Grapnel on the ceiling to climb up.
Magic User: Cast Levitate to float up through the ceiling.
Final Battle
After Ad Avis and Katrina cast the Summoning spell a fight will break out between them. Ad Avis will win and you’ll be left to deal with him.
Use Erana’s Staff (Magic Users cast the Staff spell) and then tell the Ultimate Joke. Ad Avis will say it wasn’t funny but actually he can’t stop laughing.
Fighter: Throw the Staff at Ad Avis and then use the Staff on the crystal.
Magic User: Cast Force Bolt at Ad Avis and then summon the Staff again.
Thief: Jump onto Ad Avis. Jump back to the platform and then use the Staff on the crystal.
Enjoy the final cutscene. Congratulations on completing Quest for Glory 4: Shadows of Darkness! If you enjoyed this game make sure you check out the original Quest for Glory and the other games in the series.