Subnautica: Below Zero
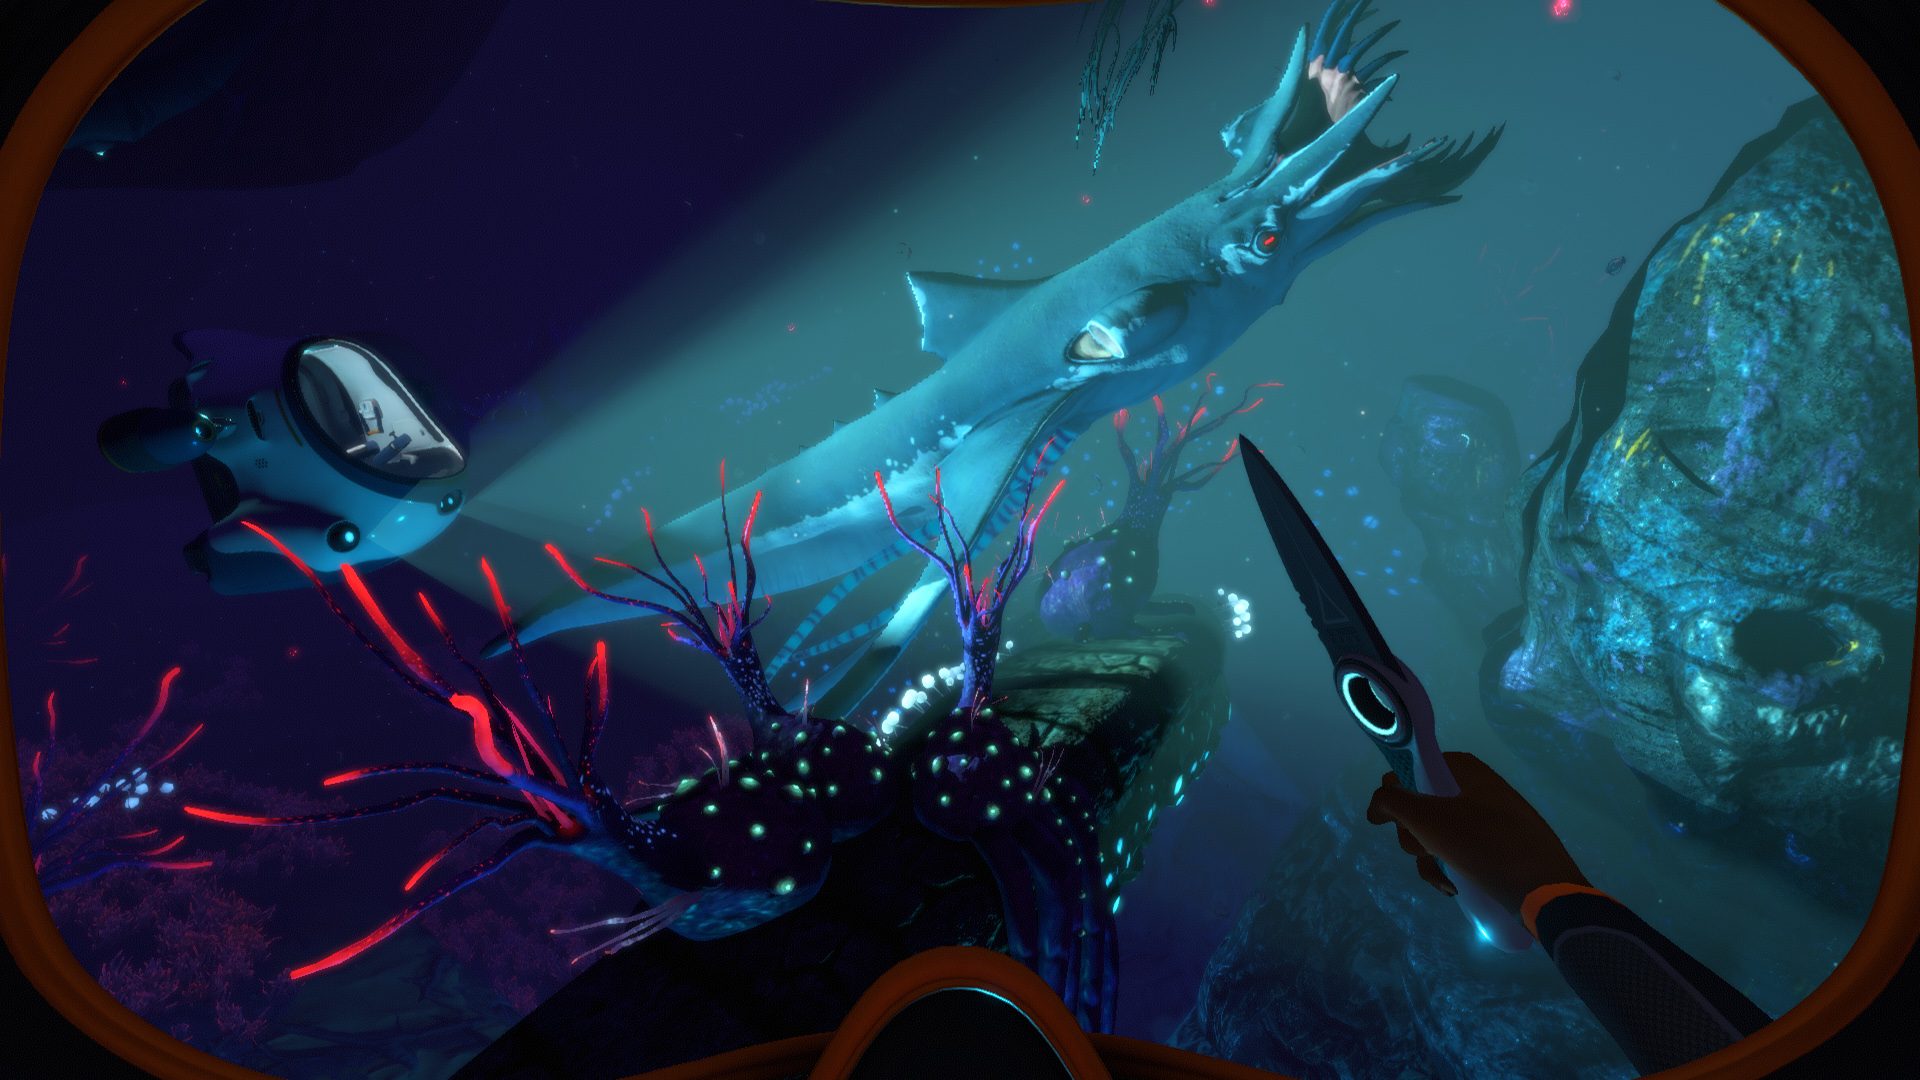
 Subnautica: Below Zero is the second game in the series and takes place in the polar region of Planet 4546B. You play the role of Robin who travels down to the planet to investigate the death of her sister.
Much of the gameplay is the same as Subnautica but resources are a little easier to find and you generally need less of them. You’ll not only need to worry about food and oxygen but about body temperature as well. You can generally stay warm enough in the water but once you’re on the ice your body temperature will drop quickly.
While exploring the area you’ll come across around 3 dozen varieties of marine fauna. Some of the larger species are aggressive while the smaller fish you’ll need to hunt for food.
If you want to find out where you are at any time press F1. Your location, along with lots of other information, will be listed. The X,Y,Z coordinates tell you your current location. X is your east-west location, Y is your depth and Z is your north-south location. Your PDA has lots of information and occasionally you’ll get updates and notifications.
Finding the Drop Pod
The initial cutscene sees Robin leaving a spaceship and flying down to planet 4546B to investigate the death of her sister. Robin has a rough landing after trying to avoid a meteor.
Once you get control you’ll be stuck out on the ice and will quickly freeze if you can’t find the water soon. Quickly grab as many as the supplies littered about the place as you can. There are 3 Filtered Water Bottles, 3 Nutrient Blocks and 9 Flares.
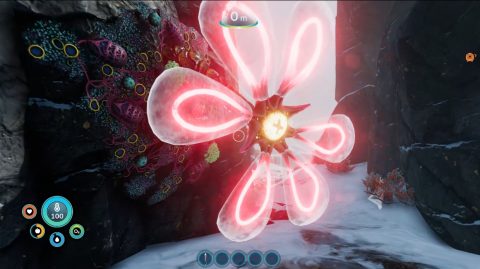
The Drop Pod is underwater and not too far away but you’ll need to make your way along the path to the water. If you get too cold stand next to the Thermal Lilles to warm up.
Once you find the water jump in and make your way to the Drop Pod. Catch any fish you can along the way and cook them in the Fabricator. They’ll provide you with a delicious meal and a bit of water. Once you enter the Drop Pod listen to the communications from your sister Sam and Lilian Bench.
Basic Tools and Supplies
When you’re out swimming in the Shallow Twisty Bridges, the area around the Drop Pod, look out for Bladderfish. Just like the first game they can be used in the Fabricator and turned into Filtered Water. Use Salt and any kind of fish to make Cured Fish, a tasty snack which won’t go off over time.
Luckily resources are easier to find in Below Zero, and you’ll need to use far fewer of them to complete the game. You’ll be able to find Limestone Outcroppings around the Drop Pod which can be broken for Titanium and Copper. These can be used to make Copper Wiring and other basic materials.
You’ll need to craft a Survival Knife to gather some materials and to fend off attacks from aggressive creatures. You’ll need Silicone Rubber which can be made from a Creepvine Seed Cluster and Titanium
A Scanner is also essential but it needs a Battery. In Below Zero batteries can be crafted by using two of the Ribbon Plants. They can be found in shallow areas on the sea floor.
A Seaglide will help you travel around much quicker and should be your first priority after finding enough food and water. Luckily the Seaglide Fragments can be found on the sea floor within about 150 meters from the Drop Pod. After scanning three fragments the blueprint will be added to your PDA. It can be crafted with a Battery, Lubricant, Copper Wire and Titanium Ore.
Delta Base
After the first couple of days you’ll be given the location to Delta Island. It’s the location of the Delta Station and the Communications Tower. The coordinates are -3, 0, -678. To find your coordinates press F1. X is east-west, Y is depth and Z is north-south.
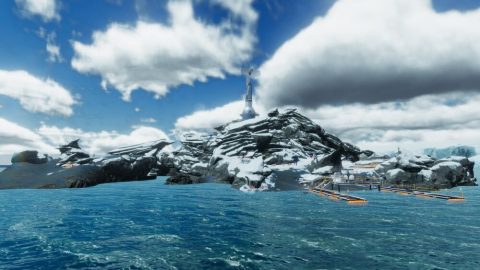
Climb up onto the island and make your way up to the tower. You’ll need to go through the caves to get to it. Make sure to stop by the Thermal Lilies or hot springs to warm up along the way.
When you’re close to the top a cut-scene will trigger with Marguerit Maida. She tells you to get off her land and then jumps away in her Prawn Suit. Her last tracked location will be stored in your PDA for later exploration.
Delta Station is at the top of the island. You’ll find a Habitat Builder Fragment here which is needed to start building your own seabase. Make sure you scan the Multipurpose Room and Modification Station before you leave. You’ll also find various other vanity items.
Leave the base and head up the stairs to the tower. Grab the PDAs and interact with the terminal at the base of the tower. You’ll be given a status report telling you that the area is under constant satellite surveillance.
Sanctuary Zero
While exploring the Twisty Bridges or on your way to Delta Island you’ll receive an SOS from the Sanctuary. It’s located south of the Drop Pod, deep in the biome with the entrance at a depth of about 180m.
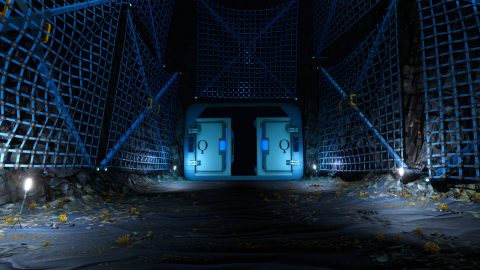
When you get close you’ll see the alien pillars. Follow them into the cave opening where you can breath without the tanks. Look around for 3 Ion Cubes and grab them as they are fairly rare.
Make your way to the inner sanctuary. You’ll hear a message that the power is low and that Robin has a storage capacity found on her person. Make your way around and up the ramp to a hologram. Interact with the hologram to begin a cutscene where the alien consciousness is merged with Robin.
Once you leave the sanctuary the alien, or Al-An, will tell you that it needs a body so that it’s consciousness can be transferred. From time to time Al-An will give you updates on the locations of various alien artifacts.
Building a Seatruck
From here on with the story you’ll need to dive much deeper. Having a Seatruck will make your journey much easier. To craft it you’ll need the Mobile Vehicle Bay. You’ll need to scan 3 fragments for both the Seatruck and Mobile Vehicle Bay before you can craft them.
Seatruck fragments can be found in the Twisty Bridges, Thermal Spires and Purple Vents biomes. It’s modular so you can add various modules to extend the length of the ship. You’ll probably want to add a Storage Module at the very least and a Fabricator Module is always handy to have as well.
Once you have the Seatruck you’ll also unlock the Depth Modules, MK1, MK2 and MK3. They extend the crush depth to 300m, 650m and 1000m respectively.
Mobile Vehicle Bay fragments can be found in the Arctic Kelp Caves, Arctic Kelp Forest and Twisty Bridges. Make sure to look in the Sea Monkey Nests because they often have fragments hiding in them.
Koppa Mining Site
To get to the Koppa Mining Site make your way from the Drop Pod to the Delta Station. Once you arrive turn to the right to the southwest and hug the island. When you come to a drop-off dive down and you should see cargo boxes and lights. In the side of the cliff you’ll find the entrance to the Koppa Mine.
The Seatruck can’t fit through the doors so you’ll either need to go in with the Seaglide or find the secondary entrance in a crevice filled with geysers. It’s a bit awkward getting past the geysers but the Seatruck will fit.
Once inside you’ll find fragments for the Prawn Suit, Drill Arm fragment and the Prawn Suit Jump Jet Upgrade. There’s also a box with the Vehicle Upgrade Console.
Continue down the cave to a split. The left path takes you to an Artifact that you can scan. It’s not necessary but scanning the artifacts gives you access to hybrid technology later. The path to the right has an elevator going down. Dive down to find blueprints for the Headlamp and Flashlight. There’s also a third Prawn Suit Fragment here.
When you’re done exploring exit out of the mining site the same way you entered.
Building a Prawn Suit (Optional)
Now that you have the fragments from the Koppa Mining Site you’ll be able to craft the Prawn Suit. To build it you’ll need a Plasteel Ingot, Power Cell, Enameled Glass and a Computer Chip.
Once you craft the Prawn Suit the Depth Upgrades and Storage Module will be available. The Depth Modules allow you to dive down to a depth of 1100m but can only be crafted at a Modification Station. The upgrades can be installed or changed by opening the panel on the left shoulder of the Prawn Suit.
If you have the Seatruck Docking Module you can transport the Prawn Suit over long distances. The Drill Arm allows the mining of larger resources. The Jump Jet Upgrade is very handy and allows you to take large jumps in the air. Both of these upgrades are found at the Kopping Mining Site.
Marguerit’s Seabase
You’ll encounter Marguerit for the first time while making your way up to the radio tower on Delta Island. She threatens you and then jumps away in her Prawn Suit. Her last known location is stored in your PDA.
Make sure you have at least the MK2 Depth Upgrade for the Seatruck and make your way to the last known location near the Lilypad Islands. You should notice some alien technology nearby in the form of a large broken cable. Dive down and make your way through the crevice in the sea floor.
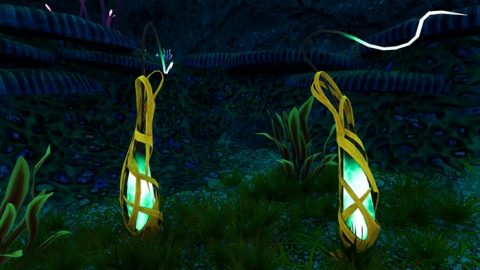
When you see the lightsticks follow them to Marguerit’s base. Once inside a cutscene will trigger. Marguerit will tell you that if you sabotage the Communications Tower she’ll give you more information.
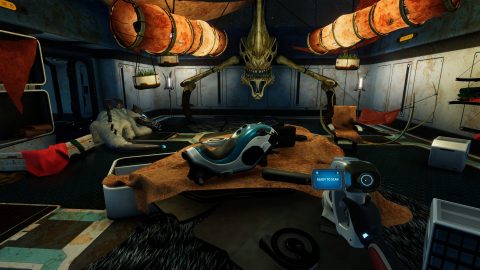
Scan the Snowfox Fragments and the Test Override Module on the table. You’ll also find a Seatruck Perimeter Defence Module near the table. Her pet Snow Stalker blocks access to the other rooms of the base.
Disabling the Communications Tower
The Test Override Module needs a Parallel Processing Unit (PPU). To get the blueprint you’ll need to scan 3 fragments. These fragments can be found on the broken sections of the Mercury II. To get to them you’ll need a Seatruck with at least the MK1 Depth Upgrade and a Lasesr Cutter.
The locations for the sections of the Mercury II are shown below:
Stern: 75, -40, -888
Bow: 270, -217, -1334
Thruster: 474, -151, -630
There’s a lot to explore in this wreckage but all you need to progress with the story are the PPU fragments. They can be found in sealed cases so you’ll need a Laser Cutter to get access to them.
Once you have the PPU craft the Test Override Module and take it to the Communications Tower at the top of Delta Island. Climb the ladder and insert the module into the maintenance port. Climb back down and interact with the terminal. Select “Enter Test Mode” to turn off the satellite tracking.
Marguerit will give you a call and invite you to her greenhouse. She’ll give you the approximate location, about 1000m east of Delta Station.
Marguerit’s Greenhouse
The greenhouse is located on an iceberg a little over 1000m east and a little south of the Delta Station. The exact coordinates are 998, 30, -873.
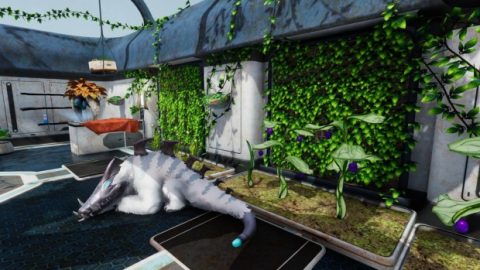
Marguerit will be inside with her Snow Stalker. She’ll tell you a little about your sister Sam and give you a clue to the location of Omega Lab.
Pick up the PDAs and make sure you scan the Snow Stalker Fruit to unlock the Spicy Fruit Salad recipe. This is the best food in the game and gives you 85 food, 30 water and restores all body heat. It also takes one inventory slot and never rots.
Glacial Basin
The Glacial Basin is your next location. It’s a large area on the ice so you won’t be swimming for a little while. There are multiple paths to the Glacial Basin. You can go through the Glacial Connection, a series of underwater caves under the glaciers, or make your way to the Glacial Bay. The Glacial Bay is the easy to find and the coordinates are -987, 0, -320.
You’ll freeze quickly on the ice so try to stay close to warmer locations such as inside caves, under water or near to a thermal vent.
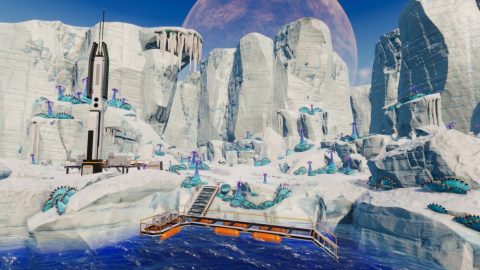
Leave your Seatruck at the dock and climb out onto the ice. Follow the beacon signal to the Phi Robotics Center. If you haven’t unlocked the Beacon blueprint picking this Beacon up will unlock it.
Phi Robotics Center
The Phi Robotics Center is made up of 2 Large Rooms and a Multipurpose Room. Take a look around and make sure you scan the Snowfox, Snowfox Hoverpad and Spy Pengling fragments. You’ll need these later. A Cold Suit fragment can be found in one of the bedroom closets.
When you’re done exploring head back to the Glacial Bay. This is probably a good spot to build a Snowfox Hoverpad. You’ll need this to explore the Glacial Basin and it also keeps you warm while you’re riding it. All of the ingredients for the hoverpad can be found nearby. You’ll need a Habitat Builder to make it.
Use the hoverpad to build the Snowfox. It can be controlled with the WASD keys and LShift gives you a short boost. You can pick it up and redeploy it. This is very useful if you accidentally ride it into the water.
There are two other points of interest in the Glacial Basin, the Frozen Leviathan and the Cure for the Frozen Leviathan.
The Cure
To save going back twice to the Leviathan you can pick up the cure first. You’ll need a Spy Pengling and the Snowfox to get there. The exact coordinates are…
From the dock head southwest and take the left passage once you reach the Phi Robotics Lab. Follow the frozen river under an ice bridge. After the bridge take the sloped path up on the left but watch out for the Snow Stalker. You can use a Flare to scare it away.
Once up the slope turn to the right and continue in a southwest direction. Continue along the path on the right side and follow the slope down. At the bottom to turn to the left and you’ll see a small hole in the cliff.

Deploy the Spy Pengling and send it inside. Be careful you don’t drive it off the edge. Open the chest and grab the Antidote. Quickly return with the Spy Pengling and pick up the Antidote from the storage.
The Leviathan
Head back to the sloped paths on either side and make your way up the slope to the left. Keep going until you find the Acai Tree clearing with the Communications Tower. Head towards the tower and on the left side you’ll see a cave opening. This is the entrance to the frozen Leviathan.
Follow the path up and investigate Parvan’s room to the right if you want. You’ll find a PDA, Silver Ore and a few Posters. When you’re done continue into the cave until you find the excavation site.
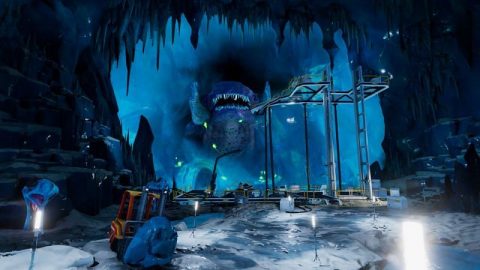
Hunt around for Sam’s Necklace, then enter the ice cave. Scan the different parts of the Leviathan, including the teeth, skull and Kharraa pustules on the upper level.
Insert the Antidote into the Sample Injection Robot on wheels and interact with the terminal to begin the injection. The injection will be successful and Robin will take a moment to ponder the death of her sister.
Outpost Zero & Omega Lab (Optional)
Outpost Zero
Northeast of the Drop Pod, through a breach in the ice shelves you’ll find Outpost Zero. The coordinates for the base are -72, 9, 301.
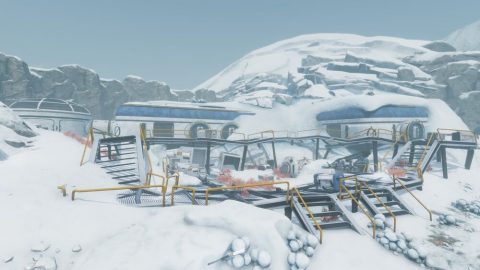
This outpost is an abandoned Alterra installation made up of 2 large rooms, 3 multipurpose rooms and a glass dome. Half of the base is covered with snow. Search inside for a few resources and scannable items. You’ll find an Ion Cube, Alien Robot, Water Filtration Machine, Coffee Vending Machine, Vending Machine, Fruit and various other bits and pieces.
Omega Lab
The Omega Lab can be found in the Floating Lilypad Islands at a depth of 200m. It’s located inside a central large floating rock. It’s made up of 2 multipurpose rooms and a large room connected by passages. The exact coordinates of the Omega Lab are 560, -189, -1065.
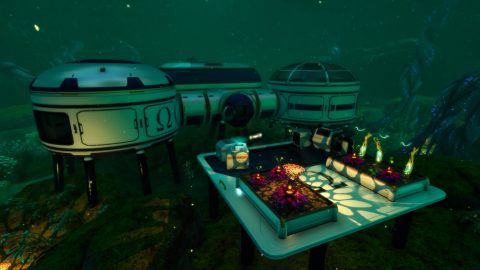
At the front of the base you’ll find a Foundation with Growbeds. On the crate you’ll find a Data Box with the blueprint for the Swim Charge Fins.
Head inside the base for the scannables and PDAs. Some interesting scannables are the Nuclear Reactor, Power Cell Charger, Water Filtration Machine and Glass Dome. When you’re done looking around get ready to continue with the main story.
Al-An’s Storage Medium
To get Al-An out of Robin’s brain you’ll need to craft a new body for it. There are three Architect Caches located around the area that contain the necessary parts. The caches can only be accessed once Al-An has been downloaded into Robin’s head.
Arctic Spires Cache
As you’ve already spent some time in the Glacial Basin you’ve probably notice the retracted bridge leading over to a new area. Approach the bridge and scan the ruptured Hydraulic Fluid fragment for the blueprint. To craft a new one you’ll need 1 Creepvine Seed Cluster and 4 Gel Sacks.
Once you have the Hydralic Fluid place it in the slot and use the terminal to extend the bridge. Make your way over to the Arctic Spires. Make sure you bring a Snowfox so you can travel around much faster. You also won’t get cold if you don’t have a Cold Suit.
Make your way through the canyon to a tech site. Search around for the Thumper blueprint. Craft a few of them as you’ll need them to distract the Ice Worms in the area. Use them by deploying the Thumpers while you make a run for it. The Ice Worms will be more interested in the shockwave from the Thumpers than from you.
The Arctic Spires Cache can be found in the furthest area of the region with the coordinates -1011, 21, 720. Scan the tissues fragment for the Architect Tissues blueprint for Al-An’s Vessel.

Deep Lilypads Cave Cache
By now you’ll want to have the Seatruck Depth Upgrade MK3 as you’ll be going down to over 600m for the next cache. The Lilypad Caves can be found under the Lilypad Islands. Make your way down through the crevices in the sea floor to the caves underneath.
The cache can be found at coordinates 541, -619, -1099. Scan the skeleton fragment and you’ll get the Architect Skeleton blueprint for Al-An’s Vessel.
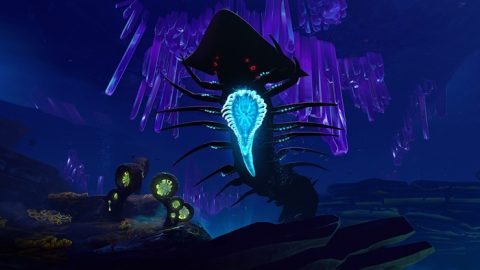
Crystal Caves Cache
The Crystal Caves have a depth of between 480 and 840 meters and can be accessed by going through either the Deep Purple Vents or Tree Spires biomes. Two Shadow Leviathans roam around this area so take extreme caution.
Having the Horsepower Upgrade or the Afterburner Upgrade on your Seatruck will help you to get through this area a little quicker. The Perimeter Defense Upgrade will shock any attacking predators so add that to your Seatruck if you have the blueprint and resources.
The easiest entrance to the Crystal Caves is past Marguerit Maida’s Base. Make your way past her base and go deeper into the caves until you see the crystals.
Make your way through the crystal formations while avoiding the Shadow Leviathans. The exact coordinates for the Crystal Caves Cache can be found at 545, -807, -694. Your Seatruck won’t fit in the narrow path so you’ll need to leave it behind and swim the final part of the way.
Scan the Architect Organs for the blueprint. This is the final part of Al-An’s Vessel. Now all you need to do is gather all of the materials and put it together in the Fabricator Base.
Fabricator Caverns
Deeper into the Crystal Caves, on the northeastern side, you’ll find the entrance to the Fabricator Caverns. You’ll know you’re entering the caverns when you see the red crystal formations.
Continue on down until you find the entrance to the Fabricator Base. Once inside the base you’ll see three terminals. Each of them is responsible for crafting one of the parts of Al-An’s Vessel. Here is what you need for each of the components.
Architect Tissues:
2 x Root Globules
1 x Synthetic Fiber
2 x Gel Sacks
Architect Skeleton:
3 x Diamonds
1 x Plasteel Ingot
1 x Polyaniline
Architect Organs:
1 x Ion Cube
2 x Ribbon Plants
3 x Kyanite
Once the materials have been placed the fabrication process will begin. Use the control terminal to begin the transfer of Al-An’s consciousness.
Al-An will upload the location of the Phase Gate Facility into your PDA. Make your way back out of the caverns. If you have any other things you want to do before leaving now is the time to do them.
Architect Phase Gate
Head towards the Phase Gate Facility which should be marked in your PDA. To get to it you’ll need to dive under an iceberg and surface in a bay. Climb up onto dry land and follow the path down to the entrance to the facility where Al-An will be waiting for you.
Have a chat with Al-An and you’ll help him with a few tasks. Board the spaceship and you’ll head off together to travel to the home planet of the Architects.
This ends the story for Subautica: Below Zero. I hope you’ve enjoyed this walkthrough!