Orc Campaign
Back to Warcraft 2: Beyond the Dark Portal
Act I Draenor, The Red World
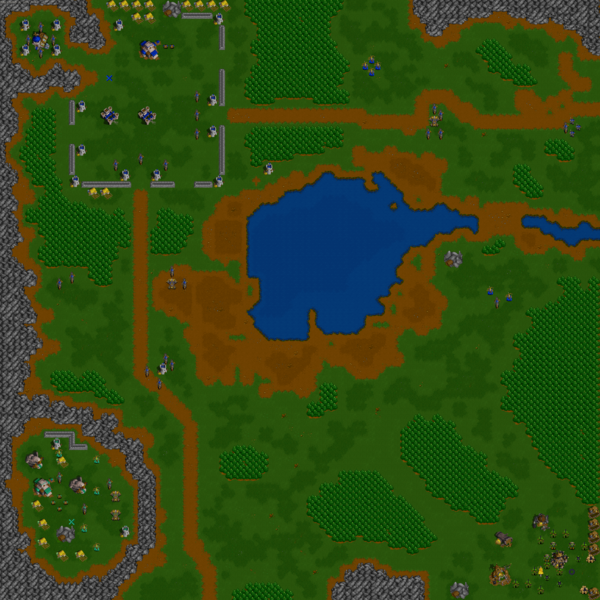
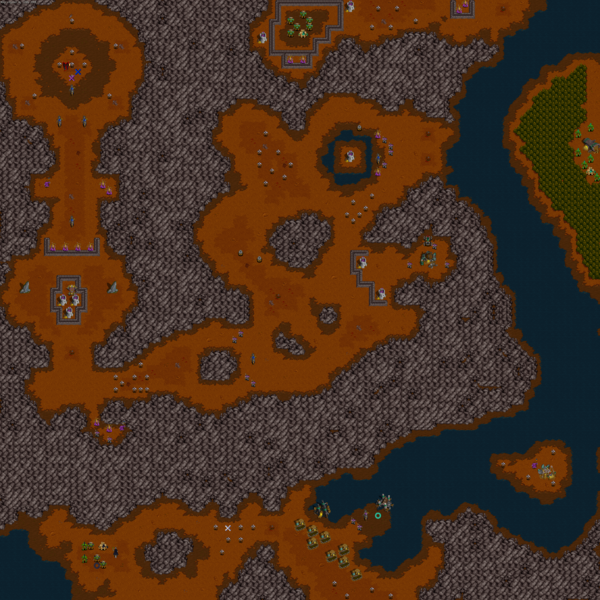
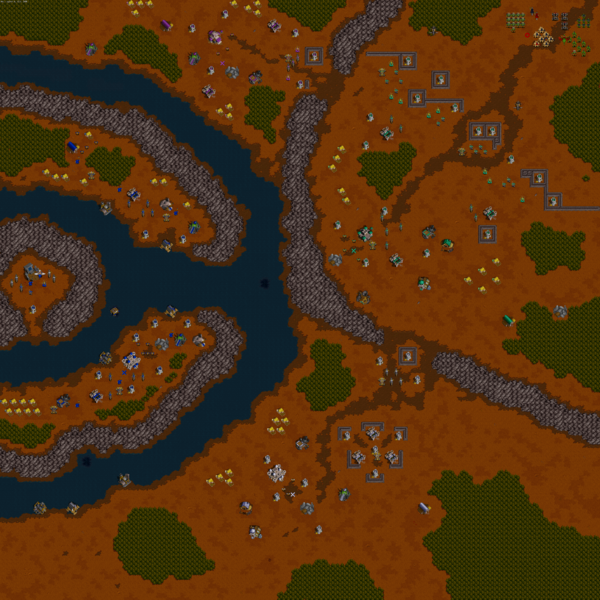
1) Slayer of the Shadowmoon
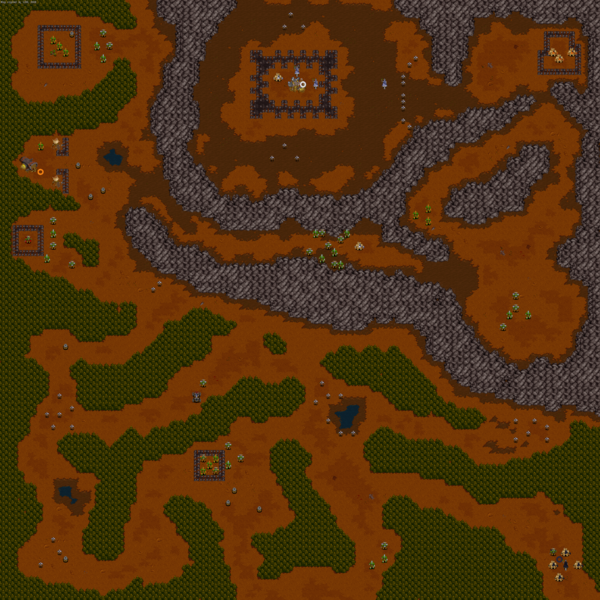
You begin with 4 Ogres, a Grunt and a Death Knight in the bottom right corner of the map. Move them to the east, taking out the White Orcs along the way. Towards the eastern side you’ll find a group of Orange Orcs in a prison. Break the walls to free them and they’ll join your side.
Make your way up to the north and you’ll find Grom Hellscream also in a prison. Free him and he’ll be a powerful hero for your army. Just to the north you’ll find a Troll Lumber Mill that you can take over and a 2 Trolls. Just to the north you’ll find more Trolls in a prison as well as Gobblin Sappers. Free them and then start making your way to the north west side of the map.
In the far northwest corner you’ll find more Ogres. Bring them with your army to the east and try to draw out the Skeletons. Send one unit to draw out the Death Knight magic and then use the Goblin Sappers to break through the wall. Send in your army to kill the Death Knights and destroy the Temple.
2) The Skull of Gul’dan
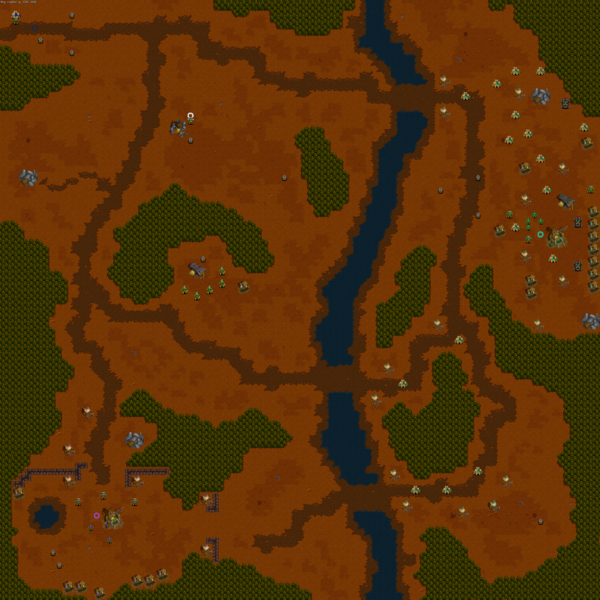
You start with Dentarg and a Grunt in the northeast corner. Quickly run them all the way to the south to recruit the Thunderlords (Violet) and Shattered Hand (White) clans. Build up your base with the Thunderlords in the southeast as you explore the map. You’ll want to block off the paths across the river to stop the enemy units before they reach your base.
Once you have a large enough army with Ogres and Catapults send them across the river to the west and start taking out the Bonechewer clan. Once they’ve been destroyed the mission will be complete.
3) Thunderlord and Bonechewer
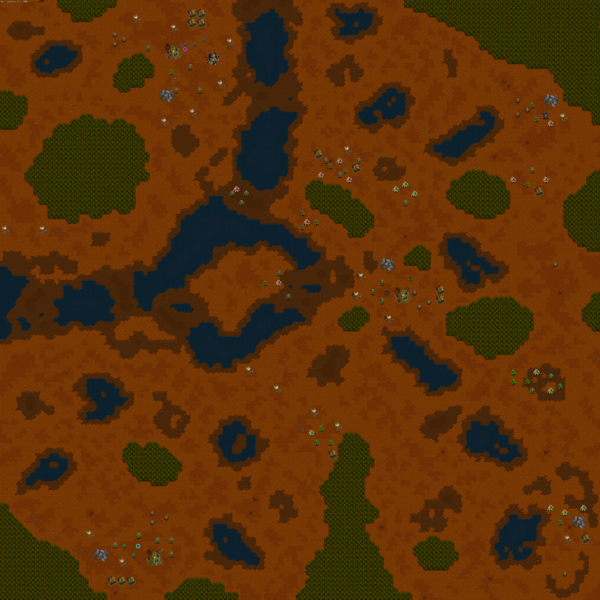
You begin close to the center of the map with the Bonechewers (Teal) to the southeast and the Thunderlords (Violet) to the northeast. Quickly train Peons to mine gold and harvest timber. Build Guard Towers around your base to keep your Peons alive.
The mine will last a little while but you’ll need to expand to the mine to the southwest or northwest before too long. Once you have Ogres with all the upgrades send them down to the Bonechewers with a few Catapults. Let the Catapults deal with the buildings while the Ogres protect them. Once the Bonechewers have been dealt with head north to wipe out the Thunderlords.
Act II The Burning of Azeroth
4) The Rift Awakened

Your army is located in the northwest corner. A Zeppelin has spotted the Humans to the east. Bring your army across to the east to take over the Teal base. You’ll have a large enough army to defeat them. Just make sure the Catapults deal with the Towers before your army gets too close.
Once the Teal Humans have been wiped out send your army to the south to the Violet Humans and destroy their base before they get a chance to train units. There is a second Mine down here but you may not be able to defend it just yet.
The Blue Humans in the center will send out groups of units so make sure your main base is defended. Build 4 or more Barracks closer to the central base and use the Catapults to weaken them before sending in the Ogres.
5) Dragons of Blackrock Spire

For this mission you only need to capture the Dragon Roost in the northwest corner of the map. Build a Town Hall and send your army out to the west along the southern edge of the map. You’ll have enough units to take over the second mine in the southwest corner.
Keep Spearmen by your first base and build Guard Towers just to the north. The Humans will send Gryphon Riders down to your base in the south east corner.
Build up your economy and then build at least 2 Temple of the Damned. Research Unholy Armor and Haste. Send a few Death Knights with Ogres north slightly and then to the west until you’re at the western edge of the map.
From here cast Hast and Unholy Armor on your Ogres and send them north to claim the Dragons and Dragon Roost. Once you have the roost the mission will be complete.
6) New Stormwind
Your base is in the southwest corner of the map. The Humans have a base entirely blocked off in the southeast corner. This is where the Gryphon Riders are trained. There’s another Human base in the northeast corner.
Quickly send your army to the north to claim the second Gold Mine. Build Guard Towers around this mine and the main base to the south.
Build up your base and send Goblin Sappers to the east to blow up the rocks around the Human base. Send in Ogres and Death Knights to wipe them out. Death Knights can use Death and Decay to quickly destroy buildings. Take over the mine if you want and get ready to head north to the Blue Humans.
Use Catapults or Death Knights to deal with the Guard Towers and Barracks quickly. Then wipe out the rest of the structures to complete the mission.
Act III The Great Sea
7) The Seas of Azeroth
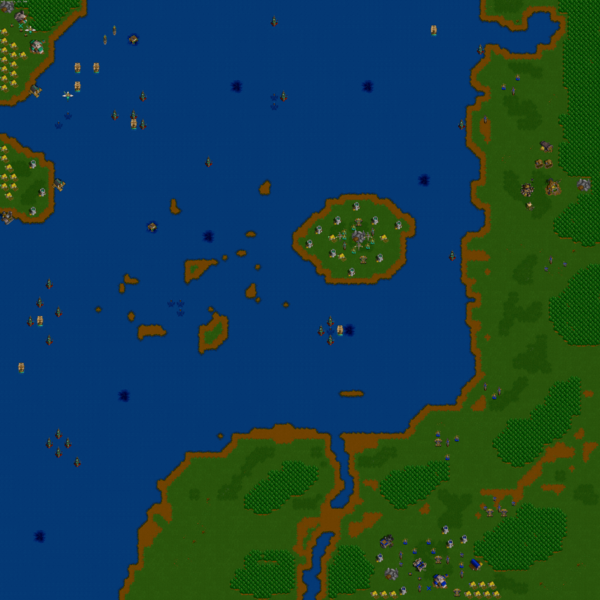
For this mission you need to build 5 Shipyards and destroy all enemy ships. There is a Human base to the south of where you begin but you can ignore it. Just make sure you have enough Guard Towers on the southern side of your base to deal with them.
Build a Catapult to clear out any ships nearby in the ocean to the east of your base. Then start building the Shipyards. You should have enough gold to build as many ships as you need but you can take over the small island just off the coast with another Gold Mine if you need it.
8) Assault on Kul Tiras

Load your transports up with your ground units and send them to the mine in the southwest corner. You’ll need to protect them with your navy along the way.
Quickly build a Town Hall and get your Peons working. Send your navy out across the seat to the northwest. Destroy all enemy ships and then destroy the Human Shipyard so they can’t produce more units. Use your navy to kill off any other units and buildings that you can reach.
Back at your base send an army north to capture the next Gold Mine. Use a Zepplin to scout out the Gryphon Aviaries in the northwest corner. Build the Dragon Roost and send 4+ Dragons to destroy the 2 Gryphon Aviaries.
Build a ground army of Ogres and Death Knights. Use Death and Decay to destroy the buildings as you sweep through the Human base. The Ogres will protect the Death Knights when they get attacked. Wipe out all enemy units and structures to complete the mission.
9) The Tomb of Sargeras
For this mission you need to kill the Daemon who holds the Jeweled Scepter. There is no base building but you will take over a few structures as you go. Send you units to the west to the Farms and Shipyard and build a Transport. Keep your Death Knight alive at all costs as it’s the only one you get.
Sail your units west to the small island and take over the Temple of the Damned. From here you can research Raise Dead and Death and Decay. I recommend only using Death and Decay for this mission.
Sail your units along the river to the north. Disembark one unit on the north side of the next island to the west. Send it down to recruit the Trolls and Ogres to the south. There’s a Lumber Mill here as well. Use it to upgrade the throwing axes.
Sail a few units north and disembark on the east side. Use Death and Decay to kill the Archers behing the wall. Send your units east, use Death and Decay on the Guard Tower and run a unit in to free the Orcs.
Sail your units a little to the south and get off to the east. Keep your Death Knight away from any Paladins as they will kill it with one spell. Make your way around to the southeast and then north to the Daemon. If you keep your Death Knight alive and use Death and Decay as much as possible you shouldn’t have too much trouble.
Act IV Prelude to New Worlds
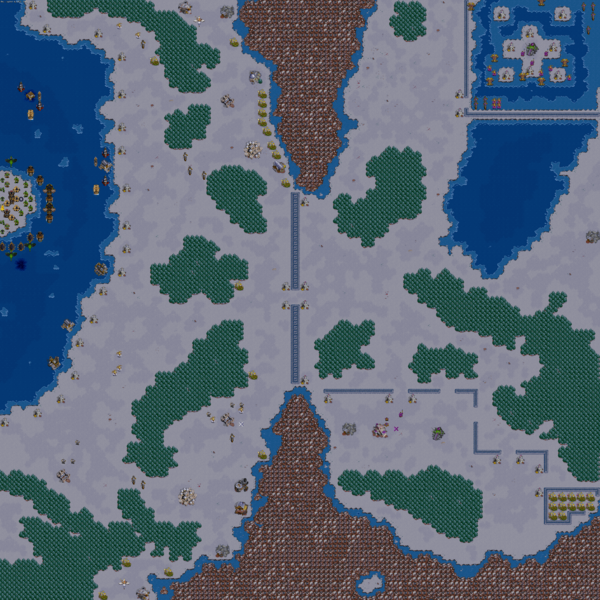
10) Alterac

You begin in the northwest corner of the map in a small outpost without a Gold Mine. You’ll need to use your army to break through the blockade so you can set up a base near the Gold Mine to the southwest.
You can make this map easier if you send your army to take out the production of the White Humans to the south. Just be very careful about entering the camp as they have Ballistas at the ready.
The northwest camp will be attacked by the Red Humans so make sure you have Guard Towers set up at the entrance. When you’re ready build Ogres and Death Knights. Use the Death and Decay spell to wipe out enemy units and structures and the Ogres to protect them. Kill all Humans and then make a Shipyard so you can rescue the Mage in the southwest corner. Bring him back to the magic circle to complete the mission.
11) The Eye of Dalaran
You begin with an army on a small island on the western side. Use your ships to wipe out the enemy ships and load your army onto transports. I found it easiest to unload your troops to the south and take over the White Human base on the southwest quarter. You only need to destroy the Dalarans (Violet Humans) and the Mage Towers. The other White Human structures can be ignored.
Use Death Knights to break through the wall in the middle of the map and take over the Dalaran base. From here build Dragons, fly them north and wipe out the Mage Tower and other structures and units in the northeast corner.
12) The Dark Portal
This mission is tricky to get established but once you have a base set up it shouldn’t be too difficult to build an army to wipe out the other Human bases. Cast Haste and Bloodlust on the Dragon and use it to quickly destroy the nearby Towers to the southwest. Move your army though to the south and then west, into the Violet Human base.
Use Death and Decay to weaken enemy units as they rush forwards and the Catapults to quickly destroy the Towers. Once you have the base build Guard Towers at the front entrance and have Trolls on standby to deal with any Pheonix Riders.
Play defensively until you have upgraded Ogre Mages, Death Knights and Catapults. Send them out to wipe out the Human camps in the outer circle. Train around 12+ Dragons and fly them across the river to wipe out the Blue Humans. Once the coast is clear build a Shipyard and send a unit via Transport over to the Dark Portal to complete the campaign.
Continue on to the Human Campaign