Mission 26: Measure is Unceasing
Back to Shadow Gambit
Measure is Unceasing
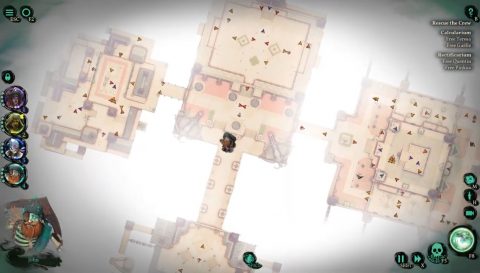
There is no map or landing spot to choose from for this mission. Instead you’ll drop down onto the starting platform. After every reset you’ll end up back at this position.
Objectives:
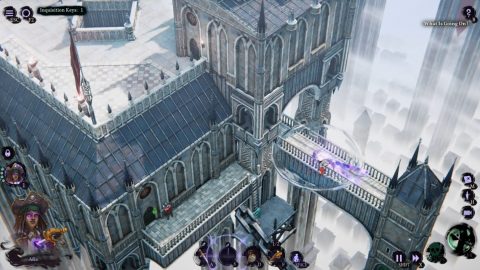
What is Going On?
Rescue Crewmates
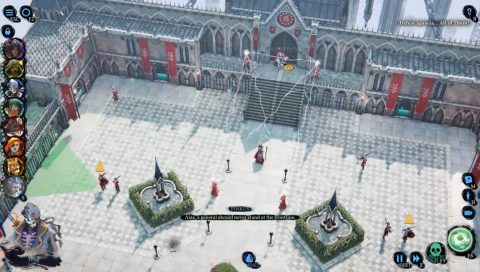
Make your way along the walkways until you can grab the Key from the Commissarius. Use it to open the door so you can get up to the rooftop.
Time will get reset and you’ll need to make your way back to this spot. The second time here you’ll be able to rescue two of your crewmates, Suleidy and Toya.
Hide in the thin bushes along the sides of the walkway. Then attack the nearest soldier and dash attack the second before the alarm is raised. The Prognosticars holding Suleidy and Toya are distracted so they won’t notice you.
Continue down the walkway towards John. Clear out the soldiers and rescue him as well.
After rescuing John time will get reset and you’ll be back on the starting platform. The difference this time is that Afia and the 3 crewmates you rescued will still be with you.
Make your way back up to the rooftop. This time you’ll want to head to the right through the door. Make your way across the bridge to the next large platform.
From there you can go to the Calcularium to rescue Teresa and Gaelle or to he Rectificarium to rescue Quentin and Pinkus. Going either way is tough. There are tons of enemies and patrols.
Whichever path you choose make your way slowly towards the captured crewmates. You’ll need to use all your abilities and most likely multiple attempts to reach them. Save after each bit of progress.
After crossing the bridge I went left first and rescued Teresa and Gaelle.
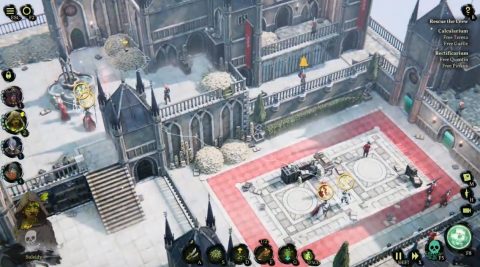
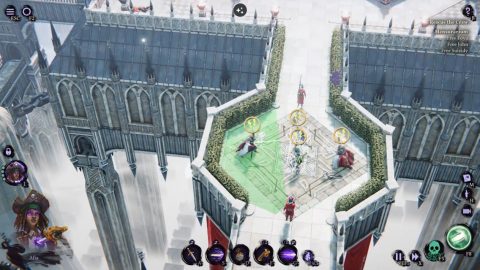
Take out the enemies all around the courtyard while avoiding the three patrolling guards doing laps around the square.
At some point you’ll be able to safely take out the three patrolling guards and then the Prognosticars to rescue Teresa and Gaelle.
Once again the memory will reset but you’ll have all the crew that you’ve rescued up to this point. Head back across the bridge and then take the path to the other platform to rescue the final two crewmates.
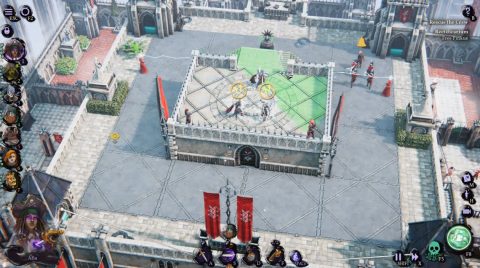
Quentin and Pinkus where the final crew for me. It’s very tough getting past the patrols around the sides of the building. Then you’ll need to head up to the rooftop.
With all the crew rescued make your way back to the central platform. Then go through the door being blocked by the Commissarius.
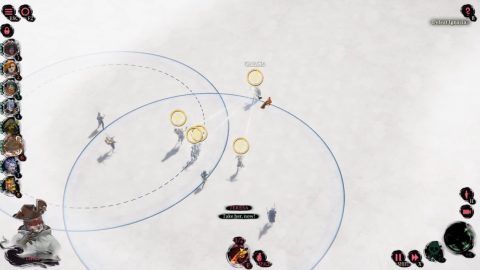
The courtyard on the other side is sparse for cover but you have Suleidy who can make plants wherever she wants. You’ll need to get past the Kindred and Prognosticars to make it through the next door.
Use the Pistols here to take out the Prognosticars as well as the Kindred. You have 8 Crew so you can get in a lot of hits if you use Suleidy’s cover to get close enough.
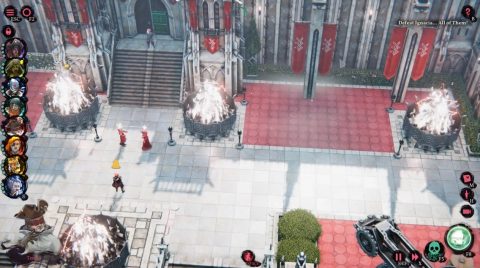
Once past the Prognosticars you’ll be into the final battle.
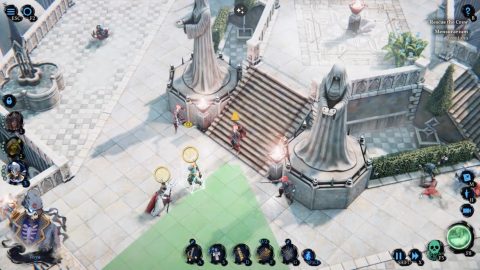
Ignacia has 5 forms and they all need to be taken out within a few seconds of each other. Deal with the Iudex on the lookout towers before doing anything else.
Split your crew to deal with the two Ignacia on the side platforms and the one on the upper platform. The two other crew can stun the two Ignacia in the center. You’ll then need to quickly bring 2 crew to finish off the center Ignacia before they break the stun.
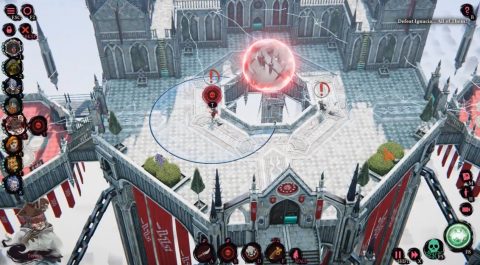
With Ignacia defeated there’ll be one final scene with Ignacia. Use all the crew to take her out.
Ignacia will stun them all and then the Red Marley will come to the rescue.
After the battle you’ll be back on the Red Marley. You’re free to explore the islands and search for treasure, or complete the remaining Captain’s Tests.
Next: Mission 27: Quentin’s Hunt (Ch. 1)
Back: Mission 25: The Captain’s Treasure