Searching for Stellar
Roger’s ship has stalled so you’ll need to charge the battery and make some repairs. Click on the little Blue button just to the right of Roger’s hand. This will activate the Holographic Copilot, Manuel.
Open the glove box and take the Glue, Pump and the Duct Tape. Pull the Trunk and Hood latches. Exit the captain’s seat and open the closet on the right. Take the EVA Suit and the Helmet. Go to your inventory and wear both the EVA Suit and the Helmet.
Open the door on the left to leave the ship. Firstly grab the Jumper Cables and the Help Sign from the trunk. Use the Help Sign on the ship and wait for help to arrive.
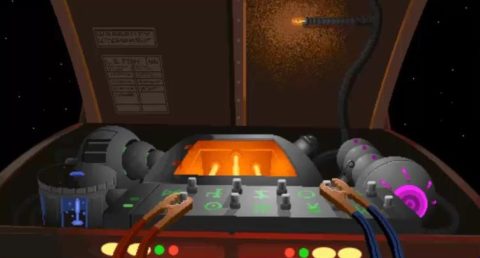
When the lady arrives she’ll help you jump start your ship. Place the Red Cable (positive) on the bottom left knob and the Blue Cable (negative) on the top row, second from the right.
Before getting back inside take the Fish that somehow ended up on the engine nacelle. Inside the ship open the compartment just to the right of the closet with the EVA Suit.
Open your inventory and use the Glue on the glowing green crystal. Look at the Datacorder and open it. Take the Small Green Crystal from the bottom left side. Close the Datacorder and exit.
Use the Glue on the Small Green Crystal and then place it on the Green Crystal in the compartment. Replace the cover and then sit back down in the cockpit. Hit the Initiation button to continue on your journey.
When you arrive at Delta Burksilon leave the ship and take the lift to Lab A. Speak with Dr. Beleauxs and he’ll leave. Look at the ‘Hi-Tek Stuff’ box and take the Callahan Moddie (small red object at the front). Take the lift back to the Docking Bay and get onto your ship. Sit down and Manuel will tell you about the PTS (Photo Triangulation System).
Press the PRS button and then click on the little Red button at the top of the dashboard, next to the camera. Grab the Photograph and push the Red button again to get a second Photograph. Open your inventory and peel the Negatives away from both of the Photographs.
Above the PTS button is a small blue screen. Place the Positive from the first photograph on the screen and then the Negative from the second photograph over the top. This will bring the PTS online. Click on the PTS button and lay in a course for Polysorbate LX.
Speak with Manuel and ask him to beam you down. He’ll give you a Transport Signaller so you can beam back up.
On Polysorbate LX walk to the west and enter the Implants-n-Stuff store. Talk to Fester and then show him the Moddie. He’ll exchange it for a Cyberspace Jack. Leave the store and walk back to the east. Use the Transport Signaller to beam back to the ship.
Sit down at the cockpit and push the Initiaion button. Lay in a course for Delta Burksilon and make your way back to Lab A. Sit down on the chair next to the computer and click on the Power button. Use the Cyberspace Jack on the Cyberjack port to be transported to the Information Highway.
The Information Superhighway
Follow the winding roads along until you come to the main office. The roads are a bit convoluted but there’s only one direction to go. Before you enter the office pick up the Screwdriver and the Plank.
Open the door to the office and speak with the receptionist, Sis Inny. Take a Number and use the Hand icon on the display of the Number Changer to open it. Use the Screwdriver on the number to wind it back to Roger’s number. Speak with Sis Inny and she’ll let you into the File area.
You need to find a number of files, beginning with the file for Rancid, Nigel. His file is found in the first R drawer. Use the Hand icon on the drawer to open it. You’ll need to open the drawers on the left to create steps so you can actually look inside the drawer and grab the Rancid, Nigel File.
Read the file to find the connecting files, Beleauxs, Sharpei and Santiago. You’ll also need the Project Immortality File. Find them all, read them and then leave the area.
Back in the office take each file out of your inventory and use it with the Printer. These files will be printed out in the lab.
Leave the office and make your way back along the Superhighway. This time you can use the Plank to put across the bridge so you can get back to your starting position much quicker. Follow the exit to the north and you’ll be back in the lab.
Grab the Printed Files and show them to Dr. Beleauxs. He confesses to helping kidnap Stellar and agrees to help rescue her. After the cut-scene proceed to the next section.
Next: Confronting Sharpei
Back: Space Quest 6 Walkthrough


