Eldritch Passages (Level 11)
Things start to heat up a bit as the three heroes drop down into the “cellars” or Eldritch Passages. Be careful of the slime here and be prepared to die a lot.
Experience Points: 90
Monster Points: 30
Level Secrets: 2
Eldritch Passages
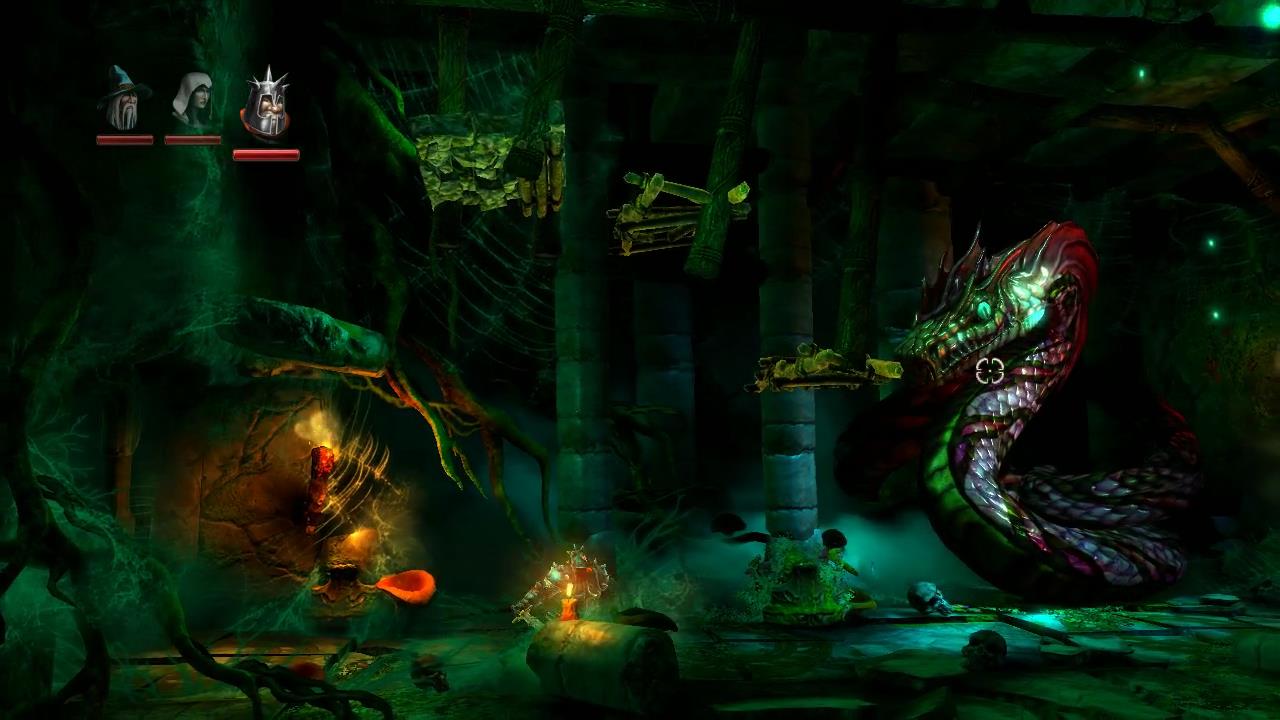
Head to the right and jump down the hole in the ground. This will take you to a large cavern with pipes and a serpent with an eye. Shoot the serpent in the eye to get rid of him, for now…
Attach the pips as in the pic below and jump across to the first checkpoint.

Slime pours down from two pipes now so use Pontius and his shield to get across. You’ll be attacked by slime salamanders once you’re through.
Put a plank across to the wall and break the rocks up the top. As soon as you do spiked balls will drop down so don’t try to get up right away.
Just before the next checkpoint there’s a hole in the roof. Use a box to jump into it for another experience orb.
A slime pool and slime flowing down from a pipe is what you have to face next!

Use a plank and box to edge your way out over the pool a little bit so Pontius can aim his throwing hammer at the rocks above. This will drop down one much needed rock pillar that you can use on one side of the slime pool. On the other side use a plank to get up but time it with the slime raining down as the plank won’t last long.
Before pulling the second lever you’ll be attacked by half a dozen salamanders. To get across the next section jump across the flappy platforms. There is more experience up the top if you want to risk it.
After the next checkpoint is two pools. The one on the left is full and the one on the right is empty. In between them is a lever.

Pull the lever in the middle to switch the water from the left side to the right side. Make some ice rafts to get across to the next checkpoint.
Jump over the gears and up the wooden platforms to the right. Watch out for the spiders that will drop down to attack you in this area.
Now you need to somehow make your way up a vertical shaft.

This is Zoya’s time to shine. Place an anti-gravity field half way up the shaft. Use a box down below to give you a bit of height. Jump to the left wall and jump off the wall all the way to the top. If you don’t have the anti-grav field you can throw a hammer straight up to break the rocks. This will expose wooden beams that Zoya can grapple onto.
The next room requires a bit of timing.

Jump over to the right and press the button so a barrel falls down. The barrel will drop down to the ledge which will push it down and pull the ledge on the right hand side up. As the barrel drops down on the left ledge you need to be ready to jump onto the right ledge and up to the checkpoint.
The next room houses the first secret chest of the level.

Build a few boxes to be able to get up. Inside this chest is a collectible poem. Placing the boxes here to get to the secret chest also stops up the spiky balls. You can place a plank over the top of them to walk across.
Jump across to the next checkpoint and more slime! Placing an anti-gravity field as in the pic below is a great way to make this place safer.

Otherwise you’ll have to use Pontius’ shield to make it across safely.
Jump across and run to the bridge with the tentacles. The tentacles will break the bridging, dropping you down to a stream below.
Hit the checkpoint and jump across the small pool of water. Dive down if you want more experience. There are two levers here but you’ll need to take out the mermen with tridents before you can use them.
The top lever doesn’t appear to be working. You’ll need to connect up the pipes in the room above before it will work. The bottom lever will open the small gate to the right.
Go through the gate, break the rocks blocking the top area and find a way inside (planks and boxes or the anti-gravity field). The pipes should be set up as in the picture below.

You can then go back to the lower room and pull the lever again. The lever will lower the water level letting you get across to the other side.
More mermen and spiders will attack in the next room with a lever in the center. The lever switches which pool is filled with slime, the right or the left pool. Jump across to the next checkpoint and you guessed it, another pool of slime!

Box your way up to where the slime is pouring out and jump across to the other side. Before going down below to the slime lake make sure you hit the checkpoint above. Here’s one way to beat this area and claim the second chest.
Place a box in the slime and quickly change to Pontius (throwing hammer) or Zoya (explosive arrows). Jump down onto the box before it disappears and destroy the rock wall to the left.
Amadeus can now pull the strange contraption across and drive it over to the right. Before you get to the slime pipes shoot an anti-gravity field to stop the slime from flowing. It’s now safe to break the rock wall, move all of the stone out of the way and open the secret chest.

Inside the secret chest is a collectible painting.
Make your way back and up the flappy platforms. Shoot the tentacled-eye before continuing on into Rosabel’s mirror. This will take you to the next level, Icewarden Keep.