Chapter 3: Once Upon a Climb
 Once Upon a Climb is the third chapter of the new King’s Quest game by Activision. Chapter 3 was released in April 2016. Graham is seeking love and is sent to the land of Kolyma to rescue a beautiful princess. Kolyma was actually the land that Graham went to in King’s Quest 2. It’s a days journey from Daventry.
We’ll have a look at all of the puzzles and paths to take below so that you can finish this chapter with all accomplishments completed.
The Owl Family (Saving Cedric)
King’s Quest Chapter 3 starts a little differently than normal and you are able to walk through time to see the changes over the years. Walk to the right and Graham will get older and more mature.
Continue to the right until you spot the Owl family in a nest. You’ll notice a baby Cedric (from King’s Quest 5) among them. Cedric gets kidnapped by a possum. You must save him. Pick up the Shovel to the right and go back to the first screen. Dig up the rock on the left and the third rock from the left to find the Spiniferous Thornweed and Acorn Seed.
Plant the acorn near the rock on the left and the spiniferous thornweed near the next rock to the right. Walk over to the right and click on the trellis to move it over to the left. It must be in the same location as where you planted the spiniferous thornweed.
Continue to the right and you’ll see the owl family with Cedric happily up in a tree. The possum will try to catch them but will get caught in the thorns. Walk off to the right to complete the first part of King’s Quest Chapter 3.
The Two Princesses
Once in the land of Kolyma continue along the path until you reach the tower. Make sure you have your speakers turned up to listen to the epic music as you travel along.
Knock on the door of the tower and a rock will slide out on the right side for you to climb up. Climbing up the tower is very easy. If you make a mistake on one of the rocks just take a different path until you reach the top.
Upon reaching the top of the tower you’ll be met by two beautiful princesses! You’ll find out later that their names are Vee and Neese. Both of these could be shortened versions of Valanice, Graham’s true love.
Pick the princess you like. Don’t worry you’ll have a chance to get to know both of them soon.
After Graham embarrasses himself the tower will lift up and begin walking. Run to the left and hold the shelves steady. Run to the right and do the same thing.
Two items are about to fall. A vase belonging to Neese and a bag belonging to Vee. You can only protect one of them. Hit left to save the bag and right for the vase.
After the chaos you’ll notice a vase rolls out through the force field. Go inside and talk with the two girls. Vee follows the path of Wisdom and Neese the path of Compassion. Ask the girls some questions to try and get to know them better. The girls will talk about you to each other later in the night so be consistent in your answers.
Pick up all of the items laying around to help them clean up. Show them the item that belongs to them and put it away. Putting away each of the princesses items will make them happy.
After putting away two of the items for a princess a special item will fall down. It’s Bongo Drums for Neese and Bone Nun-Chucks for Vee.
Either show the Bongo Drums to Neese and put them away to find an Acorn or show the Nun-Chucks to Vee and put it away to find a Spear.
To get the Vase outside either show the Acorn to the squirrel and he will retrieve it for you or pull it in with the Spear. Either way the girl whose item you don’t use will be unhappy.
Hiding From Hagatha
As soon as you have the vase Hagatha will enter from below. Graham will hide behind the table. When Hagatha turns around make your way to the left, towards the closet.
Once again Hagatha will start to sniff you out and one of the girls will drag her attention away by smashing a vase. Sneak to the left as Hagatha moves forwards but don’t go too far or she’ll see you. When she turns around sneak all the way to the left behind the painting.
Watch the cut-scene as Hagatha discovers you and takes you for another princess.
Moral Quarrel
After dinner you’ll play a game of Moral Quarrel with the two girls. In this game you’ll have to answer a number of questions and then try to guess which girl has the same answer as you. Vee and Neese will also asks you questions. Once you have three of the same answers with one of the girls the two of you will win.
This game will help you decide who Graham’s true love really is. I won’t go through each of the questions individually as you can decide which princess you like the most.
The day will end with the two girls talking about you before going to sleep. This will give you an opportunity to explore deeper into the tower.
Exploring the Tower
Walk to the center of the room and press the action button to take the lift down to Hagatha’s room. Hagatha will return and take a look in the mirror that shows you the past. Hagatha was once a very beautiful princess.
Take a look at the mirror, the clock and the desk with potions on it. Once you look at these three things a rumble will move the closet and reveal a door with a clock on it. Hagatha will take the elevator up, leaving you to explore further into the tower.
Take a look at the door with a clock on it and move the hour hand to 3 and the minute hand to 50. You can easily see the shadow of where they’re supposed to go.
Head down the stairs and look through the door. The girls and Hagatha will come down and Hagatha will send the Princesses on an errand.
Back to Daventry
You’re back in the main room of the tower now. Talk to both of the girls who are trying to fix the puzzle box and lute. Once you speak with them the elevator will come up so you can take it down. Ride the elevator down to Hagatha’s room and then walk down the stairs and into the large enchanted clock room.
To make the spell work you’ll need to drop an item into the water. You have three portraits so decide who you want to ask for help. I chose Amaya. Drop the portrait into the water and be teleported back to Daventry.
Pick up the Portrait of Manny before entering the town square. Visit the person you came to see. In this case I decided to talk with Amaya. During the conversation you’ll get to tell her about two qualities you don’t like to see in a person. This will affect who you choose to be with at the end.
Vee is Challenging and Critical while Neese is Clumsy and Messy.
If we went to see Amaya she’ll give you a Wrench, which can only be used to fix one thing! Then you’ll be teleported back to the tower. Whisper (If you went to see Chester) will give you a Blanket.
Fixing Things
Head back up to the princesses. On the way up you’ll stop to look use the Portrait of Manny on the magic mirror and discover who he really is.
Decide which princess you want to help with the Wrench, or the Blanket. Either Vee and her Puzzle Box or Neese with her Lute. Either way one girl will be happy and the other won’t.
During the cut-scene a man will knock on the door and receive a potion from Hagatha. He’ll then give her a book “How to Tame Your Dragon”.
Pretty Princess Ball
The next part of King’s Quest Chapter 3 is a little silly. Hagatha will make you perform a dance with the two princesses. Follow along with the instruction to do twirls and other movements. Unfortunately Vee isn’t so good and will be chastised by Hagatha. This will give you some alone time to have a private dance with Neese.
At least that’s the way it happened in my case. If you have a better connection with Vee than possible it will happen the other way around.
Special Mission
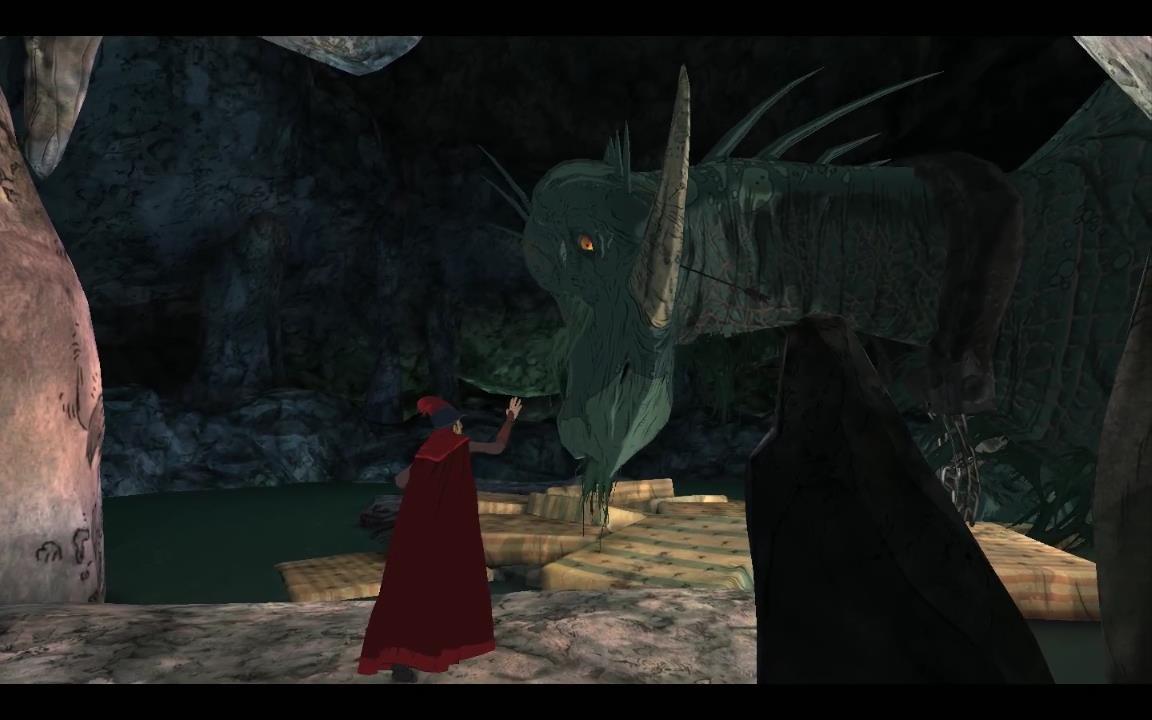
At this point Hagatha will call you in on a special mission. She’ll accidentally knock the book “How to Tame Your Dragon” into the water and you’ll be teleported to the dragon’s cave. Have a look around and when you leave to the left Manny will enter with his “brother”.
You’ll be teleported back to the tower before being capture. During the cut-scene with the older King Graham and his wife you’ll get to choose whether you think she has a “caring soul” or a “thoughtful soul”. Caring for Neese and thoughtful for Vee.
The Magical Hourglass and Golden Acorn
Hagatha will now send you on a mission with Vee to find the Magical Hourglass. You’ll arrive in Tanalore and have a chat with Chester and Muriel.
After speaking with them you’ll walk into the forest and get stuck in quicksand.
Escaping the Quicksand
Grab the Umbrella and the Wheel. Point towards the Buckets and use your Umbrella to grab them. Now point towards the Skeleton and use the Umbrella with it. Put the Wheel on the Umbrella along with the Buckets. Click on the Buckets to start them spinning.
This is a ridiculous contraption that doesn’t help you at all. Luckily Vee finds a vine and helps pull you out.
The Drawbridge
There are two ways to lower the drawbridge, using your strength or your wits. Obviously Vee will be impressed if you use your mind. Using strength is easy. Just click the buttons shown on the screen until the drawbridge falls.
To use your mind have a look at the gears. There are three parts to this puzzle. The gears that you can place on the small pipe in any order, the cog that connects to them and the wheel that turns the contraption and lifts up the stone.

The lever at the top moves the cog from one gear to the next. You’ll need to place the gears so that the cog can move along the teeth of the gears and lift the stone.
Place a gear with teeth positioned so that they fit into the cog. Turn the wheel and lift the stone a little. When you run out of teeth on the first gear place another gear. Move the cog out one place and continue using the wheel. Repeat this process. You may need to move the cog backwards and take off the gears to re-arrange them. As long as the cog always has a connection to the teeth of a gear the stone won’t fall down.
Rock Goblin Archery Challenge
Now Vee likes a good challenge and definitely doesn’t like to loose. When you come to the beach you’ll find some Rock Goblins sunbathing. They’ll attack from the caves. If you shoot more goblins than Vee she won’t be happy but is excited if she outscores you. I’m not exactly sure how this affects your chances with her.
Puzzle Box Challenge
The Magical Hourglass is enclosed in a Puzzle Box. This one is a little more difficult than Vee’s one in the tower but still it shouldn’t pose too many problems. The Hourglass will move up as you clear a space for it. The pic below shows the half completed puzzle.

After taking the Hourglass you’ll be whisked back to the tower.
Avalon Forest
To find the Golden Acorn Hagatha will send you and Neese into the Avalon Forest. You start by rolling down a hill. You’ll need to clear a path for Neese so she doesn’t roll into any thorns. Make sure you roll down directly in front of her to flatten any thorns that are in her way. In the process you’ll get a String of Thornweeds.
The Wolf! Shoot or don’t shoot? Obviously if you want to impress Neese DON’T shoot the wolf.
The Chasm
Next you’ll come to a chasm. You’ll need to build a cart with Neese to get across. She will bring a log and you’ll need to grab these items in this order. First the Oars and then the Bread Wheels. Use the String of Thornweeds on the broken table to fix it. Than grab the Table. Now you’re ready to roll across the chasm.
The Golden Acorn
In the forest you’ll meet Madeline, Princess of Avalon. She’ll take you to the Golden Acorn. to open the case you’ll need to play the right melody on the lute. The Squirrels will hum the tune so you just need to follow along. Click on the Squirrels to have them sing the tune again.
If the strings are ordered from 1 to 5 from top to bottom the tunes are as follows:
First Tune: 3, 4, 5
Second Tune: 5, 4, 3
Third Tune: 1, 4, 3, 4, 1
Fourth Tune: 3, 4, 5, 5, 4, 3, 1, 4, 3, 4, 2
That’s it! You’ll grab the Golden Acorn and return to the tower for the last part.
The Final Rescue
While you’re waiting on the balcony Whisper will climb up. You’ll make an awkward poem with him to impress someone. He’ll also give you the clue to escaping the forcefield by loving yourself and give you the Minute Hand. Go back inside and take the elevator down to Hagatha’s room.
Box of Memories
Use Hagatha’s Book on the mirror to find the correct time for the clock which is 10:20. Go to the clock and use the Minute Hand on it. Now put the hour hand on the 10 position and the minute hand at 20 minutes. Push the knob and the center will open, revealing Hagatha’s Box of Memories.
Head down the stairs and knock on the door to the Teleporter Room. Hagatha will ask for a present. Give her the Box of Memories and she’ll let you in.
Escaping the Tower
After telling her that she needs to love herself to leave the tower give her the Awkward Love Poem to inspire her. As Hagatha is escaping her potion will explode and the tower will begin turning to ice!
Climb up the rope that Hagatha gives you. At a certain point you’ll jump across to the tower. Make your way up as fast as you can before the ice reaches you. At the top you’ll find the two Princesses!
Watch the cut-scene and enjoy the ending based on what decisions you choose throughout the game. I hope you enjoyed this walkthrough of King’s Quest Chapter 3.
Next: King’s Quest Chapter 4