Level 12: Barkhang Monastery
Back to Tomb Raider 2 Walkthrough
Level 12: Barkhang Monastery
Throughout this level you will encounter monks of the monastery as well as thugs. The monks will not attack you unless you are aggressive towards them.
Head down the passageway and emerge at the entrance to the monastery. Monks are in combat with the bad guys. Let the monks deal with them or carefully target the bad guys and help out. The bad guys drop 2 sets of Uzi clips, a small medi pack and automatic pistol clips.
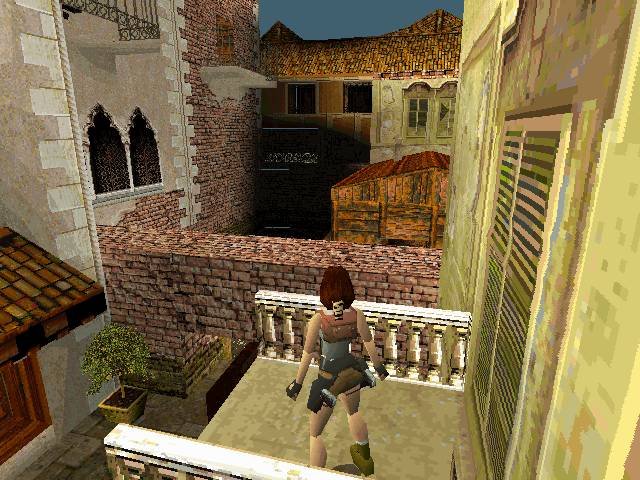
Climb up the ladder on the wall in front of the monastery. A vulture will attack at the top. Take it out and then jump diagonally across to the ledge next to the ladder, turn around and do a standing jump onto the wall opposite.

From here drop down to the grey pathway below and then jump over to the flat portion on the tan rocks. Once again you’ll be attacked by another two vultures here. Stand on the flat portion facing towards the red wall. Do a side flip to the left so that you slide down. Grab the rock, release and grab the crevice below you. Make your way across to the left and pull up at the end.
Inside the Monastery
Jump through the window on the left into a purple room that appears to be some kind of library. Head out of the library to the right and take the first passage to the left. Head left again into the room with wood panelled walls. A thug will attack from behind but the monks should take care of him. He drops a small medi pack and Uzi clips.
There may be another thug in a nearby room who drops automatic pistol clips. Outside of that window on that balcony you can find grenades.
Now that the thugs are dealt with go back to the wood panelled room and through the passage to the right. Climb up the ladder all the way to the top. Take a right along the walkway. You’ll see a monk in the center guarding a key. If you don’t hurt him he’ll let you pass. Grab the Main Hall Key.

Take out the vulture that attacks and follow the walkway around to the left. Drop down into a lower passageway. A boulder rolls down as you head forwards. Jump back and skip to the side to avoid it.
At the end of this passageway another boulder rolls down from the left side. Hop backwards to avoid it. Take the flares and head up the slope to the left. Up the top you’ll find a pool. Dive in but be careful of the current pulling you into the center.
Carefully swim around the back wall to a passageway leading out of the pool to the right. Get out and then drop down a long shaft to another pool of water. Light a flare here as it’s very dark.

Walk through the knee-deep water, past three sets of closing doors around to a ladder. Climb it to the top to emerge in another room with movable blocks. A thug will attack here but there is a monk to protect the area. The thug drops a small medi pack.
First Prayer Wheel
Head into the dark room to the right with unlit burners. Another thug waits for you there but once again the monk should take care of him. Jump over the burners to take the Prayer Wheel.

When you take it the burners will light. Do standing jumps over the bars between the flames to make it back without being burned.
Head back into the room with movable blocks and pull out the block at the base of the arch to the side. This will allow you to pull out the block in the wall twice so you can enter the passageway beyond.
climb the ladder in the alcove all the way to the top. This brings you back to the passageway where the boulders rolled down. Follow the passage past the boulder around to the right and then take the first left. Climb up to the pathway just to the right of where the first boulder is laying.

Follow the walkway all the way around to where you climbed the ladder up to this area. Climb back down into the wood panelled room and head out to the purple hallway.
The Main Hallway
Take a left to the Main Hallway doors and use the Main Hall Key to unlock them. Head inside. You’ll be coming back to this area a few times. Head towards the giant statue to the back of the room. Thugs will enter behind you. Turn around and help the monks deal with them. They drop automatic pistol clips, a large medi pack and a small medi pack.
When entering the Main Hall take the first corridor on the right. Enter into a room with tables and then take a left at the end of the room.
Strong Room Key
Take a running jump over the first slicing blade and then veer off to the room on the left. On a bench to the right is the Strong Room Key.
Head out of the room, take a right, jump over the slicing blade back the way you came. Head back through the Main Hall doors to the purple hallway. Go all the way to the end and take a left. There’s a barred wooden door in the corner. Use the Strong Room Key to unlock the door and go inside.

The only thing inside is the Rooftops Key. Grab it and head back down the purple hallway. Take a right and then a right again to the room with the rolling blades.
Dodge through the blades to the room exit at the rear left corner. There’s another lock here. Use the Rooftop Key to unlock the door.
The Rooftop
Run up the steps to the rooftop. You’ll see a line of burners down one passage. Go through the arch to the right with the two golden statues. Follow it around to the right and pull the switch to turn off the burners. Run back and do standing jumps over the burners one by one.
Follow the path around to another open area where thugs will attack. Monks will try to fend them off for you but you may need to help them out a bit. One of the thugs drops Uzi clips. Climb up the ladder on the right to grab the M-16 clips. Then drop back down the ladder.
Pull the switch to open the golden grating and drop down to the room below. Shoot through the glass to grab the two gemstones. Head around the other side. Pull the switch to open the grate above and climb up the ladder back to the rooftop.
Second Prayer Wheel
Head back up the steps the way you came and continue up the steps to the left. You’ll come to a strange golden door and statues. Place one gemstone on the wall behind the statues to open the golden door. Pull the movable block to the left out twice and climb over it. Behind it you’ll find the second Prayer Wheel.
Head back down the stairs and to the left to jump over all of the burners. Continue down the stairs through the room with the rolling blades to the purple hallway. Take a right back to the Main Hall and enter the passage at the far end to the right of the giant statue.
Storage Room
Follow this passage and take a right into the first room. If you have time to move the crates around you can find a few small items. Pull the first movable crate in front of the door to the left. Get behind it and push it closer to the door. Now pull the movable crate that was to the first ones right to the right once. Behind it you’ll find automatic pistol clips.
Pull the first crate so that it blocks the door completely. Climb on top and pull the upper level crate out once. Behind this crate you’ll find 2 sets of harpoons. Hardly worth all the effort!
Exercise Yard
Head out the exit which is to the left as you enter the Storage Room. Continue forwards until you see the gold grate on the floor. This drops open as you walk or jump across it.

Walk to the edge and take a standing jump across it. Grab hold of the ladder as it opens beneath you. Climb up the ladder and continue down the hall. Take a right at the end and then a left up the steps. Do a running jump through the window to the exercise yard below.
Don’t worry about the crazy monks, they’re just doing their exercises. Pull the switch to open the large door and the monks will run down the stairs. Don’t follow them down the stairs just yet. Instead turn around and climb up the ladder on the other side of the yard.
The Tower – Third Prayer Wheel
You’ll need to get of the ladders at each level and climb onto a different one. At the top of the fourth ladder you’ll find a block with the third Prayer Wheel. Pick it up and drop all the way back down to the exercise yard.

Now you can head down the steps with the yellow walls. Follow the path around and you may see the results of a battle between thugs and monks. Pick up the large medi pack, shotgun shells and small medi pack that the thugs drop. Follow the path around and to the left, back over the trapped grate into the storage. room.
Head out of the storage room and take a right at the hallway and continue all the way to the to the room with skylights.
The Gauntlet
Take a left and get ready for a gauntlet of traps. There’s also a secret here to be found. The burner will turn off as you approach it.

Stand just before the burner to one side or the other. Time when the spikes are moving away from you and drop down the hole in the floor. Go to the other side. Turn around and pull up. You’ll be safe to stand here. Turn around again and face the rolling blade.
When the blade rolls past run towards the burner, it will turn off, and drop down into another hole in the floor. Try to pick which side the swinging spikes will be moving away from you. Once again run to the other side but this time climb up on the right side.
There is another rolling blade here. Run behind it and take refuge in one of the alcoves to the left or right. As it goes back the other way continue to the end of the corridor. Take it to the left and jump or run through the moving doors. There are two you need to get past in order to find the Jade Dragon.

Follow the rolling blade back and continue past the gauntlet to the room to the left where you’ll find the Trapdoor Key.
Indoor Pool
Continue up the passageway to the left of the key and you’ll slide down into a pool. Dive down and in the far right corner is a small passageway with the Silver Dragon.
Climb out of the pool and take the exit on the other side of the room to the dragon.

This brings you back out to the hallway before the gauntlet of traps. Take a left past the storage room and back to the Main Hall. On the other side of the hall is a trapdoor with a lock

Use the Trapdoor Key on the lock to open the trapdoor. Drop down into the passage and follow it along to pull up into another room. You want to go outside to the right but before you do head to the left and pull the switch to open the door. This will let the monks deal with any bad guys before you get back.
Outbuilding – Fourth Prayer Wheel
Take the path leading away from the monastery and follow it all the way to the pillar. Just behind the pillar in the rock face is a passage you can climb up to. Go inside and climb up the ladder. Hop off to the left and drop down to the dirt path below. Follow it around to the right.
Stop when you come to the bridge. A vulture will attack from behind and then a man will attack from the other side of the bridge. He drops M-16 clips.

Go across the bridge and follow the path to the right. You’ll come to an outhouse. After killing the vultures jump up onto the rock on the right side of the building. From there you can climb onto the roof.

To get onto it you’ll need to do a standing jump from the rock on the side of the building. Climb onto the roof and drop down the hole in the middle. Pull the switch to open the door and grab the fourth Prayer Wheel on the block in the corner.
A masked man will attack once you leave the outhouse. He drops shotgun shells. Make your way back over the bridge, down the ladder and back to the monastery.
Climbing the Statue
Head inside and take a left at the switch to go back into the Main Hall. This time you want to take the second passage to the right from the main entrance. This is the passage on the right side when facing the statue just before the fenced off area.
Climb the ladder to the top and follow the passage along to where you can do a running jump to grab the statue’s hand. Turn to the right and climb up the other hand. Do a running jump to grab the side of it’s head, jump over to the hand on the other side and then over to grab the alcove.
Place the second Gemstone in the slot to open a trapdoor below the statue. Slide down the arm and then onto the statue’s lap. Run around to the back. Jump up the slope and into the gap above to grab the Golden Dragon and the last secret of this level.

Fifth Prayer Wheel
If you have found all three secrets you’ll also get 4 sets of M-16 clips. Drop back down and run around to the front of the base of the statue. Head inside and drop down the trapdoor that you opened. Follow the path up the slope and pull up at the end. Pull the switch by the opening overlooking the pool.

This opens the door allowing you to follow the stream of water. Jump to the left side of the movable block and push it onto the stream to block the flow of water. This will drain the pool. Head back out the door, turn left and drop backwards into the dry pool.
Climb up on the other side to where the wooden movable block is and push it out of the way. Behind it you’ll find the fifth Prayer Wheel.
Now climb up the ladder out of the pool. Head around to the left and go into the passage with wooden colored walls. Take a right when you reach the hallway and follow it back to the Main Hall.
Once again go to the base of the statue but this time run past the door to the left side of the statue. Climb up the steps to the Prayer Wheel room. Place the missing Prayer Wheels in their slots to open the massive doors. Place the Seraph in position in the center of the gold disc to open up a secret entrance to the catacombs. Head through to end the level.
Next Level: Catacombs of the Talion