Jail (Chapter 11)
Back to Stray
Main Objectives
Rescue Clementine and B-12.
Escape the high security prison.
Optional Objectives
Find Memory 26/27.
Walkthrough
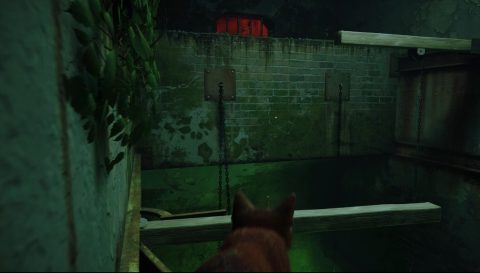
You begin this chapter locked in a little cage. Move to the left and right to make the cage swing and after building up momentum the cage will crash into the pipe and you’ll be able to escape.
Walk along the pipe, jump up to the platform and then onto the pipe on the other side of the room. Jump to the beam so it swings across and then to the higher wooden beam.
Go through the grate and into the next room. Jump onto the beam on the left to swing the beam and cage out into the center of the room. Run back around and jump onto the lower beam to swing it out also. You can now jump to the cage and down to the barrels in the water below.

Jump across the barrels and then onto the platform. Head out the open door and jump onto the air-conditioning units immediately to your left. Jump onto the pipe and across the beam to the right side of the corridor. The path ahead is blocked so you’ll need to drop off the ledge on the left side.

On the ground floor go into the cell on the right and then through the vent in the wall under the bed frame. Follow it out to another cell and then go back into the main corridor. but watch out for the roaming Sentinel.
Jump onto the green ben, up to the plank and then up to the first level. You’ll spot Clementine in a cell to the left. Talk to her and she’ll point to the keys in the room opposite.
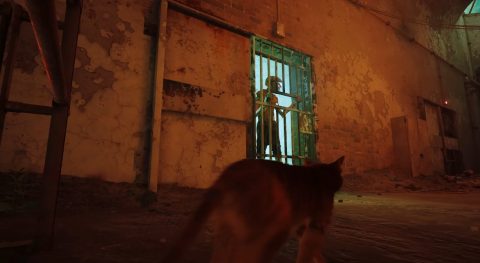
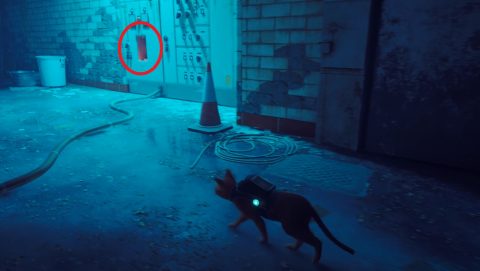
Go through the cell at the end of the corridor and out the window to the outside. Run around to the right and in through the window to the room opposite Clementine. Grab the Keys on the wall and make your way back the way you came to Clementine.
Give Clementine the Keys and follow her as she makes her way through the gate at the end of the corridor. Head down the steps and look out into the open room to see B-12 held prisoner in the center.
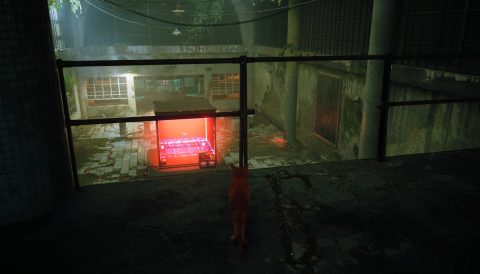
Go back to Clementine as she tries to open the next gate and you’ll alert her to the fact that B-12 is down below. Follow Clementine through the side gate and down the stairs to the open room.
Clementine will wait as you make the rescue. Follow the passage to the end and jump through the gap in the window. Go through the window to the left and then use the boxes and vents to make your way over the lasers.

Use the pipe to get past the moving lasers in the next corridor and then hide behind the small wall in the next room.

Continue to the other side when the drone isn’t watching and then use the air-conditioning units to jump past the two moving lasers. Run into the small circular room and pull down the lever to deactivate the central force field. B-12 is now free if you can pick him up.
Hide behind the wall on the left and wait for the roaming Sentinel doing laps of the room to float past you. Follow along behind and pick up B-12 when the coast is clear.

Make your escape through the side exit and head back to Clementine. With the harness back on you can understand Clementine again.
Unlock the gate and head through to the next room. Clementine won’t know how to get through to the next area. Jump onto the green bin and knock over the bricks.

Clementine will use one to smash a window. She’ll then give you a boost up so you can jump through the window and down the other side.
Head into the room on the right and pull down the lever to open the gate for Clementine. Head out into the yard area where you’ll need to bait the Sentinels into the side room. Let the Sentinel spot you and then run into the side room.
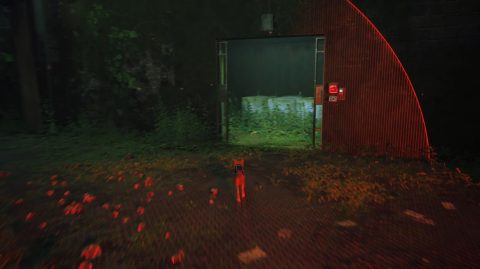
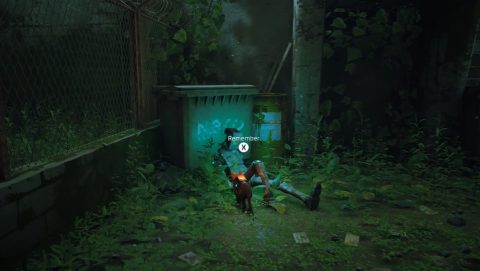
Hide behind the boxes and once the Sentinel far enough into the room run out again and quickly close the gate. Open the gate in the center area of the yard and talk with the robot by the green bin to the right for Memory 26/27.
Go through the gate to the next section of the yard. This time you have two Sentinels to trap. Keep the closest gate closed and stand by the second gate as you wait for the Sentinels to get into a position where they can both see you.

Once they’ve spotted you run into the side room and hide behind the pillars. Avoid them as you run back out again and then lock the gate. This may take a few attempts.
Follow Clementine through the far door and then through the vent on the right side of the room. Pull the lever down to let Clementine through the gate.
The door out of the jail is closed so you’ll need to find some way into the control room. Run behind the small car and scratch at the keys in the door. Clementine will move the car backwards so you can jump onto it and over the fence.
Run around to the left and into the control room. Pull the lever down to open the door and set off the alarm. Make a run for it as you head back to Clementine in the car. She’ll drive off so run as fast as you can and jump onto the back.

Clementine will make a getaway with you on the back. When you get to the city she’ll send you on your way and act as a distraction for the Sentinels.
Head back down to the subway and back to the corridor where you entered this area. Place the Atomic Battery in the slot in the panel on the wall.
Run back to the train, go to the front and sit on the seat. Use the Key to power up the train and you’ll ride it to the next area.
Next: Control Room (Chapter 12)
Back: Midtown (Chapter 10)