High Wall of Lothric
Back to Dark Souls 3 Walkthrough
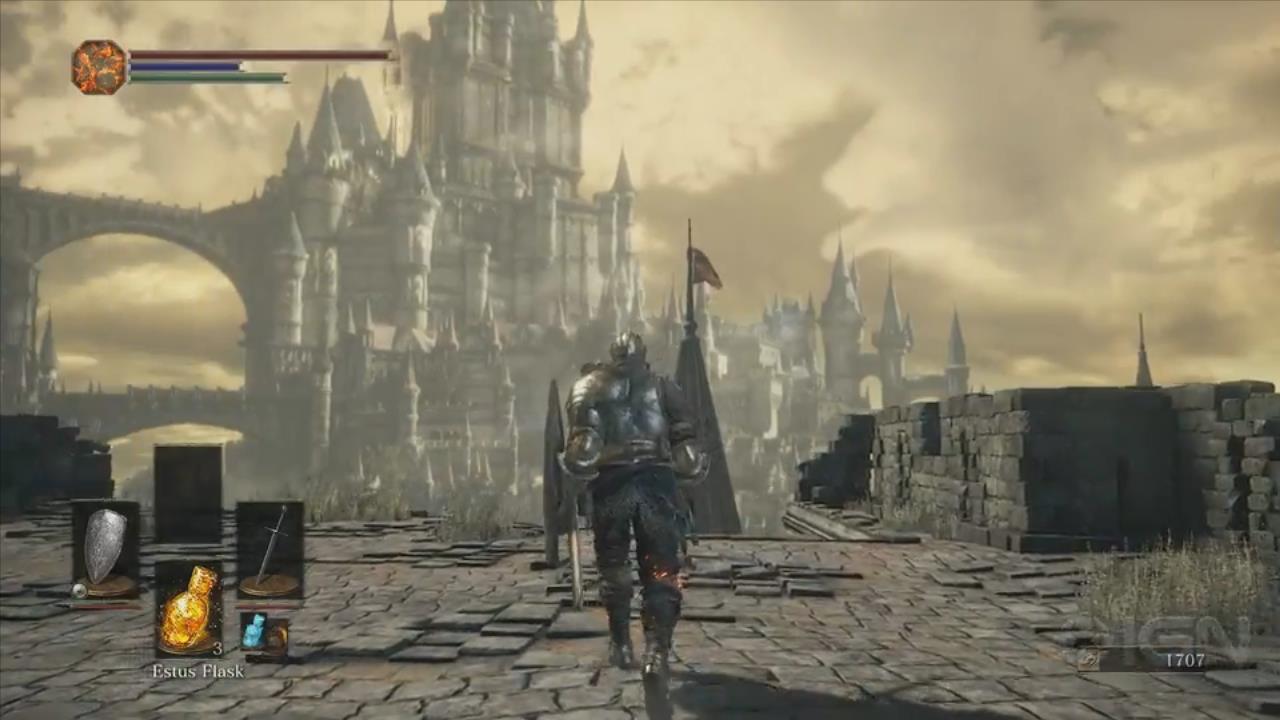 Open the doors, exit the room and head down the stairs to light the bonfire for this area. To the left is the main path that leads to a battle with a dragon. To the right you’ll notice a Hollow Archer up on a platform. He’s guarding against people coming from the other direction so you can easily sneak up on him and kill him. We’ll clear out the right section first before going the other way.
Path to the Longbow
Head down the circular stairs to the section of wall the archer was overlooking. There’s a Bone Hound here and two Hollows hiding next to the first tree. They will jump out and attack when you get close. A few steps further along and you’ll be attacked by a Hollow with an Axe. Dodge out of the way and then attack.
The next Hollow has a Halberd. This is kind of like running the gauntlet. Try to take them on one at a time.
Continue down the stairs to the left, take out the Hollow and grab the Soul of a Deserted Corpse. The gate down here doesn’t open from this side so don’t worry about it. Go back up the stairs and continue walking along the top of the wall.
Climb up the circular stairs to the next battlement. A few Hollow and deep in prayer while others notice you and take out their crossbows. Protect yourself with your shield and take out the Hollow that attack first. Up here you can grab a Longbow and 12 Standard Arrows from a corpse.
All the paths forward are blocked up here so it’s time to head back to the bonfire.
Path to the Dragon
From the bonfire take the only other path, the one leading left from the entrance. There are more Hollow praying down here. Only a few will attack. To the left is another Soul of a Deserted Corpse.
At the end of the walkway go up the stairs. Kill the Hollow with a lamp and continue up the next set of stairs. At the top, after killing two Hollow you’ll find some Binoculars.
Go back down to the dragon statue and walk behind him to find a small ledge that you can drop off to the ground below. Carefully drop off the edge to and walk around until you come to an open Arch. Inside you can pick up the Gold Pine Resin.
Drop down into the room and kill the two Hollow. You can also find a Firebomb here. Take the ladder in the center of the room down. Pick up the Soul of a Deserted Corpse as you make your way through.
Go outside and face the Hollow with a shield and spear. Take the stairs on the left that he was guarding and a Dragon will swoop down! The Dragon will blast everything up the top with fire so get out of the way!
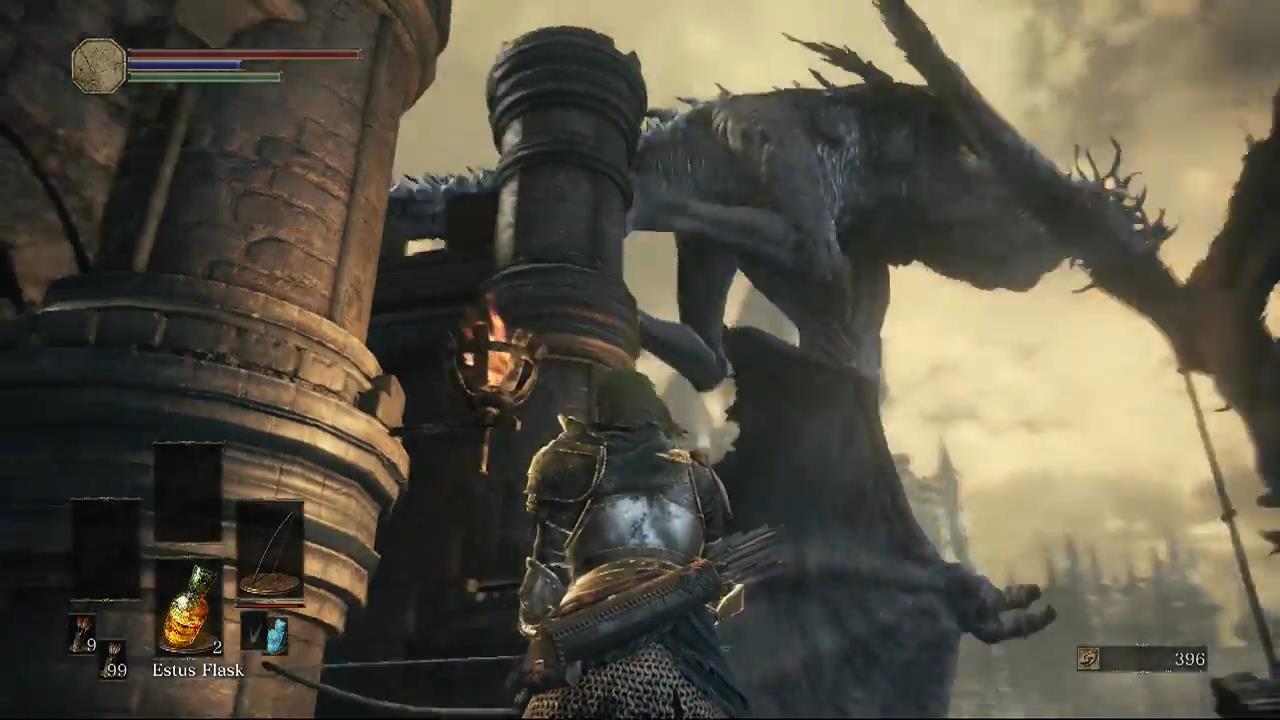 There is a way to chase the Dragon away by standing close to the building and peppering him with Fire Arrows. After 50 or so the Dragon will get tired of it and fly away.
Otherwise you’ll need to sprint and dodge the flames. The Dragon will help clear the area of Hollows so it’s not all bad. In between flame strikes pick up all of the loot. There’s a Claymore in one corner. Open the gate in the top area and go inside.
Go down the stairs and attack the chest which is really a Mimic! Stay out of reach of the Mimic.
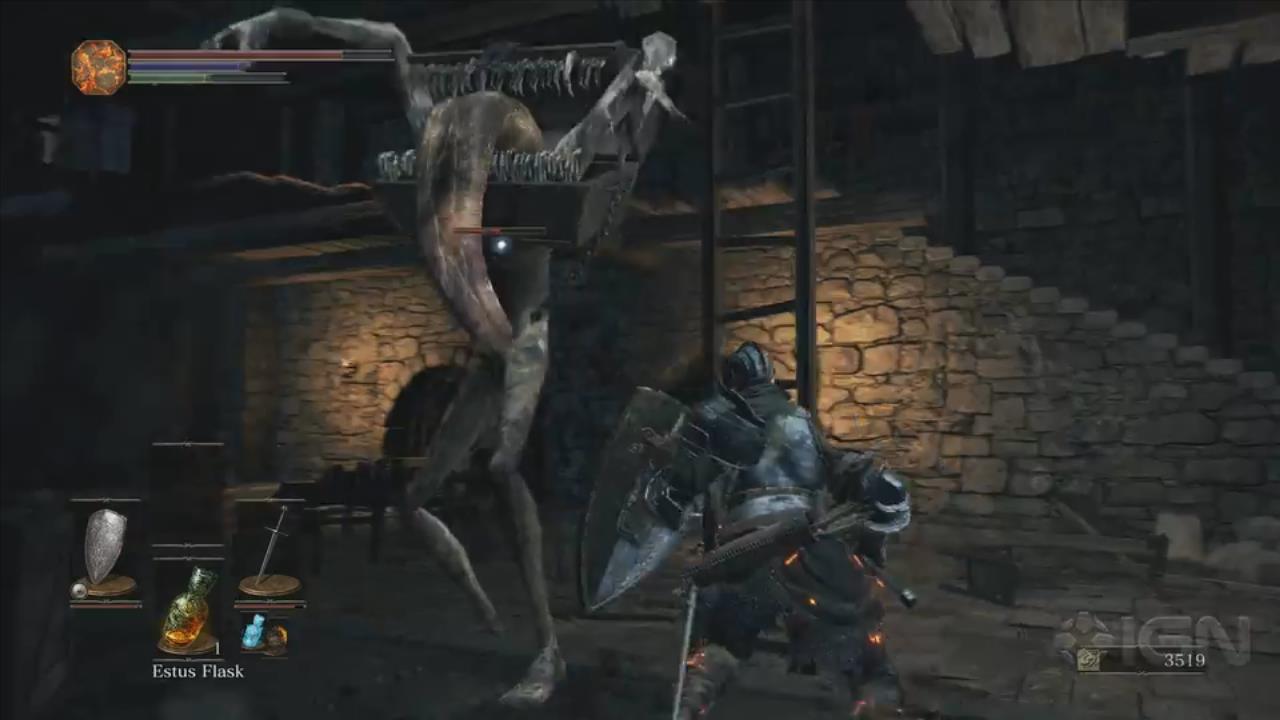 If it picks you up it will take numerous bites out of you, probably killing you. Roll and strike until it’s dead. It will drop a Deep Battle Axe for you to pick up. This axe has already been infused with dark magic causing it to do extra damage.
Climb up the ladder and go out of the gate. A Knight is patrolling this area. I suggest you avoid him for the time being unless you really like a challenge. If you do get into a battle he performs strings of attacks and lunges. A long range weapon may help you keep your distance. Otherwise go straight ahead in the building.
Take out the Hollow and then go out the exit and up the circular stairs to the top where you can light the next bonfire.
Exploring Lothric
This is a confusing area and it’s easy to get lost with lots of paths, rooms and towers all over the place. Follow as best you can but if you get lost just keep exploring.
After resting here go back down the stairs and deal with the Hollow Thief again. Wait for the Knight to leave the room and run around him unseen. Kill the two Hollows by the door at the end. One of them has Deserter Trousers.
In the room at the end of one of the planks is a corpse with 3 Firebombs. Drop down and kill the two Hollows. Climb down the ladder and take on the Hollow with a Halberd. The gate down here is locked so head through the open arch.
Find the 8 Throwing Knives. Take out the two Hollows in this area and pick up the Mail Breaker sword.
Go up the ladder, take on the Hollows, one of them will climb over the battlements, and then drop down the ladder to the roof top.
On one of the roofs you’ll see a group of Hollows worshiping. If you kill them all one of them will drop Firebombs.
Explore the rooftop to find a Large Soul of a Deserted Corpse and also a Raw Gem hidden next to one of the windows. Have a look down over the edge to the courtyard to see what you may be up against.
Descend the ladder to the ground and take out the two Archer Hollows to the right. One will attack immediately. More Hollows will climb up the ladder and over the railings. Once they are dead back around the side of the building to find the 3 Black Firebombs.
Go back through the arch into the building with the tables and chairs. A Knight with Spear and Shield will come out to fight you. Once killed he will drop the Lothric Knight Greatshield. In the corner is the Soul of a Deserted Corpse.
Go to the left and break the Vases. Behind them is a Hollow and an Undead Hunter Charm. Go up the steps and find the Titanite Shard in the next room.
Go back into the kitchen and start down the hall. Enter the room on your right. Take out the Hollow and you’ll see large wooden wheel and boxes in one corner. Roll through them to break them and reveal a Broadsword.
In the next room you’ll find a chest with a Silver Eagle Kite Shield. Head down now to the large room below where you’ll find a couple of Bone Hounds and some Hollows. Two of the Hollows have large axes.
Smash the boxes in a small alcove in this room to find a Titanite Shard. On a small table you can find and Estus Shard. Go down the stairs here to pick up a Cell Key.
Head up the stairs and out the way you came. Go back towards the kitchen and just before you reach it there will be a passageway blocked by a wooden wheel. Roll through it and go over the walkway. At the end on the left you can pick up a Green Blossom.
Smash through the boxes near the Green Blossom at the end of the walkway to drop down to a lower level. Open the chest to find the Astora Straight Sword.
Go to the edge of this walkway and drop down into the room where you faced the Bone Hounds and Hollows with Axes.
Now that you have the Cell Key go and open the cell down here to meet an NPC called Greirat. He’ll tell you about the Settlement of the Undead and ask you to give Loretta a ring that he gives you. The ring is a Blue Tearstone Ring.
Make your way back to the roof where you found the Raw Gem by the window. This time where going to go into the courtyard. You can drop a Firebomb off the roof to make killing the Knight down below a little bit easier if you like.
Below you’ll find some Embers and a Hollow with a Rapier. Exit the courtyard and make your way up the stairs. Up the top you’ll need to make a jump across to a ledge where you can find a corpse with the Ring of Sacrifice.
Return to the courtyard and take the path to the left towards the building. A lone Hollow is here but four will jump over the wall to ambush you as you get closer. On the left side of the doorway that you entered are two Green Blossoms.
Enter the doorway and take the elevator up which leads back to the locked door that we found at the beginning of this level. Grab the Throwing Knives behind you before you open the gate.
Head up the stairs to face yet more Bone Hounds and Hollow. Continue around to the bonfire where you can have a rest.
Path to Vordt of Boreal Valley
From the bonfire take the right path, past the Crossbowman, Bone Hounds and Hollows. Take the stairs down on the left, into the building and down the elevator. Go outside. Take out the Hollow and then next four Hollow that ambush you from over the walls.
Continue down the path and to the left come across a rather fat Knight with blue trimming.
 He’s a bit tougher than the others. Take him out and head back to the main paths. There are other Knights patrolling these areas. You may be able to avoid some of them. Otherwise just try to lure them towards you one-by-one.
Up on one of the walkways, on the right towards the main cathedral entrance, is a Knight guarding a Lucerne. It’s another tough challenge. Just block his attacks and strike in between his attacks.
Once the Knights are taken care of head into the Cathedral. Talk with Emma, High Priestess of Lothric castle. She tells you to go to the base of the High Wall and gives you a banner to take with you.
Head out and take the stairs up to the right to face the Blue Knight with glowing red eyes. You don’t need to face him but once you’ve killed him he will drop a Refined Gem.
Continue down the stairs and out the gate.
Vordt of Boreal Valley Boss Fight
Vordt is a large knight that acts like some kind of beast running around on all fours. He carries with him a giant mace that he can swing from a long distance away. It also does Frost damage which will slow down your Stamina Regeneration and lowers Damage Absorption.
Because of his large mace Vordt will prefer to attack you from a distance. The key here is to get in close, roll to his side and keep on swinging.
At times he will charge but you should have plenty of time to roll out of the way. Otherwise stick near him and attack with everything you’ve got.
Once he’s been killed you’ll get the Soul of Boreal Vally Vordt. Now it’s time to head to the Undead Settlement. Go out of the gates and raise the Banner.
Next Part: Undead Settlement