Birth of a Barbarian
Back to Heroes of Might and Magic 3
Yog has been trained as a Wizard but is absolutely hopeless and has learned nothing. He dreams of becoming a Barbarian and runs away from the Bracada Magic Academy. The Wizards of Bracada will attempt to stop him. This campaign includes 5 scenarios with Yog as the main hero. Yog can’t learn any spells and can’t buy a spell book so there’s no point giving him any magic related skills.
On the Run
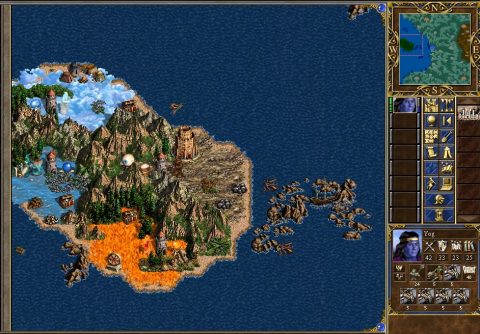
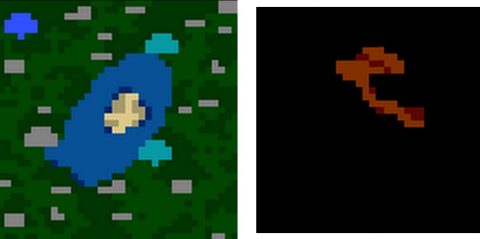
The first scenario has a tricky start. You begin outside Calarnen Tower and must escape to the southwest before the Wizards catch are sent out in a few days time. An easy way to complete this scenario is to run along the road southwest for 3-4 days, wait for the Red Wizard to explore to the south, then come back to Calarnen and take the empty Tower before the end of the week.
You’ll then be able to recruit all of their units on the first day of week 2. It may not be enough to defeat the Red Wizard but you’ll at least be safe if you hold the Tower and continue to recruit more units.
With an army you’ll need to head to the southwest, tag the Green Keymasters Tent and take the Tower of Padon. Then take your army along the passage on the far eastern side of the map. This curves around to the west and leads to the Blue Keymasters Tent. Now you can break through to the north and take the Tower by the lake.
Sail across the lake to the other side and clear out the rest of the map. By now you should have a strong enough army to deal with all of the enemies. Make your way over to the town of Groa in the east and capture it to win the scenario.
The Meeting
For this scenario you start with a Stronghold in the southeast corner of a small map. You’ll need to navigate your way through the map, going through the tunnels underground and back up again to avoid the garrisons. Along the way you’ll pass by Refugee Camps and other places where you can recuit more units.
About half way through your journey you’ll find a second Stronghold in the southwest corner of the map. Take this over, recruit more units and keep going. Eventually the enemy will start travelling through the garrisons but you have a short time to build up an army and make as much progress as you can.
Recruit a few more heroes so you can form a chain to bring new units up to your main hero. You’ll also want to check the Refugee Camps each week to see if there’s any Tier 7 units.
Continue making your way around the map until you come up from the underground right next to the main central Stronghold of Ulgak. By now you should have quite a large army. Take over Ulgak to complete the mission.
A Tough Start

For this scenario you need to take the Sandals of the Saint and the Armor of Wonder to Alendora. Yog will have amazing stats due to the rare artifacts in his possession. It will give you a huge advantage in combat.
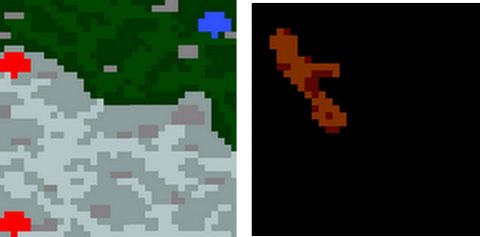
You begin with a Stronghold in a mostly enclosed area next to a lake. You’ll want to explore the enclosed area and break out to the east before the end of the first week. If you can take Marshwall just outside of your area by the first day of the second week you’ll be in a good position.
From here you can travel either north or south to take the other enemy Fortresses. Whichever way you go travel back in the opposite direction to clear out the Tan enemy.
With the enemy out of the way you’ll be able to focus on training 15 Chaos Hydras so you can go through the Quest Guard to the north. By a boat and travel to the island with the 4 Orbs.
These Orbs are exchanged for an Orb of Inhibition in the Seers Hut on the southwestern peninsula of the main land mass. This is then exchanged for the Sword of Hellfire with the Seer in your starting area. This can then be used to go through the Quest Guard leading to the tunnel underground where you can finally complete your quest.
Falor and Terwen
For this mission you must deliver the Celestial Necklace of Bliss and the Lion’s Shield of Courage to Falor and Terwen. You begin with a Stronghold in the northwest corner of the map.
There are 2 Rocs in the starting town so make sure you grab them and also a second hero so you can trasnfer their army to your main hero. You’ll want to head east to grab the Cliff Nest for more Rocs. Then make your way south and capture the town of Alexandretta. Build a Blacksmith immediately so you can give Yog a Ballista.
With this army you’ll be able to sail across the small lake and take over the other 2 enemy towns. Tag the Blue Keymasterss Tent in the south and then go through the Blue Guard in the center island so you can head underground. Tag the Green Keymaster’s Tent underground so you can go through the Green Guard near to your starting town. Tag the Red Keymaster’s Tent which opens the Red Guard in front of the Seers Hut underground. Visit the Seers Hut and hand over the artifacts to complete the mission.
Returning to Bracada
For the final mission you must return to the borders of Bracada and deliver the Heavenly Helm of Enlightenment and Sword of Judgment to Beleg and Orruk. You begin with a Stronghold in the northeast corner of the map. The enemy has a two Towers with a third neutral Tower.
You’ll want to move quickly before the enemy build a large army. The two main enemy heroes, Astral and Aine, are powerful Wizards so be careful. Head to the west to buy a Ballista from the War Machine Factory. This will give you the advantage in battle.
Gather a small army and break through the pass between the mountains. Take one of the Towers within the first week and use the army from there to take the second Tower. The Stone and Iron Golems will be particularly helpful agains the powerful wizard heroes.
Once you’ve defeated the enemy go for the White Keymaster’s Tent near your starting area and the Purple Keymaster’s Tent underground. Then you can visit the Seers in the southeast corner of the map to complete the mission.
Next: Rise of the Necromancer
Back: Hack and Slash