Dragon’s Blood
Return to Heroes of Might and Magic 3
For this campaign you take the role of the Overlord Mutare, a Nighon Lady wishing to rise up the ranks among the Nighon Lords. There is rumor of a vial of dragons blood that if taken will transform you into a powerful dragon. Mutare must find the artifact before Ordwald and other Nighon Lords can get their hands on it.
Culling the Weak
The first scenario is a medium map with 3 enemy factions. Mutare must survive until the end and she’s limited to level 10. As a starting bonus you can choose either the Pillar of Eyes, Quiet Eye of the Dragon or the 12 Harpy Hags. To get a quick start choose the 12 Harpy Hags.
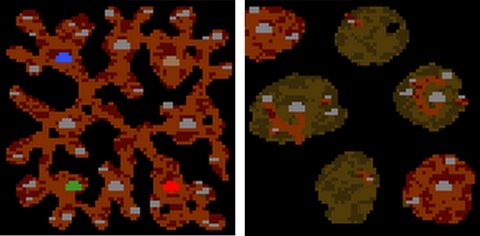
You start with a Dungeon town in the southeast corner of the map. Ordwald’s forces are in the opposite corner of the map while the other 2 enemies take up the southwest and northeast corners. There are 4 neutral Dungeons between them all and a further 4 Dungeons on the surface map.
Move out quickly to capture the neutral Dungeon to the north and west and continue on to find and capture the first enemy Dungeon. Try to level up Mutare with Wisdom and Earth magic. Mage Guilds in this scenario are limited to level 2 or 3.
There are numerous tunnels leading up to the overworld where you can find more towns and resources. Once you’ve taken out one of the enemy lords you should be able to establish your forces and sweep through the rest of the map.
The Seers Hut is in the overworld just above your starting location. Give her 13 Sulfur, 13 Gems and 17 Crystals and you’ll be given the Charm of Mana which will go with you to the next scenario.
Savaging the Scavengers
For this mission you begin with your hero Mutare. She’s limited to level 18. You must destroy all opponents and begin with either the Quiet Eye of the Dragon, Dragon Wing Tabard Cloak or 4 Medusa.
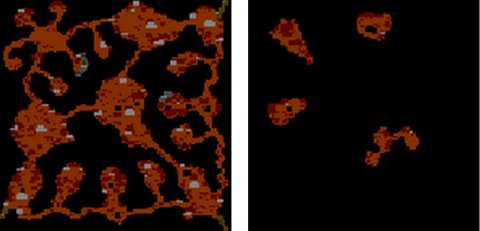
You begin in the southeastern corner of the map and must break through the neutral creatures to make it to the first town. The two enemy heros also start without a town and must capture there towns in the corners.
Take the closest town, build up a little and then head for the town in the center of the map. From here go north to the next town and then east to the northeast corner to wipe out the first enemy. You should have no trouble overwhelming the second enemy once you have 4 of 6 Dungeons.
The tunnels near the center of the map takes you up to a Quest Guard. Hand in the Charm of Mana from the previous scenario and you’ll be allowed through. You’ll be able to reach the Library of Enlightenment and the Dragon Scale Shield which will go with you to the next scenario.
Blood of the Dragon Father
For this scenario you must acquire the Vial of Dragon Blood before Ordwald. It’s quite a long quest but not too difficult. You begin with a Dungeon in the southeast corner of the map and can take Mutare and two other heroes to the next scenario. You begin with 1 Red Dragon, Labyrinth, or Endless Purse of Gold. Obviously take the Red Dragon.
To make sure Ordwald can’t get access to the vial take over the Dungeon to the west of your starting position and prevent the enemy here there from reaching the Light-Blue Keymasters Tent just to your north. Ordwald will not be able to break through the guard tower leading to the vial.
It’s important to not flag any creature dwellings except the Dragon Caves. This means your Portal of Summoning will only summon Dragons, giving you one extra Dragon per town each week. At the end of this scenario you’ll be fighting Dragons so you’ll need a big army.
Try to take the first enemy town to the west after the first week. Then set sail along the river to the west. You’ll be able to free an hero in the prison along the way. Go through the whirlpool to the lower caverns.
Falg the Green Keymaster’s Tent and another Dragon Cave. Continue to the east to the Red Keymaster’s Tent and then further east to the next enemy Dungeon, Shadowden. From here go north through the Green Border Guard and then through the tunnel to the upper caverns. Once you go through you’ll be in a larger area of tunnels with three enemy Dungeons. Capture them as quickly as you can and then go through the Light-Blue Border Guard to the next tunnel. Go through to the Dragon area. Kill all the Dragons and then open Pandoras Box to find the Vial of Dragon Blood.
Blood Thirsty
This is a large map with lots of enemies. You begin with 2 Crystal Dragons, 3 Faerie Dragons or 6 Black Dragons. Take the Black Dragons if you want the highest damage output.
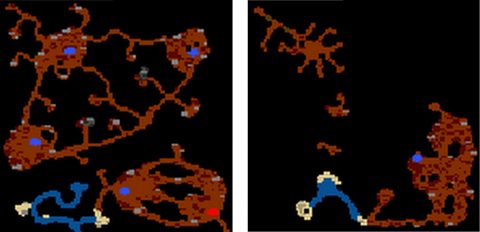
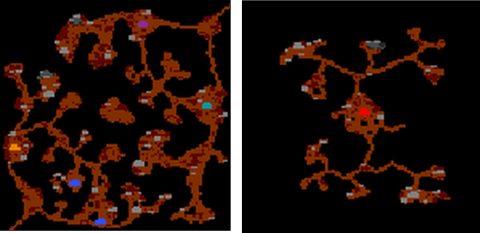
On the first level of the caverns where you begin you can take the tunnels up to a small area with a Gold Mine. To the northwest you’ll find a neutral town and a Gold Mine. to the southeast you’ll also find a neutral town and a Gold Mine. Directly north and south you’ll find a Dragon Cave and Sulfur Mine. Build Portals of Summoning for extra Dragons in your Dungeon towns.
When you’re ready take either the path to the southwest or northeast and go through the tunnels to the higher caverns. From here you can explore the rest of the map and meet the 4 enemy factions. It’s probably best to clear out one section, either northeast or southwest, and then sweep through the other side. Purple and Teal are to the northeast and Blue and Orange are to the southwest.
Back: Armageddon’s Blade Next: Dragon Slayer