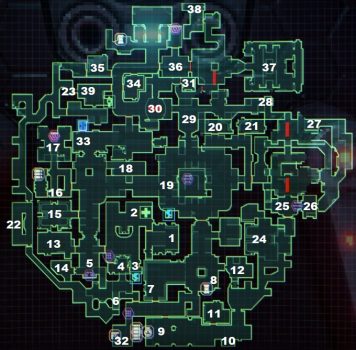
Level 1 (Medical)
Return to System Shock
Prologue
After the cutscene you’ll be in your apartment. Take a look around if you want but there’s not much to do here until the computer has finished bruteforcing the password.
Once it was finished interact with the computer for another cutscene. When you wake up you’ll be in the Neurosurgery Ward of the Medical Labs.
Level 1 – Medical Labs
The Healing Suite
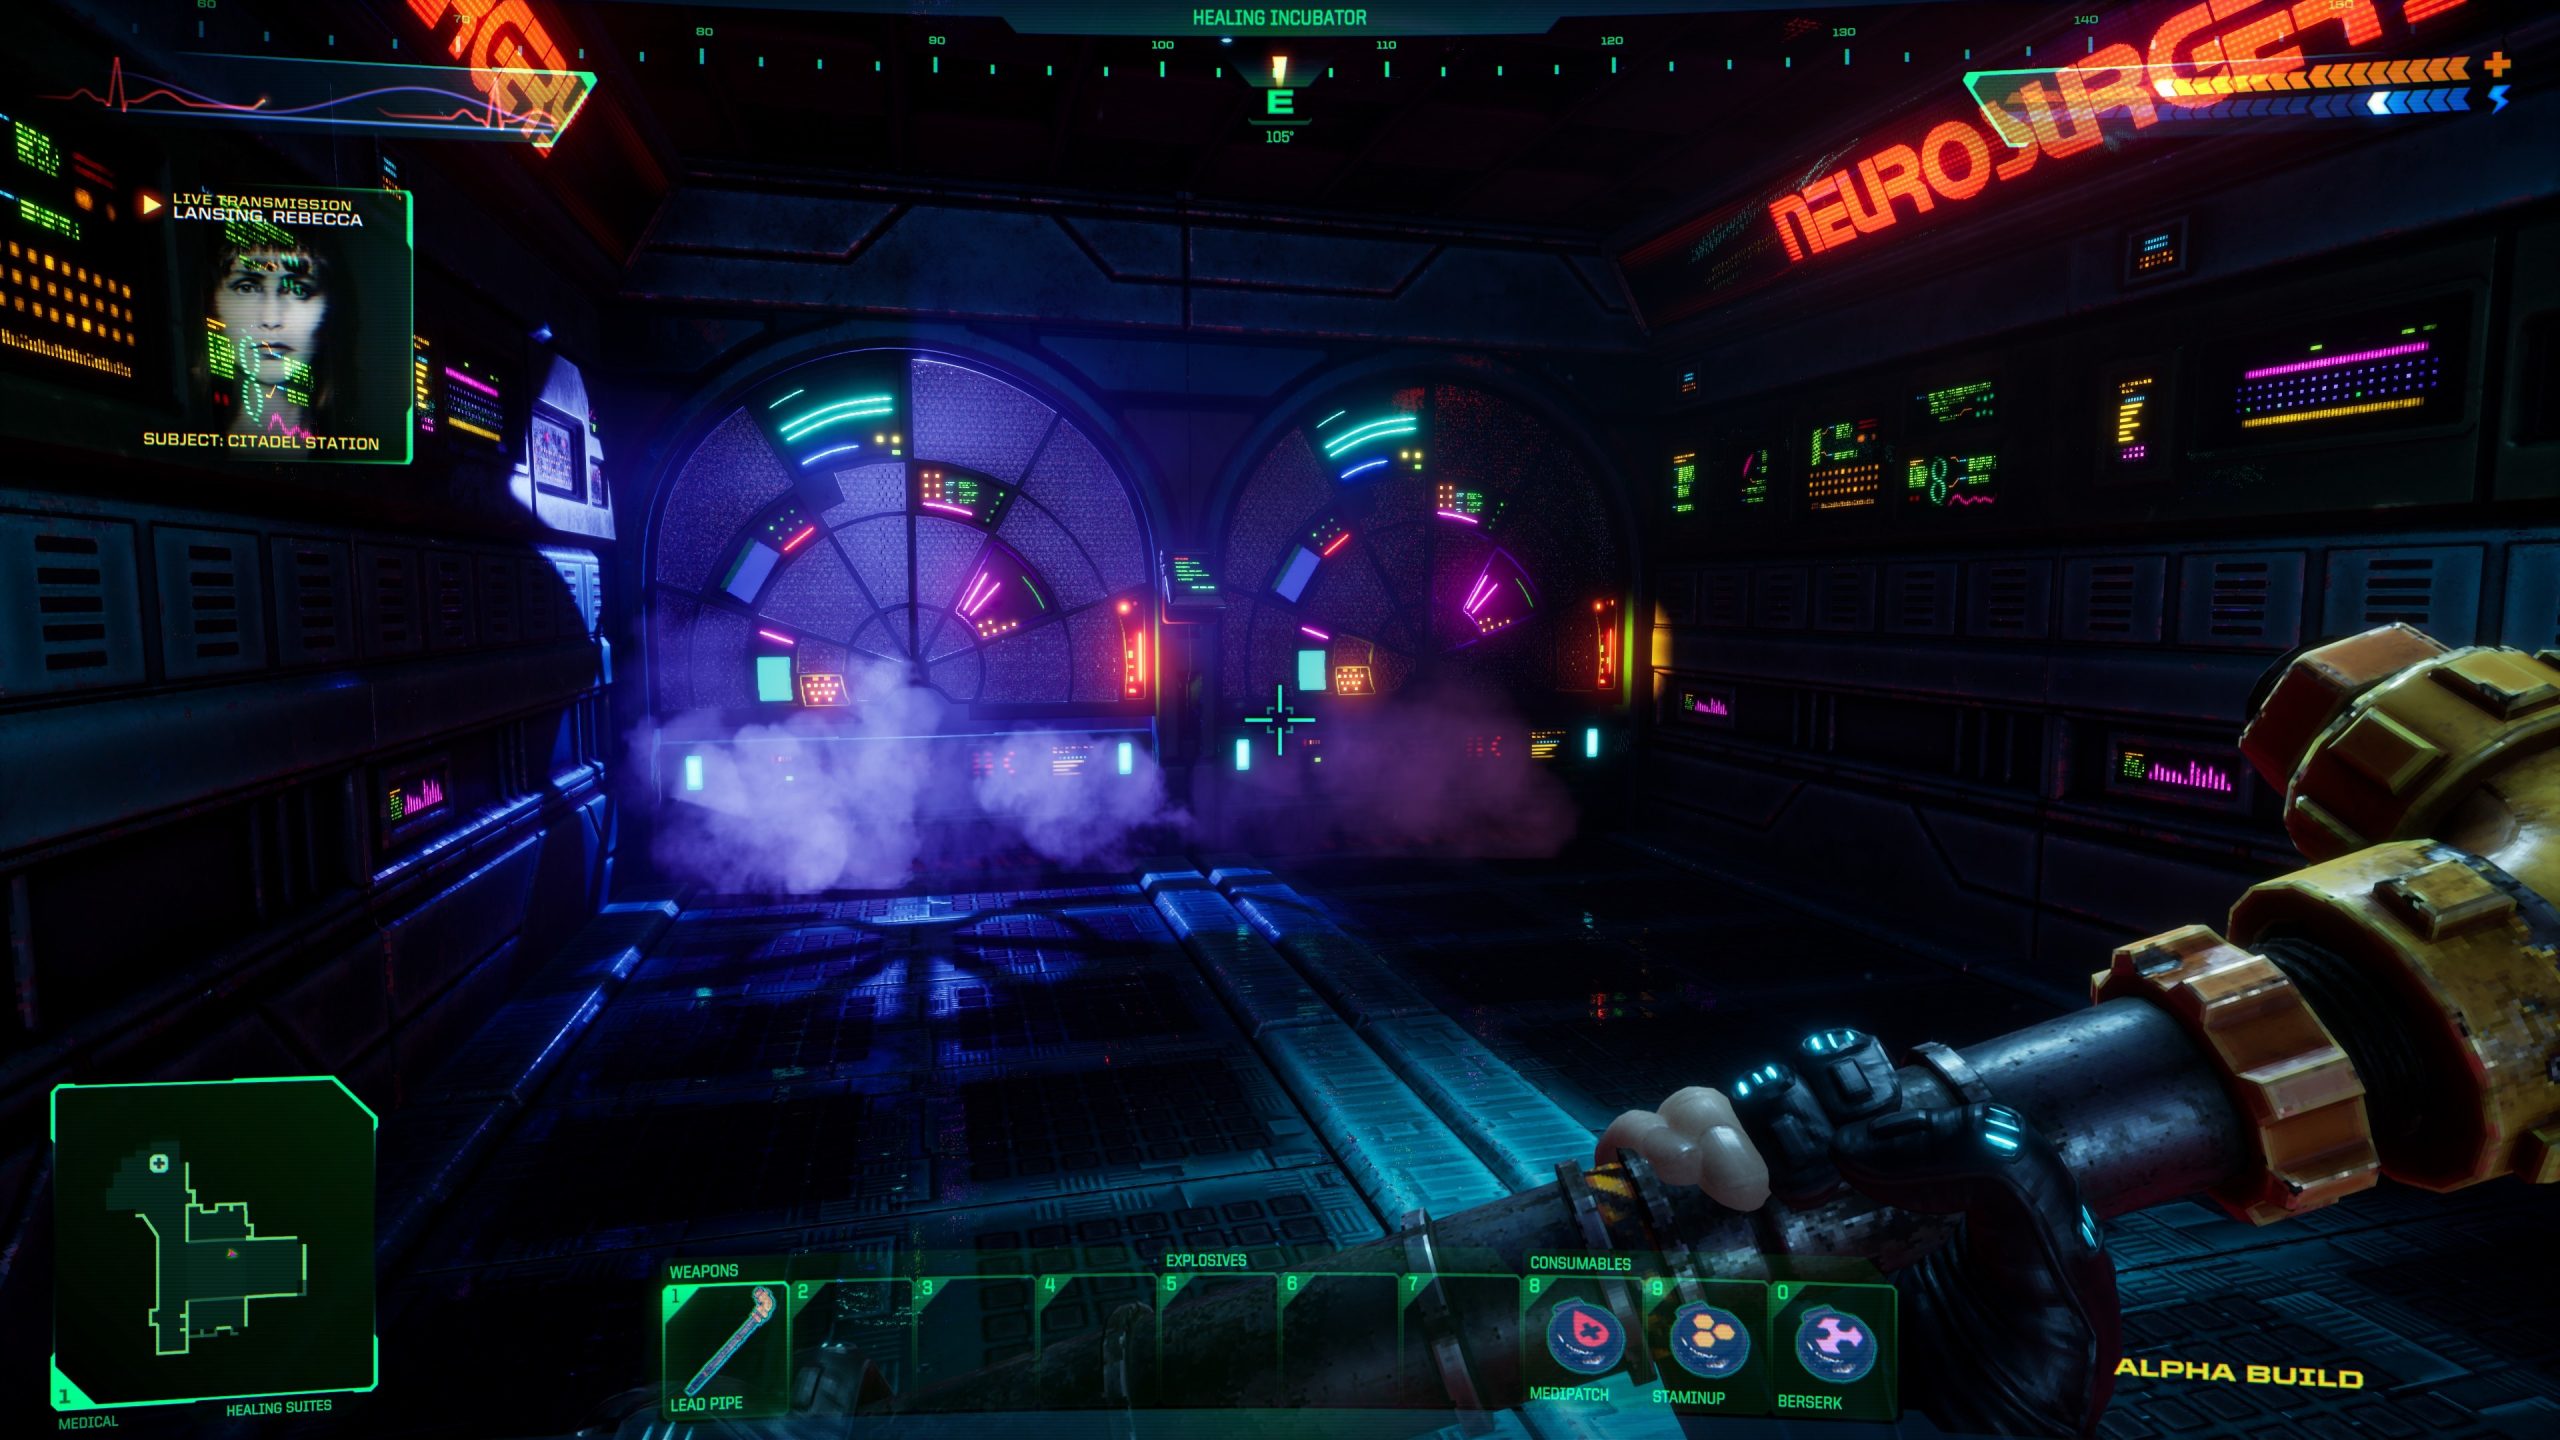
You begin the game in Neurosurgery (1). Grab the Medipatch on a shelf to the right, then open the door down the ramp on the left side for a storage room where you’ll find your first weapon, the Lead Pipe. You’ll also find the Navigation and Mapping Unit V1, the Standard (STD) Access Card and the Multimedia Data Reader V1.
Pretty soon you’ll get a live transmission from Rebecca Lansing. It seems you’re not alone. Use the STD Access Card to open the door at the bottom of the ramp on the right.
The Healing Suite is at (2) where you’ll find a Surgery Bed for a full heal. Take out the 2 Serv-Bots first. Just give them a whack with the lead pipe a few times. In the corner you’ll find the first camera. Soon you’ll find a message telling you to destroy them all.
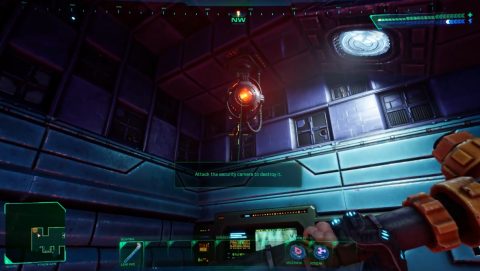
You’ll hear a little beep when a camera spots you and their location is marked on the map as an orange circle so I won’t mention the location of all 24 of them.
The Charging Station is nearby (3), don’t forget to pick up the Head-Mounted Vision Unit V1 on a nearby shelf. This works like a head lamp.
Open the small hatch to the office (4) to the right of the Charging Station. Inside you’ll find a Data Stick giving you the code to the door to the Healing Suites. The code is 451. You’ll need this to get out the door to the west. Press the Green Button to open the office door and enter the code in the keypad by the to the west.
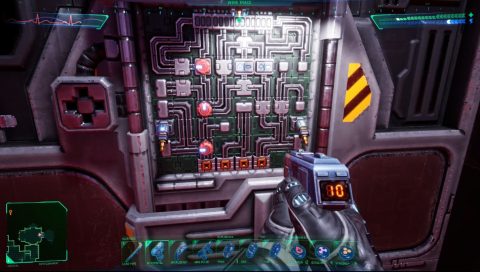
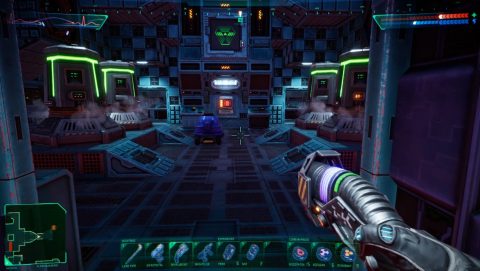
On the other side you’ll find your first enemy, the Humanoid Mutant. To the south of this room you’ll find your first Junction Box puzzle (5). There are 2 kinds and this is the connection type. It will be different every time you play the game.
You need to connect the two square nodes together by connecting a path between them. The more circular nodes are end points so avoid them.
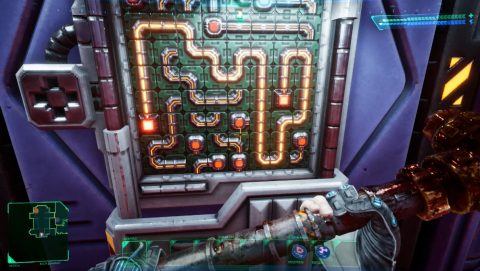
Once the connection is complete the lift to the left will activate. Ride it down and head up the stairs. Take out the Maintenance-Bot and then check out the Recycle Station (6).

You can throw junk items in there for Credits or Scrap (vaporized junk objects). Junk items will give you more credits but Scrap takes up less space in your inventory. You can use Credit on vending machines for ammo, weapon modifications and so on.
Open the door to the left leading to the south. The door to the Weapon Mod Station is locked with a security code. We’ll find that later.
Go through to (7) for a Data Stick to tell you about Recycling. At (8) you’ll find a vending machine for snacks, the Snacktron. Then down to the south you’ll find the Transderm Dispenser (9) for buying patches.
At (10) you’ll find an Audio Log by Lawton Kirby. In the room just to the north (11), you’ll find the Group-1 (GP1) Access Card in a briefcase. You can use this access card to open the door a little further to the east.
Go through to find a corpse with the TB-05 Sparqbeam Sidearm. This weapon uses energy instead of bullets and has two settings, high and low. The GP1 access card will also let you open the door to the storage room at (12). Search the room to find an Audio Log (5U5H154N) and ammo and a Medipatch.
The STD Access Card will give you access to a med bay (13) back closer to where you began. Inside you’ll find a neutral cyborg and an Audio Log (Mira Stackhouse).

There’s also a GP1 Access Card in this room but you probably already have one by now if you’ve been following this walkthrough.
The GP1 Access Card then gives you access to the storage room at (14). There’s not much inside. Just some ammo and a Medipatch.
Pull the lever to the north of the Junction Box at (5) to get access to the rest of this level. Use the STD Access Card to open the door to (15) where you’ll find a Data Stick with a medical report, and the Biological Systems Monitor V1.
The door to the north leading to the elevator can’t be opened from this side. You’ll need to go the long way around and explore the rest of this level first.
On the floor in the corridor at (16) is another Audio Log (Abe Ghiran) telling you to go to Beta Quadrant to make a stand against SHODAN.
The doors to the Medical Armory to the west are locked and can only be unlocked by jacking into Cyberspace. Go down the ramp to (17) for a Data Stick (Engineer’s Report), Medical (Med) Access Card and the first Terminal where you can access Cyberspace.
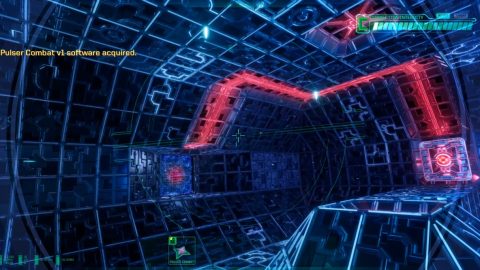
Cyberspace
Use the terminal to access Cyberspace and you’ll immediately pick up the Pulser Combat v1. Shoot the red panel on the wall to turn the red path to green. Follow the green path to the barrier that you just opened.
Watch out for the Mines along the way. Avoid them or shoot them if you have the time. When you come out of the tunnel you’ll pick up the Decoy Evasion v1. This is a one use program that creates a ghost version of yourself to distract enemies.
Take out the enemies in the next room, shoot the red panel, pick up the Recall Escape and follow the green path to the next area.
Recall Escape is also one use and lets you teleport back to the entrance if you’ve lost integrity and think you might be forced out of Cyberspace.
Follow the path through to a large room with mines and other enemies. Take them out and then destroy the beam in the center.

This unlocks the Medical Armory. Continue through to the next area, take out the enemies and follow the path out of Cyberspace. You can also just Recall at this point.
Go up the ramp and enter the Armory to find a vending machine for ammo, the JW-76 Mag Pulse Rifle (useful against robots), as well as a couple of patches.
Enter the small room at (18) for the KE-41 Minipistol just lying on the floor and some ammo. Head to (19) for the central room where you can access all of the quadrants. To the south side you’ll find another Charging Station.
Take the lift up on the eastern side in the Beta quadrant. Inside the office of Dr. Nathan D’Arcy (20) you’ll find another Sparqbeam, System Analyzer V1, Audio Log (Nathan D’Arcy) and the Personal-1 Access Card.
Nathan tells you what to do in the audio log.
Fire the laser into the station’s own shields. Get Isotope X-22 from the Research level for the shields and get the Safety Override code in the Research Library. Head down to the Reactor and power the shields. The laser can be fired from the Research central control.
In the Grossman office (21). You’ll find another KE-41 Minipistol, and Audio Log (David Honig). David tells you to lower the security of each level to access to the lifts.
Heading back to the Recycle Station and taking the ladder down you can head along a small tunnel to the west. This opens up to a viewing room (22) where you’ll find an Audio Log (David Honig).

This path leads around to another Audio Log (Karenna Ozark) at (23) and then to a locked door that you can only open from the other side so make your way back for now.
Go to the central hub and we’ll explore the southern section, Gamma quadrant. You’ve probably explored some of it already.
Make your way down to the south and then east. At (24) you’ll find some kind of control room. There’s nothing there but a Sparqbeam Sidearm on the table. Take the door up the stairs to Beta.
Extending the Bridges
There’s a Junction Box (25) immediately to your right. For me this was a Power puzzle. You need to bring the right amount of power so that the power level reaches the point between the two markers.
Look carefully at the lights on the plugs, some of them of have more power then others. You can also turn the notches to direct power along different paths and flick the switches to turn power on or off. If that’s too much trouble use a Logic Probe on the left side to bypass the puzzle.
Head over the bridge and up the stairs on the left for an Audio Log (Alex Valero).
You an also pull the switch to open the door leading back to the central hub from this side.
A little further to the north is another bridge that you need to activate. If you head around to the room at (26) you’ll find an Audio Log (Althea Grossman) on the table.
There’s another Audio Log (Althea Grossman) if you follow the corridor north to (27).
When you come back to the second bridge you’ll see that it’s already been extended. Walk across and pick up the third Audio Log from Althea Grossman to the north (28). Althea will tell you the combination for the Armory on Medical. For me it was 705 but the numbers might be random.
You can access this by using the console by the locked door behind the Recycle Center to the south at (32). Inside you’ll find a Mod-Kit Station for an upgrade for your Minipistol. This one increases the bullets you can load from 10 to 20. You’ll also find a couple of vending machines for ammo.
Head west to the small hub just at the entrance of the Alpha quadrant (29). There’s lots of enemies all around so be careful. You’ll be able to open the barrier back to the central hub from this side.

Alpha Quadrant
As you walk across the bridge at (30) SHODAN will remove, forcing you to drop to the ground below. You’ll need to find another way across. The repulser lift doesn’t work so press the buttons to get into the room at (31) where you can pull the lever to activate the lift.
Ride the lift back up to the higher level and you’ll find an Audio Log (Kevin O’Connell).
Press the button in the office to the south to reactivate the bridge. SHODAN won’t remove it again. The Elevator (33) to the Research Labs is just to the west. You can pull the Switch to open the doors to the south for a shortcut back. Nearby you’ll find an Audio Log (SHODAN).
There’s another Audio Log (Todd Blankeship) in a room to the north (34), and yet another Audio Log (SHODAN) on the ground in room (35). You can manually unlock the door on the west side here, leading back to a narrow corridor on the west side of the level.
At (36) you’ll find 4 Humanoid Mutants in stasis. As soon as you attack one of them they’ll all wake up.
Open the door to the north for an Audio Log (SHODAN) and a Cyberspace Terminal. Jack into Cyberspace and take out the blockage to remove the barrier to the east.
Watch out for the Security-1 Robot on the other side. Use the Mag-Pulse or an EMF Grenade to disable it. Take the lift down and mak your way to the CPU Nodes (37).
Destroy the Nodes any way you want and take a look at the computer at the back of the room. It will show a number. The number was 8 for me but I’m pretty sure it’s random.
In (38) you’ll find a Sensaround Rader Unit v1 to scan for useful items but the room is irradiated. So get in and out quickly.
Before you leave the level stop by the Cargo Lift (39) and place any items in there that you want to access on other levels. This frees up a bit of space in your inventory. You can also pull the lever to cancel Cyborg Conversion. If you die you’ll be restored and brought back here.
If you’ve destroyed all of the Security Cameras and the Computer Nodes the level security should be at 0%. This means you’re free to use the elevator and head to the Research Labs.
Next: Level 2 (Research Labs)
Back: System Shock