Level 4 (Storage)
Return to System Shock
Level 4 (Storage)
Storage is Level 4 of the station and can be reached by taking the elevator up from Maintenance. You’ll need to destroy the CPU Nodes here to find another number for the self destruct code we’ll use later.
You’ll can also find an Environmental Protection Pack, Micro Pocket Dimension, Z-44 Plastique explosives, Turbo Motion Boots and the KF-18 Skorpion. The Plastiques and Environmental Protection Pack are essential.

When you enter the level take out the Drones to the left. You’ll find a mix of Avian Mutants and Robots on this level. At (1) you’ll find the Recycle Station. Remember to take out the Security Cameras as you explore. Further down the ramp at (2) you’ll find the Audio Log (Ryan Mannion).
Enter the small hatch and follow it around to a room (3) with doors leading to Storage 5, Storage 6 and Storage 7. Inside Storage Room 6 (4) you’ll find a Shotgun and Audio Log (Sabo Engle). The door to the south can’t be opened until you get to 0% Security.
Storage 7 (5) is protected by a couple of Drones and is radioactive in the center. One of the Buttons on the console reverses the gravity lift.

Ride the lift up to the upper level and enter the room to the north (8). Take out the Robots and climb down the ladder. On the other side you’ll find Audio Log (Greg Macleod) on the floor. He mentions part of the code to Storage Room 9 is 8**.
Open the bay doors to the north and you’ll be right in front of Storage 1 (9). Down the corridor to the left (10) you’ll find Audio Log (David Broyles).
In Storage 1 you’ll enter on the upper level with a gravity lift down on your left. Watch out for the Repair Droids down below. The bridges on the upper level are not yet activated.

Search around on the ground for Audio Log (Jon David Wong). Near it you’ll find a series of four buttons. Push them to activate the bridges above, then take the elevator up. You will get attacked by about half a dozen Security-1 Robots.
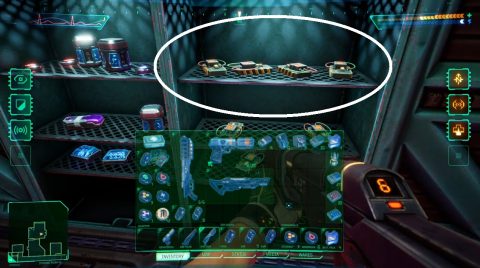
Take them out and then grab the Audio Log (John Nanut) (10) from one of the small rooms. Jump across to Surveillance (11). Inside you’ll find the Z-44 Plastiques. Make sure you pick up 4 of them. You’ll need them later to take out the 4 Antennas.
You’ll also find various bits of ammo and a Switch to open the door to Storage 4. Make your way back out and you’ll find a ramp in the hallway at (12).
You can explore the lower section near the room at (13) but if you want to get over to the ledge with the enemies you’ll need the Turbo Motion Boots v1 that you can find on a shelf at (15).
Run and jump over the gap to the ledge on the other side. SHODAN will complement you on your jump and Bots will attack from the sides.

Take them out and grab the loot. The button here changes the grav lift. Continue clockwise around to the east. When you enter the room in the northeast (14) the Cyborgs on the other side will deactivate the bridge.

Take them out and then use the lift on the left side to get to the ground floor. Two bay doors will open releasing 2 Cyborgs and a Loader Bot.

Hide around the pillars as you take it out. A Button on the console will reactivate the bridge. Ride the lift back up and head over the bridge.
On the other side you’ll find a Mod-Kit Station for the Shotgun. This is a Choke Modkit that decreases the spread and increases damage. You can buy it for 25 Credits.
Audio Log (Greg Macleod) can be found at (16). Press the Button to remove the forcefield so you can get into the room at (17). Take out the Loader Bot, Drone and Cyborg and then destroy the 4 CPU Nodes.
Take a look at the monitor after destroying them for another part of the self destruct code. Head back out and you’ll be close to where you started the level after having done a full lap around. Grab Audio Log (Ed Aubry) from (18) if you haven’t already.
Go through the little door into the room at (19) in the southeast corner of the level. You’ll see two grav lifts leading down. One leads to Storage 9 but you’ll need a code to enter.
If you’ve been listening to the messages you’ll know that it should be 8*8. Guess the middle number and head inside for a Magnum, cans of Soda and most importantly the Environmental Protection Pack V1.
You’ll also find a Mod Kit Station for the Magnum to increase damage. Taking the lift on the other side will lead you to a med suite with a Transderm Dispenser, Cargo Lift and Restoration Bay.
Make your way over to Storage 4 (20). Take out the Bots and turn on the Environmental Protection V1. Drop down by using the crates on the right. Open the door to the east and take out Security-2 Bot. Inside is a button to change the direction of the grav lifts so you can get back up. There’s not much here except the mini boss fight with the Bot so head back and go to the south.
Open the doors at (21). Follow the ramp down and around. Open the door at (22) and head to the back corner of the room where you’ll find a Pocket Dimension v1 fo extra inventory space and an Audio Log .
Push the button on the crates at (23) and you’ll see a door open on the monitor. The door is just behind you. Use the boots to dash past the first grav lift and you’ll be lifted up by the second one.

Up the top is where you’ll find the last Security Camera. There’s also Audio Log (Greg Macleod) at (23). On the ground nearby you’ll find the KF-18 Skorpion. The lift takes you back up to the hallway at (3).
Now that security is at 0% you will be able to open the door to the south of (4). Inside you’ll find Audio Log (Sabo Engle) and Turbo Motion Boots v2.
That should complete the Storage level so head back to the lift. You can take it straight up to the Flight Deck.
Next: Level 5 (Flight Deck)
Back: Level R (Reactor)