Level 6 (Executive)
Return to System Shock
Level 6 (Executive)
The Executive floor is a large level with trams leading out to Alpha, Beta and Delta Grove. Beta Grove is radiated and will need to be jettisoned before you can gain access to the Engineering Level.
Some items to keep a look out for are the Admin (ADM) Keycard, MK-84 Accelerator Railgun and Target Identifier v3.

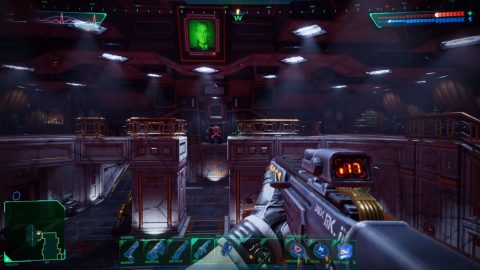
As soon as you enter the level you’ll get a message from Edward Diego on the screen. Head around the corner and take a look at the numbers on the screens (1). Write them down as one of them will be used to open a door in the casino later.
At (2) you’ll find the tram to Alpha Grove. You can head there now or continue exploring the Executive level.
back to the west you’ll find Audio Log (Zachary Aaron) in the small square room (3). Around the corner you’ll see a map of where the groves are located around the level (4).

Gamma is not accessible but Delta, Alpha and Beta are north, east and south respectively. The path to the casino in the southeast is locked and you’ll need Admin Access. You can get into the boardroom at (5) for the Pulse Rifle which you probably already have by now.
Further west take out the Bots and grab the MK-84 Accelerator Railgun (6) if you want it. This is a good weapon against bosses but a waste against smaller enemies.
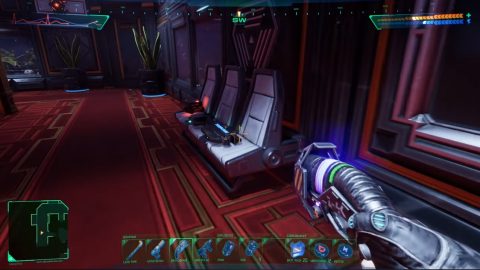
On a chair to the south of this room (7) you’ll find Audio Log (Zachary Aaron). Grab it and then head back the way you came.
Gamma Grove (8) is to the west but has already been jettisoned. In the control room (9) you’ll find Audio Log (Harry Wilkinson).
If you head to the north of the level you’ll find Delta Grove (10). You can take the tram there now if you want or continue exploring this level.
Make your way along the corridor to the east and enter the room with lots of bodies on the floor and around the table. In once corner you’ll find the Admin (AMD) Access Card (11). There’s also a Shotgun on the floor if you don’t have one already.
In the small room to the south (12) you’ll find Audio Log (Zachary Aaron) on the floor. The med suite can be found at (13). Unfortunately there’s no surgery bed but you will find the Cargo Lift and Restoration Bay as well as a First Aid Kit and other items.
The Cyberspace Terminal (14) will let you break the connection to unlock Edward Diego’s Storage Room and also grants access to the Beta Grove transit. We’ll get to that later. There’s also an Audio Log (SHODAN) on a bench nearby.
In the boardroom to the west (15) you’ll find Target Identifier v3 and Audio Log (Kiner Perry).
With the top half of the map explored you’ll be able to get access to the southern portion by using the Admin Access Card on the door at (16). Take out the Bots in the hub room at (17).
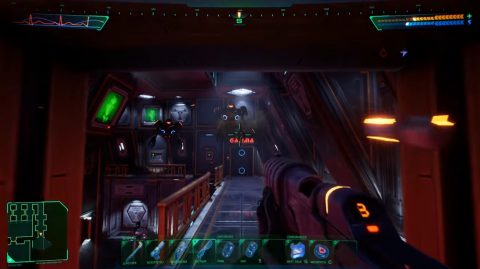
Only the doors in the northwest and southeast of the room are working. The southeast door needs the ADM access card. Watch out for the Cyborg Warrior that attacks from behind when you unlock the door.
On the other side of the door (18) you’ll find Audio Log (Gerard Koufax) and a Charging Station.
The ADM Access Card will unlock the door leading to Beta Grove (19) in the south. Watch out for the mutants hiding inside. There’s also another Audio Log (SHODAN).
SHODAN tells you how to jettison the groves. The jettisoning of all groves must be enabled before any single grove can be jettisoned.
You must hit the Jettison Enable switch inside all remaining Groves, then activate the Master Jettison Enable in Gamma Quadrant. Finally pull the jettison lever in a specific Grove to launch that Grove.
This means going to all remaining Groves (Alpha, Beta and Delta) individually and finding the Jettison Enable switch.
To the east is a long hallway with rooms leading off from it. In (20) you’ll find Audio Log (Daniel Fishman). Wath out for the Gorilla Tiger in the large room at (21).
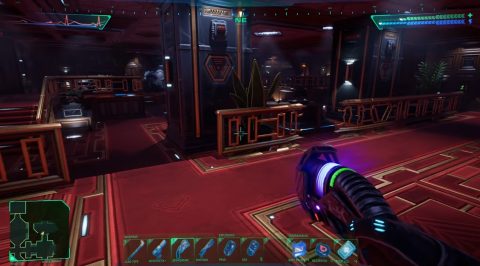
The casino can be found at (22). Watch out for more Gorilla Tigers, Mutants and a Bomb Droid. On a coffee table in the center you’ll find Audio Log (Daniel Fishman).
The door in the corner (23) can only be opened by using a keycode. The code can be found on one of the monitors near the level entrance. Once opened you’ll get access to the southern corridors and Diego’s hideout.
Inside the first room you’ll find quite a bit of junk that you can vaporize or recycle. go through the hatch to the west and down the ladder.
Continue through the hatches to the west until you reach the room at #24. Take out the bots and then use the Mod-Kit Station to the east if you want. You can buy the Mark III Full-Auto Modkit to give the Assualt Rifle increased capacity and make it fully automatic.
Drop down to the lower level and you’ll see the CPU Nodes behind a barrier.

Right next to it you’ll find the Recycle Station. Press the green button to open the bay doors and take out the Loader Bot on the other side. This also lowers the force field so you can destroy the CPU Nodes. Make sure you write down the number on the monitor.
Head back up and follow the crawlway to the west. Make your way around the hallway to Diego’s Hideout #25. When you enter Diego will teleport in and the boss battle will begin.
Get ready with the Health and Reflex Patches. Diego has some kind of laser canon and a sword for close combat. I used the Assault Rifle and the Magnum for this fight.
Once Deigo teleports out you’ll have a chance to look around. Open the door to the west and try to use the Jettison Enable switch #26. You’ll get an error saying there’s possible damage to the power relay. You’re told to:
Consult diagnostic report in Repair Bay Level 3 for detailed analysis.
You’ll need to do this to get access to the outer areas of Maintenance. The lift here goes to Engineering but you won’t be able to reach that level until you’ve jettisoned Beta Grove. There’s also a Data Stick on a small table.
In the room to the north #27 you’ll find a Crystal Skull worth 12 credits and Audio Log (Edward Diego). In the storage closet to the north you’ll find a Mod-Kit Station and other goodies. The Mod-Kit Station has a capacity upgrade for the Magnum.
Find the green button on the wall by Diego’s desk to open the teleporter at #28a. This teleports you near to the entrance of this level at #28b. From now on you’ll be able to use this teleporter to quickly get back to the Master Jettison Enable switch once you’ve been back to Maintenance.
Next: Alpha Grove
Back: Level 5 (Flight Deck)