West Garden
Back to Tunic
West Garden
From the entrance to the West Garden continue west until you reach the first Checkpoint. Take a look through the telescope along the way if you want to get a better look at the area.

Just to the north of the checkpoint you have a Well, and behind it around the corner you’ll find another Merchant. Go back the way you came and just before the rock bridge take a look around the corner.

Follow this path around, all the way past the heroes grave to a chest hidden around a corner. Inside the chest you’ll find an Ability Card.

Head back to the Checkpoint and follow the path to the southwest. You’ll face your first Chompignom. Kill it and follow the small path to the north for Page 26/27. This includes the map for the West Garden area.

Come back to where you fought the Chompignom and continue to the southwest into the water. Follow the underwater bridge around to another island. Open the chest for some Gold and then walk over the wooden bridges.
Follow the only path around under a walkway. From here you can go south or north. Follow the path to the north. Go over another bridge and under the platform above for a chest with a Fox Piggy Bank. Come back and go up the ladder to unlock the shortcut.

Open the chest for some little Blue Berries and then climb back down the ladder. Go across the bridge and this time head to the south. Take out the Chompignoms and Fairies. Unfortunately you won’t have a ranged weapon to take out the flying Fairies but you’ll pick one up soon.
Continue top the southwest and climb up onto the wall of the ruins. Follow it around and back down. Kill another group of 3 Chompignoms. Use bombs if you need to, then head back to the east. Kill the Fairies, open the chest for gold and head up the ramp to the upper level.
The walkway to the northwest leads to a chest with 4 Dynamite. Take the path east and then south to the next Checkpoint.

A little to the south is an Obelisk that you can’t reach yet. This will activate the nearby teleporter which you’ll use later to get one of the hidden pages. For now walk around the front side of the platform and roll into the wall to the left of the stairs. It will open revealing a chest with a Golden Coin inside.

Go back to the checkpoint and then north to the 4-way intersection. Take the path east, kill the monsters and go down the stairs for a chest with Gold. Enter the cave under the bridge and you’ll find the Magic Dagger. You can use it to freeze opponents but it uses magic points (MP). MP is replenished when you rest at a checkpoint.
Return to the 4-way intersection and go north. Take out the Rudelings and Chompignom and then break the bushes to the right. Inside the chest you’ll find Green Feathers. This can be used to upgrade your Stamina.

Climb up the ladder and open the chest above for a Dragon Tooth. Follow the path to the north and drop down the Rope. The boss is just up ahead but it’s worth climbing down the rope and going back to the first checkpoint to upgrade your stats and set a checkpoint closer to the boss.
Remember the nearby merchant if you want to buy any bombs or other items. Climb back up the rope and head to the north for a the boss fight.
Garden Knight Boss Fight
If you quickly run up to the boss you’ll be able to get in at least 6 attacks before it wakes up. If you freeze it just after that with your new Magic Dagger you’ll be able to do even more damage.

The Garden Knight has a few different attacks. From range it will shoot at you three times with the rifle. When you’re close it will slam down the rifle multiple times. It may pause at the end of a strike and spin around with the rifle. When you see it pause roll out of range.

Roll out of the way of each of the strikes and then get in a few attacks of your own. If you’re getting close to defeating the Garden Knight but just need a bit of extra help use a Lure. This will distract the Knight for a little while so you can get in the final blows.
Once the Garden knight has been defeated run up the path to the north east and open the chest for 200 Gold. Continue up the ladder to the West Bell and strike it to ring the bell.
Follow the path to the northeast for another chest with Blue Berries. Then lower down the bridge for a shortcut back to the Windmill.
Sealed Temple
Return to the main Checkpoint and go north to the sealed temple. You’ll find out the doors are no longer sealed.
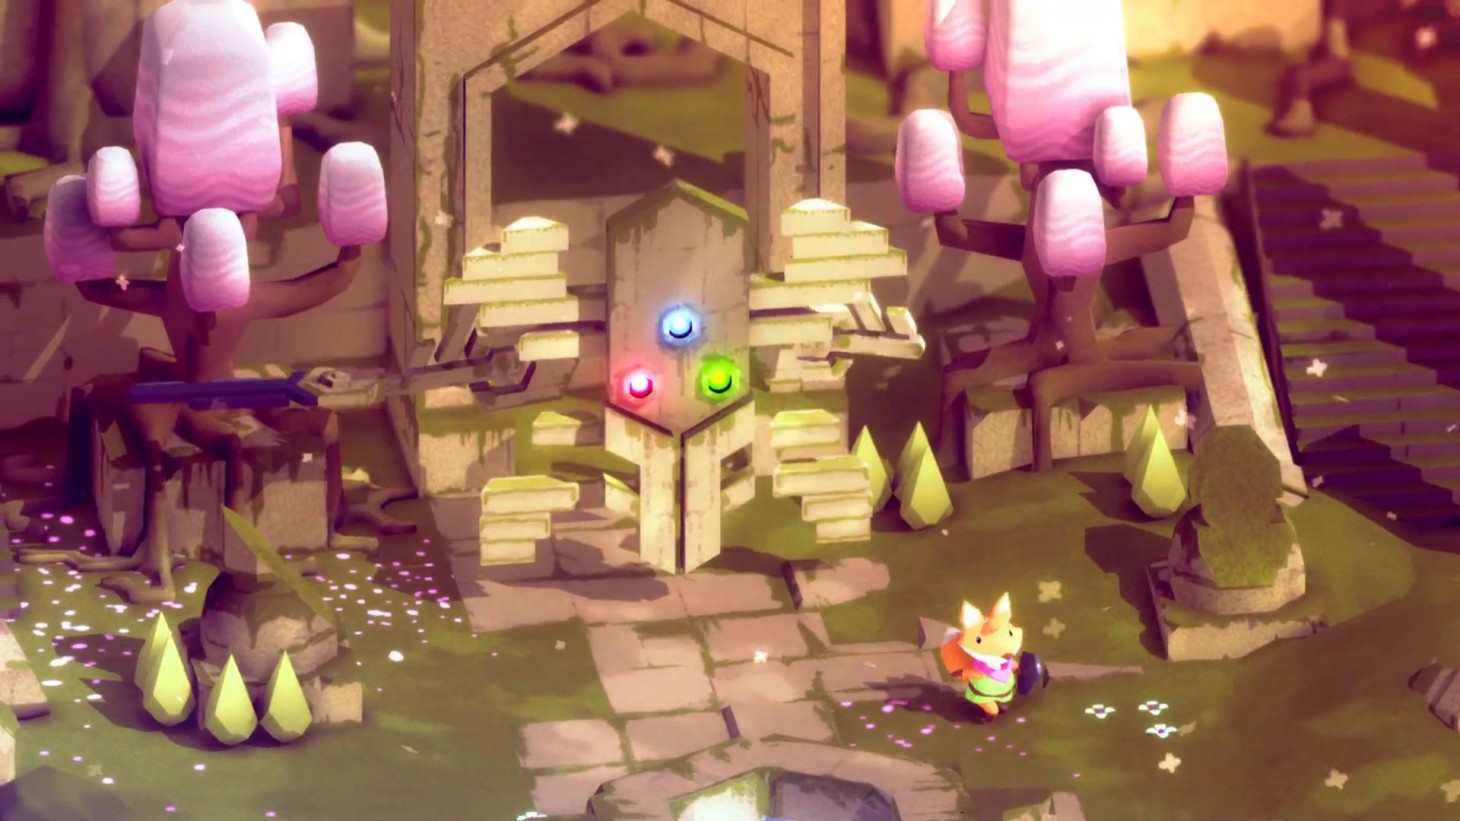
Take the path all the way up to the large structure. You’ll need to come back here with 3 keys to place in each of the receptacles. Take the path to the northeast and climb up the ladder. Make your way around the path to Page 24/25.

Lower down the bridge to unlock a shortcut back around to the area above the sealed temple.
Overworld
Climb up the ladder to the west and kill the Rudeling. Take a look through the telescope if you want, then make your way to the west to the Golden Door. In front of it you’ll find the Fire Rod.

Take a look at the pattern on the door. From the dot in the center follow the path on either side.
Up-Left-Down-Right-Down-Left-Up-Right
Page 48/49 will appear. Pick it up and make your way back over the bridge to the east. Continue all the way to the east to the entrance to the mountain door.
Head up the stairs and follow the path all the way up the mountain. You can’t open the door yet but you will find Page 20/21 of the manual.

Run back down the mountain path to the Overworld. Continue to the east, kill the Rudelings and open the chest for 3 Blue Berries. Go down the ladder and follow the hidden path around to the south by the side of the temple. Pull up the Lever to open a gap in the cliff and reveal a ladder.

The path that has opened leads to the Forest Fortress. We’ll explore that on the next page.
Next: Forest Fortress
Back: Under the Well