Level 10 (City of Khamoon)
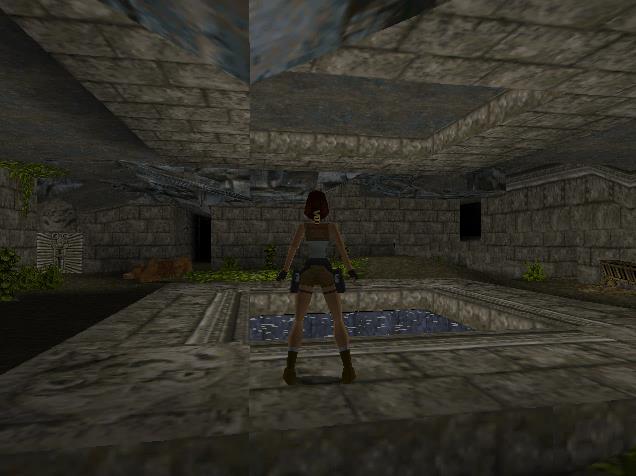
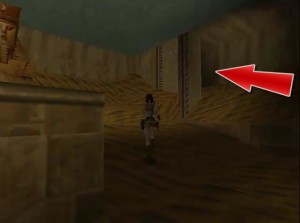
Upon arriving in Egypt Lara finds herself on the yellow sands of the City of Khamoon. Run to the end of the tunnel until you reach a room with pillars in the corners.
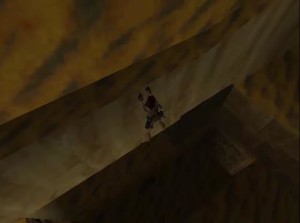 Turn around and drop down, catching the edge as you fall. Drop down once more and catch the horizontal crevice.
Shimmy your way to the right and drop down onto the ledge. You’ll see a switch here. Pull it and drop back down into the room below.
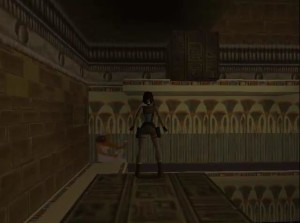
Underneath the switch is an alcove with a movable block. Pull this block out three times and then climb over it into the alcove beyond for a small medi-pack and magnum clips.
Grab the other movable block and pull it sideways once, then pull it backwards twice. Go to the other side and push it all the way to the pillar with carvings on it.
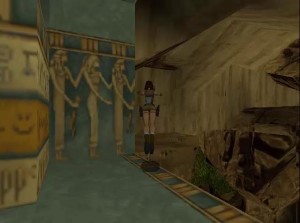
Jump up to the pillar with carvings and then up to the sandy ledge. You’ll need to traverse to the right a little before you can climb up.
The Sphinx
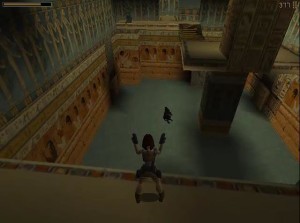
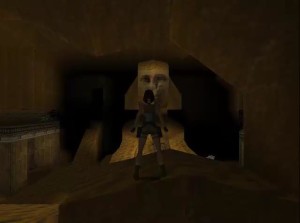 As soon as you climb up you’ll be attacked by a panther. Run to the edge of the sandy area and take a look at the sphinx. Running around down below is a mummy. Kill it before dropping down into the Sphinx area.
The Sphinx has a movable block in its chest. There’s a pool to the right and another door and ramp to the left.
First jump into the pool to pick up the 2 x magnum clips.
Get out near the palm tree. Climb up the blocks and run around until you are opposite the carved obelisk. Take a running jump to the obelisk and pick up the shotgun shells.
Drop down into the water and climb up the left side of the Sphinx to get behind it. You should be able to walk around the right shoulder of the Sphinx.
Behind the head you’ll find some shotgun shells and inside the head you’ll find the sapphire key. Return to the front of the Spinx and pull out the movable block. Climb over it and use the sapphire key to open the door.
Inside the Sphinx
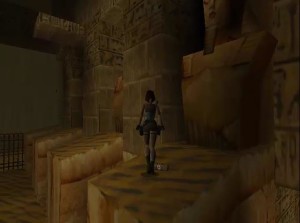 Enter the passageway and run all the way to the end. Turn right and climb up the first pillar. On top is a small medi-pack.
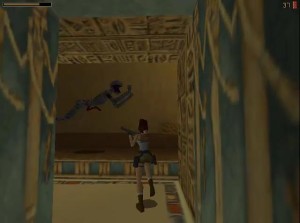
Jump across the pillars to the other side of the room. You can shoot the panther down below if you like.
Take a right and head up the passageway. Another panther will leap out at you.
Go as far as you can then turn left into a very large room with painted pillars to the right and a crocodile down below.
Kill the crocodile before jumping down. Before you go anywhere else turn around and follow the passage for a large medi-pack.
Head back to the large area and run up the ramp to the right until the boulder rolls down. Jump out of its way. This will make it easier later on when you need to jump down to there from above.
 Secret 1
Head to the back corner of the room and jump over the sloping sand to find the first secret.
Inside is a large medi-pack and some magnum clips.
Head out and jump into the pool to your right. Swim down the tunnel and pull the lever which opens the door at the end of the tunnel.
Pool Room
Swim through into a new area and climb up quickly before the crocodile sees you.

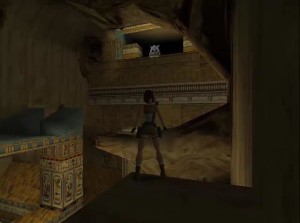
Climb up to the first ledge and find the movable block. Push it twice towards the podium/steps into the center of the room. Climb on top of the block and jump to the ledge seen in the pic to the left.
Once on the ledge climb up the steps to the hole in the roof and jump up. Pull the switch and drop back down all the way to movable block.
You’ll notice half a gold bridge has appeared above you now.
Push the block twice more until it hits the steps at the edge of the room. Pull it to the right. Climb over it and push it once more.
 You need to get it into a position so you can jump to the ledge with the other movable block on it.
Take a running jump to the ledge, climb up and push the block once. This will reveal another passageway to the left.
Head into this room and pull the lever, opening the roof above the gold bridge. Go back and push the movable block once more. Climb on top of it and take a running jump to the gold bridge.
From here jump up to the room above and pull the lever. You’ll see the floor around the cat altar collapse.
 Look out over the ledge and you’ll see you are now above the large area with the cat temple. There is an l-shaped rock ledge to the left so head over there and jump over to it.
Walk to the edge of the ledge and take a running jump to the rock in the middle.
Turn right and find the magnum clips right next to the center rock pillar.
Go back to where this rock ledge meets the wall and drop down. You’ll slide all the way down to a small medi-pack.
 Secret 3
Now turn right and take a running jump to the next rock ledge in the center of the room. Then over to the roof of the cat temple for some magnum clips.
Turn around and climb up the sloped block on the front right of the cat temple roof. From here take a running jump to the ledge for the second secret and some uzi clips.
If you triggered the boulder earlier you can now drop down onto the ramp safely.
The Cat Temple
Head to the cat temple and drop down the now open floor. In one alcove you’ll find some magnum clips before dropping down another hole. Drop down again into another room but don’t go in yet. Follow the ledge around to the left and pull the switch. You’ll see a part of the floor give way.
 Now walk back to the edge and drop down one step to the ledge below. You can safely kill the panthers from here.
Behind the cat statue to the left is an alcove with more magnum clips.
When you drop down more panthers will be released. This is the cat temple after all!
Head into the alcove where the panthers came out for a large medi-pack.
Secret 3
Climb up the grey pillar then jump up to the bridge. Walk across the bridge to the center and then take a running jump to the ledge with cat statue on the left. Behind it is the third secret with shotgun shells.
More panthers will appear so take them out before dropping down. Inside the tunnel they came from is a small medi-pack.
 The Empty Room
Climb back up to the bridge but this time don’t go over the bridge. Take a right turn into the tunnel instead.
Get ready with a shotgun because at the end of the tunnel you’ll be attacked by a mummy.
Turn right and jump up to the opening on the right side of the empty room. This will take you up a ramp to the room above this one.
On top of the block you’ll find a sapphire key. Jump off the block and run up the left side of the sand mound.
 This will take you to an area with small ledges.
Jump carefully across, pick up the clips and pull the lever in the alcove at the end.
Go back to the sand mound. The floor has opened and the sand fallen down into the room below.
Jump down, climb up the middle part of the sand mound now to reach the doorway beyond. Use the sapphire key on the door to end the level.
Continue to the next level, the Obelisk of Khamoon.