Level 12 (Sanctuary of the Scion)
Before climbing up the staircase pick up the loot to the left and right, two sets of magnum clips. As you climb up the stairs you’ll be attacked by two mutants. Up the top to the right are more magnum clips.
Climb up the blocks until you reach a new area above. Continue straight forward and climb into the alcove ahead for a large medi pack. Drop back down and slide down to the right. This is actually a large Sphinx.
 The First Switch
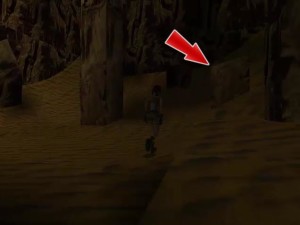
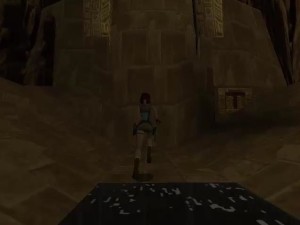
Pick up the magnum clips and kill the fireball-shooting mutant. Run ahead and turn to the right to climb up the small pillar to the right of the Sphinx. The pillar is shown in the pic to the left.
Jump to the next pillar to the front left. Then jump straight up to a rock ledge.
Running jump diagonally across to the next highest pillar. Turn around and running jump again to the slightly higher pillar.
Turn around and jump straight up to the rock walkway. Run forwards and around to the right, jumping through the chomping blades.
Pick up the small medi pack and continue forwards, jumping over the gap to the lever. Pull the lever which opens a gold door and then turn around to face the winged mutant that will attack very shortly.
Take a jump down to the pillar to the right of the switch with a large medi pack on it and then slide down back to the ground.
The Second Switch
 The next block you want to climb is the lighter colored block in front of the Sphinx’s left paw. Climb up turn to the right and jump to the next pillar.
Take a running jump across to the next pillar and climb up the block straight ahead. From hear jump diagonally across to the left to a slightly lower ledge and climb up the pillar ahead.
From here there should be a crevice to your left. Jump up and hang onto the crevice, working your way to the right. Go as far as you can and then drop down.
Turn right and climb up the rock. Turn left and climb up the steps around to the left. Jump across to the rock blocks along this wall. There’s some magnum clips you can pick up along the way. By now you should be able to see the switch you’re heading to.
Run around and pull the switch to open another gold door. Turn around and get ready for another flying mutant.
Secret #1
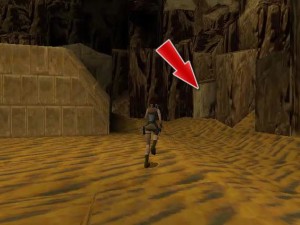
 This secret is rather strange because it is on an invisible ledge. Follow the ledges around beyond the switch. The first one has shotgun shells on it. You can see this in the pic to the left.
Pick up the shotgun shells and then do a running jump to the next ledge. There are some more shotgun shells here as well.
Do a running jump across to the next ledge. This is where you need to jump across to the invisible ledge.
If you look out towards the Sphinx you’ll see floating Uzis!
Position yourself exactly as you see in the pic below.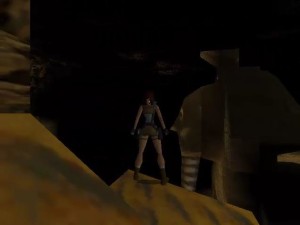
Hop back. Do a running jump and grab onto the invisible ledge. The invisible ledge with Uzis is shown below.
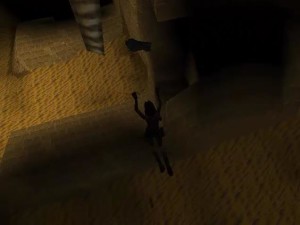
Pull up and grab the Uzis. Do a shift walk to the edge of the invisible ledge, hop back and do a running jump back to the ledge you came from.
Two flying mutants will attack. Now’s a good time to try out your new Uzis!
The First Ankh
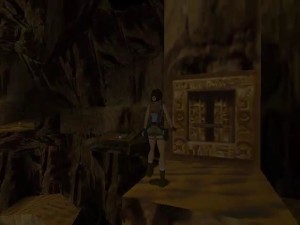
Jump down to a lower ledge and keep following the ledges along the side of the rock cliff until you can enter into the cliff face and find the Golden door. Inside you’ll find a pushable block behind a craved block. Run around to the right and push it forwards once.
Run around to the left and climb on top of it. Climb up the block to the left and enter the blue room with a centaur. On a pedestal is the first Ankh.
The Second Ankh
Head back out and slide down to the right to land on top of the back of the Sphinx. A mutant will attack you here. Slide off to the right once more and enter through the now open door.
 Up ahead is a slide leading down into water. Face your back to the slide and hop backwards. As you slide down grab the ledge and hold on. Shimmy over to the left and drop down to the ledge.
Pick up the magnum clips and jump up the wall in the corner. Continue up the blocks and turn left just before the stairs.
Dive into the water and come up at the left with some more large stone steps. Climb up and around until you reach the slide. Slide down and jump at the end so you can grab onto the bridge in the middle.
Pull yourself up and use the Gold Key on the lock to the right. This will open the door behind. A centaur stalks the room beyond and you don’t have much room to dodge on the bridge. When you’ve killed him run into the room and grab the second Ankh.
Go back out to the bridge. Turn right and head up the corridor with large stone steps. At the end turn right and drop down into the water. To the far left is another place you can pull up out of the water. Climb up the blocks and run around the corridor back out to the Sphinx area.
The Top of the Sphinx
Run around to the Sphinx’s left paw and climb up from the outside edge. Run along the leg and climb up the blocks over the Spinx’s shoulder to its back.
On the right side of the Sphinx is a block that looks like a ramp. Climb up it and move as far as you can to the left. Take a running jump to the broken block on the Sphinx’s head. On the top of the head at the back is a place for you to use the Ankh. The second Ankh can be used on the front side of the top of the head. Move to the front and drop down to find the second location.
The Giant Statues
 Once the two Ankhs have been placed the door between the Sphinx’s paws will open. Slide down either side carefully and run around to the open door. When you go through the door you’ll drop down into a large pool.
Dive down and you’ll see two enormous statues. Facing them, the one on the right is where you want to go. Dive all the way down between its feet and pull the lever. This will open the gold door and you’ll be sucked through.
When you emerge climb up and jump up to the smallest pillar (the only one you can climb up on). Jump across to the next one and then over to the stairs.
Follow the path around and then kill the flying mutant that attacks you at the exit. You’re now above the statues and the water has been drained. You need to get down somehow.
Drop down to the left. Drop down once more and then take a standing jump. You should land by the ear of the right statue.
From here jump backwards and hang onto the ledge. Drop down and do this once more, stepping backwards, hanging onto the ledge and dropping down.
 Climb over a small block and head towards the water. Dive into the water and swim over to the lap of the right statue.
Pull the lever and dive back into the water. This time go through the door that opened at the feet of the left statue.
Come up at the opening and run up the corridor, around and around.
Eventually you’ll reach the top where you’ll find a Scarab. When you pick up the Scarab the gate will open. This takes you back to the beginning of the level but now there’s a centaur and a mutant waiting for you.
Run over to the gate on the left and use the Scarab. Run down and jump up to the opening on the left. Drop down into the room beyond and get ready for a battle with Larson.
Kill him once and for all this time and run up the stairs to grab the Scion.
Watch the cutscene and continue on to Atlantis for Level 13 – Natla’s Mines.