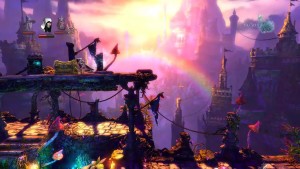
Searock Castle (Level 10)
After traveling through dark and murky caves and swamps it’s a bit of a relief to see the ocean side in the light of the morning sun.
Experience Points: 130
Monster Points: 40
Level Secrets: 2
Searock Castle
If you have the frozen arrow ability you can make ice rafts across the ocean. There are many experience points below the water so you may want to check there first before jumping across. You can also shoot down the fruit or giant coconuts from the trees. They float in the water.
I won’t go through the entire level, just point out the main areas and puzzles so you should have no trouble making it through to the end. And of course I’ll point out the locations of the two secret chests.
Make your way to the right over the oceans until you come to a crab. At the end of this platform is a button that operates the flappy platform.
You can place a box on the button or have wait until the crab walks on it to jump across. As a side note crabs hate boxes and will destroy them if they can. Continue jumping over the rock ledges to the next checkpoint.
Here you’ll find a flamer just by a button. The flames will destroy Amadeus’ boxes so you’ll have to bring over one of the coconuts and place it on the button. This will operate the flappy platform and allow you to jump up.
In the next area you’ll be faced with a goblin with two flaming swords. You should know how to take him out by now. Once you do you can pull the lever and open the gate.
Get to the next checkpoint and time your way across the platforms that are spinning around a metal pole. Down below are some pipe pieces. You can fit these together to give you something to walk on and help you across this gap.
Once across you’ll come to a bridge that breaks when you walk over it. It’ll drop you into the ocean below. You can push the boulder to the right under the water to block up the strong flow of water so you can get down to pick up some experience potions.
Exit the ocean to the right up the stairs and prepare for another goblin with fire swords. There’s a checkpoint here as well. Before continuing on check out the rock platform above the ocean for the first secret chest. Inside is a collectible painting.
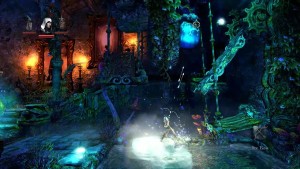
To the right of the checkpoint is another water area with fireballs. Use the Zoya’s ice rafts to get across.
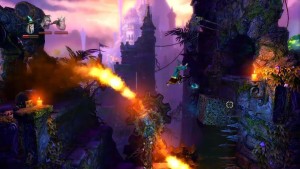
The next part is quite tricky and involves a large gap with spinning flames. You’ll somehow need to get across here. Place a box on the spikes to the right and then jump onto the flame thrower and onto the box to get across.
Run across to the checkpoint and then pull the lever for the elevator which takes you all the way down and drops you into the ocean.
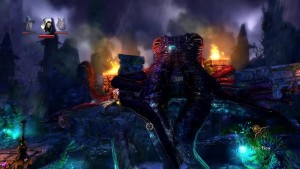
Follow the ocean floor to the right. There is a place where you can come up for air if you need it. Keep going to the right and avoid the sea serpent before coming up where a Kraken resides.
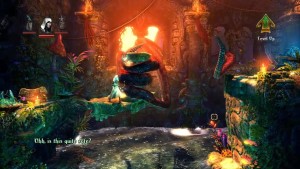 The Kraken is fortunately holding on to a platform so you can jump across to the second secret chest of the level. This one contains the collectible poem for this level.
Now jump to the rock platform to the right and down to the next checkpoint. Break the rocks to the far lower right to fill this area with water. Now you should be able to jump up the rock ledges and over to the right.
The next area has spikes and three swinging blades.
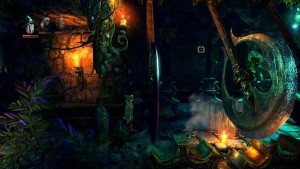
Run across to the next checkpoint and outside to were a storm is raging. Kill the goblins and make your way up the rocks to the right into some kind of study.
After trying to pull the lever you’ll realize the gears are stuck. Destroy the TNT and then break the box that is holding up the gears. Read the poem in the next room and then drop down.
Time your way across the fireball room and then out to the bouncy starfish and past the crabs to the Kraken.
Jump from one platform to the other when you can and then across to the other side. Once you enter the room with the beautiful picture of the Lady Rosabell you’ll be attacked by goblins.
Move into the next area after defeating the goblins and once again break the rocks to the lower right to let the water into this area. Time your jump across the spinning platform to the next checkpoint.
Past this checkpoint we have another water puzzle.
Make an ice raft for Zoya, switch to Amadeus and pull the platform open. Quickly switch back to Zoya and shoot the water bulb. Switch back to Amadeus to keep the platform open so the water runs down to the sparkly ground.
You can now jump up the bouncy leaves to the next checkpoint. Once reaching the top there is one small problem, the Goblin King!
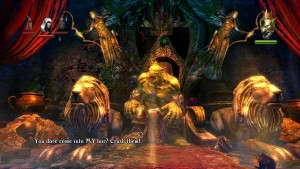
Once you’ve defeated the Goblin King the rock wall to the right will collapse allowing you to go through to read the letter. Follow the Trine down into the cellars to end the level.
Head on to the next level, the Eldritch Passages.