
Main Street Showdown (Jurassic World)
Back to Jurassic World Main Page
Main Street Showdown
Follow the translucent studs up to the Innovation Center. Use Claire to activate the monitor so that Owen can climb up the wall. Push off the skeleton and have Gray assemble the bones into a ladder. Claire can now climb up and use the console to open the door to the Innovation Center. Go through for a cutscene.
Innovation Center
When you enter walk to the right and have Claire use the monitor on the wall. Owen can then climb up the climbing wall to the pipe above. Shimmy across to the left and it will break and blow away the sand.
Switch to Gray and assemble the bones into a ladder. Climb up to the floor above. Have Claire use the console to the left to open the vault. Owen can go inside and cut the rope. This break the large DNA display.
Put the pieces together to make a spinner. Pull it back and the hammer will release, breaking the display and revealing a hatch behind it.
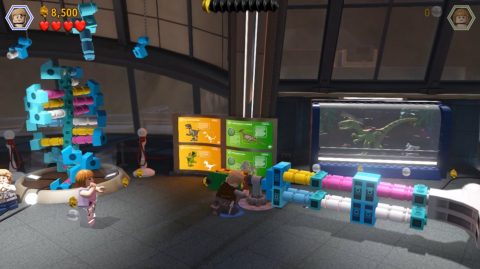
Gray can crawl through the hatch to the room to the right. Break the display in the center and use the pieces to fix the tiles on the display to the left. Switch to one of the other characters and push the display in so everyone can head to the right.
Use Zach to sneak behind the Raptor and enter the dark room at the back.
Fight off the Raptor and then power the generator at the back of the room. A hologram will turn on and distract the Raptor. Head down the spirals staircase and another Raptor will break through the double doors.
Switch to Owen and use the camouflage to sneak past the Raptor. Break the pieces on the other side and assemble it into a catapult. Turn the wheel to throw the pizza and distract the Raptor.
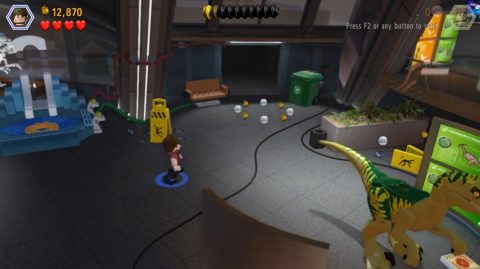
Have Zach repair the console and a giant hologram will appear in the center of the room. Everyone will escape the center and bump into three friendly Raptors.
Amber – Mosasaurus
Use the access panel to the left of where you start this area to open up a new room. Go inside and stealth past the camera. Use the console to open the cabinet and grab the Amber Fossil
Minikits
1: Use the security panel on the wall to your left to release some bricks. Assemble them into a minikit.
2 (Free Play): In the same room where you get the Amber solve the equation on the board for the minikit.
3 (Free Play): in the same room as above use the hacking station to the left and complete the DNA sequences.
4 (Free Play): Continue left in the secret room. Destroy the 3 incubators and rebuild them into two incubators for a minikit.
5 (Free Play): In the main room find the dig spot on the back wall and dig up a minikit.
Boardwalk Showdown Part 1
Walk to the right and break the bench. Put the pieces together to make a Raptor switch. Have the raptor pull out the switch to open the door. Send Zach into the dark room and press the red button at the back to turn on the lights.
Send Gray through the Duct to the top area and jump across to the photo spot. Take a photo to distract the Indominus and he’ll break the glowing pillars.
Put the parts together but you’ll need more pieces to finish the cannon. Have the Raptor follow the scent from the little Triceratops and uncover more pieces. Put them together and boost Gray up to the pillar.
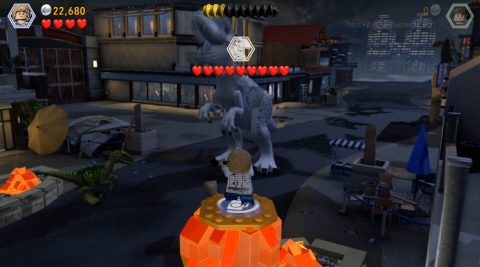
Take another shot and the Indominus will break the pillars on the other side. Put them together to finish the cannon and hop onto it. When Indominus roars at you shoot the item into its mouth.

Switch to the Raptor and attack the Indominus. When it’s stunned for a few seconds quickly use the jump attack that you do to jump up to the high switches. Indominus will then roar at you a few times so jump over the breath twice and switch back to the cannon.
Repeat this process until Indominus runs out of health. You’ll get a cutscene and the T-Rex will join in the fight.
Minikits
6 (Free Play): Break the cracked door on the left side of the street.
7 (Free Play): When you’re up on the roof break the glass to the left for the minikit.
8 (Free Play): Shoot the 3 Pterosaurs to get the minikit. One is to the the right, one to the left and the other to the far back left. You may need to be on the photo spot to see it.
Boardwalk Showdown Part 2
Switch to a Raptor and follow the scent from the bin on the left side. It will take you to the large blue bin. Dig up the pieces and put them together for a Raptor Switch. Jump up to grab it and break the screen. Put the pieces together to make a ladder and climb up to the rooftop.
Have Claire jump on the lift and Owen dig through the droppings to find a crank. Use the crank on the lift and turn it to lift up Claire. She can then slide down the wire.

On the other side use the console to fold out the awning. Have Owen climb up and then climb up the wall. Up the top he can cut the rope which drops the sign and electrocutes the Indominus. Switch to the T-Rex and follow the prompts try and win the fight.
The Indominus is too big so the Raptors will have to help. Pull out the Raptor Switch to the right to open the door. Then flip up to the roof and stand on the awning near to the Indominus. Jump on it and watch the fight.
Follow the prompts once again to push the Indominus back near the edge of the street. Once it’s close enough it’ll get taken by the giant Mosasaurus.
Enjoy the final cutscene! Congratulations on completing LEGO Jurassic World!
Minikits
9 (Free Play): Repair the vending machine on the right side for this minikit.
10: Investigate the dung pile just near the vending machine and put the pieces together for the final minikit.
Next: All Dinosaur Locations
Back: Under Attack
