
Part 10 – Two Moons
Back to Blasphemous 2
Fast travel to the Elevated Temples. To reach Two Moons we’ll need to travel to the eastern side of the area.
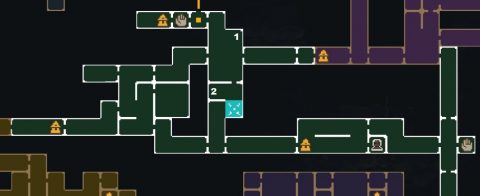
Elevated Temples

From the Portal Room head to the left, up, and then around to the right until you reach the Shrine before the Chapel of the Five Doves. Go straight through to the other side.
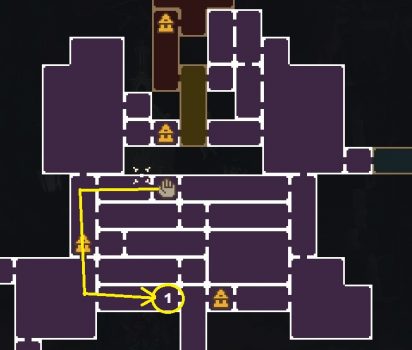
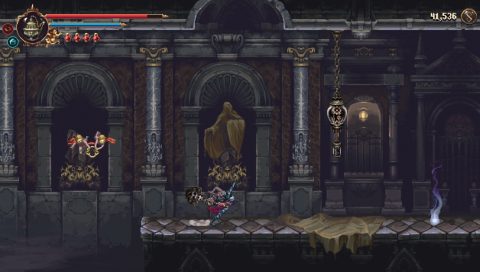
On the other side continue through the room and take the right exit. Go down the first ramp and then double-jump and dash up to the climbable wall. Jump back to free Cherub 24/33 (1).

Continue across to the right and up the ladder. Break the glass mechanism to open the gate and run along the higher walkway back to the left.
Take the exit to the left and ride the angel ring up. Take the exit above and go to the left. Use the mirror to get up higher and smash down to break the wall. Jump up the mirrors on the left and take the exit to the top right.
Walk to the right and smash down to break the breakable floor. You’ll drop down onto the Sarmiento and Centella Upgrade (2).
Take the exit to the right. Hit the glass mechanism to lower the ladder and slide down. Hit the next mechanism to open up the shortcut back. Run to the right and dash through the blue chains.
Continue as far right as you can, teleport up the mirror to the angel ring.
Continue across the rings until you can land on the small ledge with the Silver-Clad Crystal Shard.
Drop down and dash back through the blue chain. Take the ramp down and then go through the lower right exit. Across the gap you’ll find 5000 Tears.
Continue to the right to enter Two Moons.
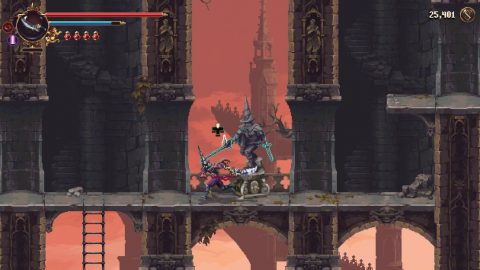
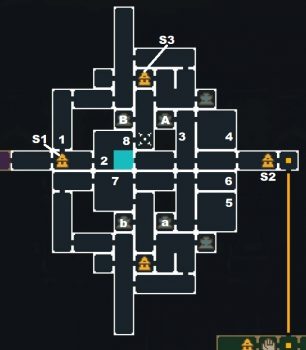
Two Moons
Two moons is a large area that’s mirrored. The top half is the right way up and the bottom half is upside down.
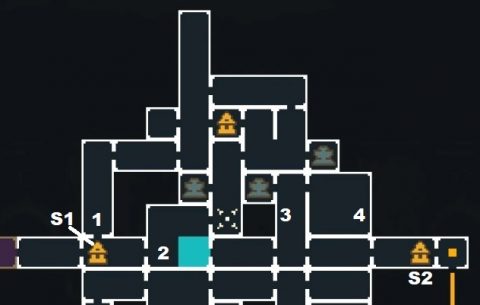
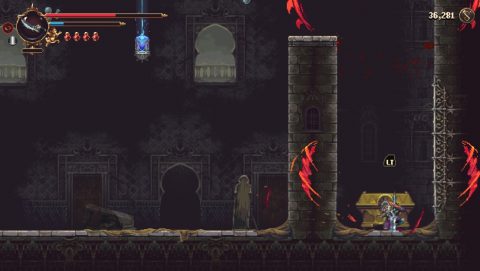
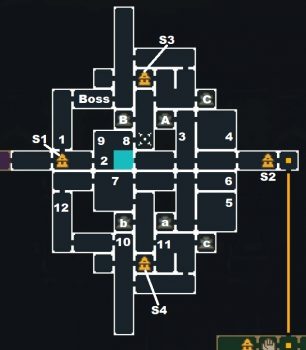
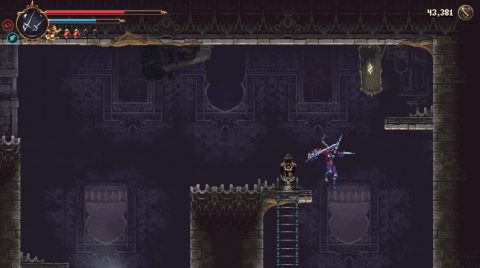
Head to the right for the first Shrine (S1). Climb up the ladder to the left of it to find an Altar with 1800 Tears (1). You can’t go any further in this direction so drop back down to the Shrine.
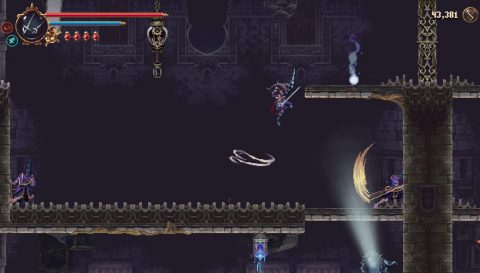
Take the exit to the right, dashing through the blue laser along the way. You’ll get trapped in this room (2) and won’t be able to leave until you defeat all of the enemies.
If you leave and go to the shrine and come back you’ll notice that a priest, two floating skulls and a giant spawn here. You can use them to grind for Tears if you want. Use Debla to kill the priest and defeat the other enemies. If you damage but don’t kill the skulls they’ll clone themselves, giving you even more tears. Quickly return to the Shrine and come back to respawn them.

Continue all the way to the right and you’ll get stuck in another room for a battle. Head right once more to Shrine (S2). Head to the right and take the lift down. We’ll pick up a few things nearby before exploring the rest of Two Moons.
Choir of Thorns
The gate to the left is locked so take the exit to the right. Drop down and double-jump and ash across the thorns. On the other side you’ll find the Aubade to the Sleepless Iron prayer (1).
Drop down and take the exit below. Jump through the blue chains to the left and hit the wall. You’ll find Sister #6 (2).

That’s all for now so climb all the way back up to the lift and ride it up to Two Moons.
Two Moons
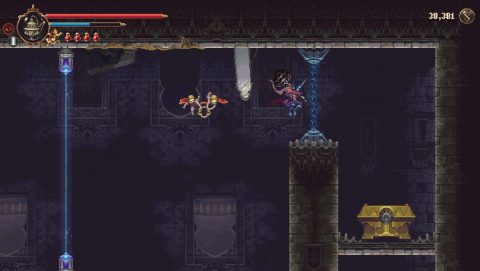
Head back to the left, climb up angel rings and platforms. Drop down on the left side. Enter the secret room for an Altar with a Mark of Martyrdom (3).
Take the exit to the top right. Ring the bell and dash past the lasers to the platforms. On the right side, after smashing through the breakable floor, you’ll find the Pewter Tears Rosary Bead (4).
Go back to the right two rooms and interact with the Fountain (A). You’ll be in the upside down section with Fountain (a).
Go to the right, interact with the statue and bring the platform all the way to the bottom. Don’t climb it yet. First take the exit to the right and navigate past the lasers using the angel rings. In a chest on the other side you’ll find the Sphere Kissed by the Storm Rosary Bead (5).
Go back to the left and then jump up the platform. Take the exit at the top right, interact with the statue and slide under the door before it closes for 1800 Tears (6).
Now go back to the left and take the exit to the left. In the next room gates will close on either side and you’ll have a battle with some smaller enemies. Take them out and continue to the left.
There’s a Cherub 25/33 (7) all the way to the left. If you double-jump and dash or use the Bleeding Miracle prayer you’ll be able to reach it.
When you drop down take the exit to the lower right. Drop down, go to the left and interact with Fountain (b). You’ll teleport to Fountain (B).
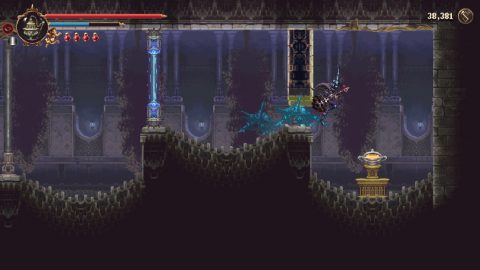
Go to the right and drop down. Take the exit to the right and break the glass mechanism (8) to open up a shortcut. Use the angel rings to jump across to the top left side of the room where you’ll find Cherub 26/33 (9).

Jump back across to the top right and head back up the tall room past the Fountain (B). Take the exit at the top right and then up to the left for Shrine (S3).
Exit to the left and drop down. You’ll see Yerma at the bottom but a glass mirror stops you from getting to the boss room.
For Yerma to help you this time she’ll need some Holy Oil. We’ll pick it up immediately before doing anything else. Use the Return to Port prayer to go back to the City. Fast travel to the Elevated Temples.
Elevated Temples
From the fast travel room go to the left, drop down and take the fourth exit to the right. Jump across the angel rings to the right side. Break the glass mechanism to open up a shortcut and grab the Holy Oil of Everlasting Ointment (1).
Two Moons
Make the trek back to Yerma and give her the Holy Oil. Now we just have to figure out how to remove the mirror.
Climb up the room on the left side to the top. Smash down on the right side to break the breakable wall and glass mechanism to lower down the ladder. Take the exit to the right.
You’ll get trapped in the corridor for a battle with some smaller enemies. This one is pretty tough. Take them all out and drop down to the right. Drop down to break the glass mechanism and open the shortcut. Then take the lower right exit to Fountain (C).
Interact with the fountain to teleport to Fountain (c). Exit to the left and take the exit below. Dash past the lasers to the left and head out to the tall room to the left.
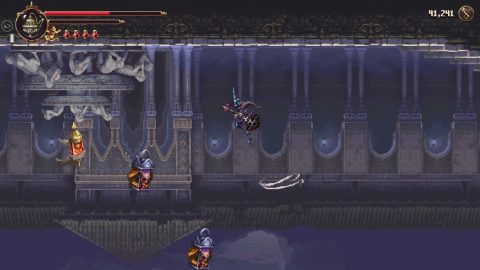
Drop down to the bottom, clear out the enemies and ring the bell. Quickly climb up the platforms to the first room on the left before the door closes. You can’t do anything here yet. Continue to the top of the tall room and break the glass to lower down the ladder. Break the glass mirror in the top right corner and use the Chimes prayer to reveal Hidden Symbol #4 (10).
Drop down and ring the bell again. Climb up on the right side and drop down to smash the floor and break through the wall leading to Shrine (S4).
Take the exit on the right side and climb up for a Wax Seed (11).
Break the glass mechanism here and in the room to the top left to open up shortcuts. Return to the top of the tall room (10) and take the exit to the left.
As you run through this dark room you’ll meet a girl and the mirror to the boss room will disappear. Continue to the left and use the bell to make your way up the next room. Towards the top you’ll find an Altar with a Mark of Martyrdom.
Continue up and take the exit to the right. Break the glass mechanism to lower down a ladder and make your way to the lower right and left to find Fountain (b). Activate it to teleport to Fountain (B). From here make your way around to the boss room.
Svsona Boss Fight
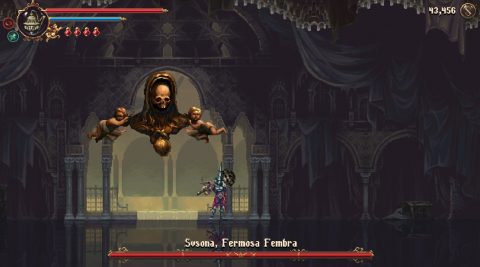
Svsona is an interesting boss fight with just a few attacks. Once you figure out how to avoid them the fight should get easier.
For the first attack Svsona will let out a beam of energy. You’ll need to hide under the platforms that appear. Later on in the fight fewer and fewer platforms will appear.

For the second attack Svsona will release balls of electricity that need to be dodged. For the third attack she’ll send out electric walls that you’ll need to dash through. I like to use the prayer with the poison mist to do tons of damage while Svsona is sitting still.

After the battle Yerma will give you Zejel of the Cruelest Thorn Rosary Bead. You’ll be rewarded with 4 Marks of Martyrdom and the Mirrored Key.
Once again you’ll enter the dream to release a dove. This should be the final dove. After the dream exit to the left. Drop down and break the glass mechanism to open the shortcut back to Shrine (S1).
There’s one more thing to do while we’re her. Return to Fountain (A) and interact with it to teleport to Fountain (a). Head to the right and interact with the statue. Move the platform up by the breakable wall.
You can’t climb up this way so you’ll need to go back through the fountain, then through Fountain (B) to Fountain (b). Climb up, head to the right and enter the statue room from the top. Smash down onto the platform to break the wall.
Inside you’ll find a Fervent Kiss. Return to the City. That’s all for now. Next time we’ll be doing some shopping in the Streets of Wakes.
Next: Streets of Wakes
Back: The Severed Tower
