Part 5 – Beneath Her Sacred Grounds
Back to Blasphemous 2
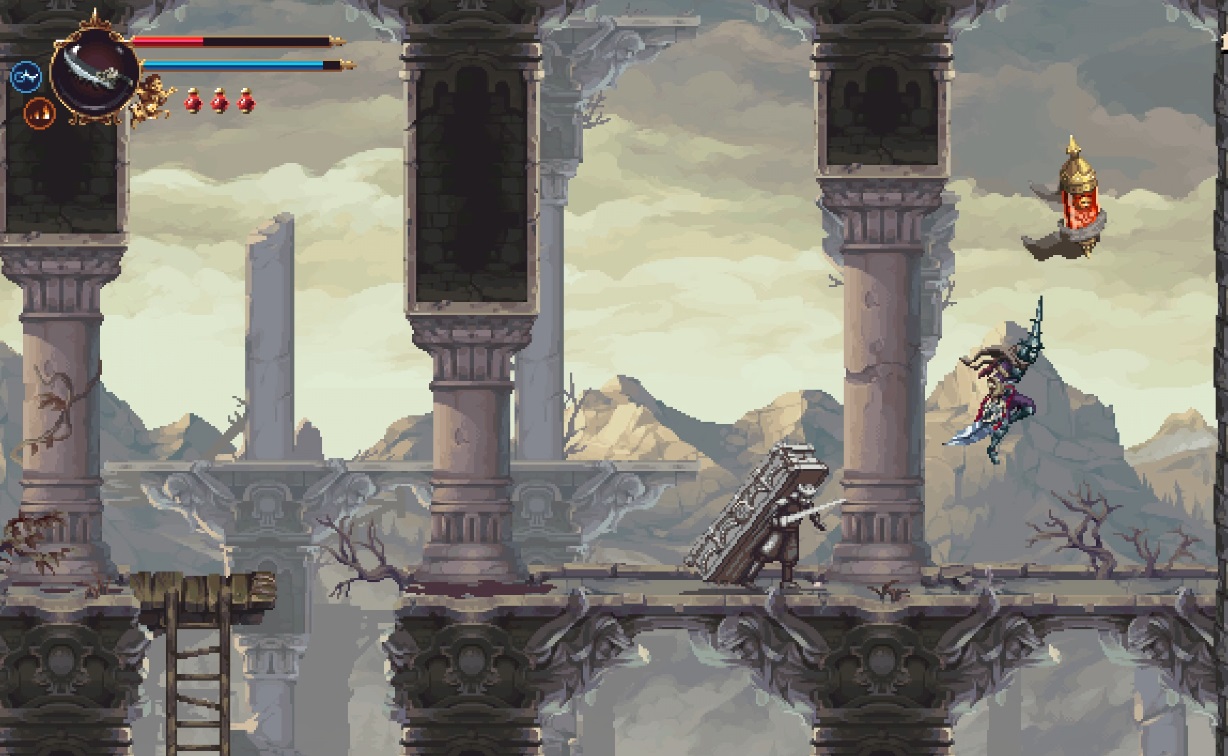
Profundo Lamento
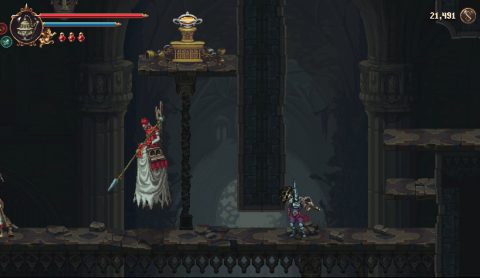
Drop down into Profundo Lamento and make your way towards the bottom of the area. By now you should have Veredicto so stop by the Shrine and ring the bell to the right of it. The door will open so you can free Cherub 11/33 (1).
Use the mirror to get through the gate, take out the big enemy and then climb down the ladder. Make your way down to the bottom of the tall room, avoiding the spikes along the way. Take the exit to the left at the bottom.
Mother of Mothers
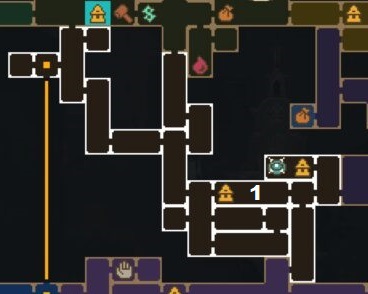
Drop down the ladder and you’ll be able to go left or right. We’ll go to the left first to find the Shrine (S1).
Take the exit to the left. You can’t reach the Altar on the platform yet so continue to the left, taking out the enemies if you wish.
Take the exit to the left, climb up and go left again. Break the wall here (1) and you’ll open up a be back at the beginning of the Sea of Ink.
Head back to the right, climb up and take the upper right exit to the Portal Room. If you continue to the right you’ll be in the Hidden Symbol Room (2).

Open the chest for the Chime of the Twisted One prayer. You can use this prayer to reveal hidden symbols around the world. There are 10 in total to find. Once you’ve found them all come back to this room for an Altar filled with Tears. We’ll do this before facing the final boss so we can purchase all items from the shops.
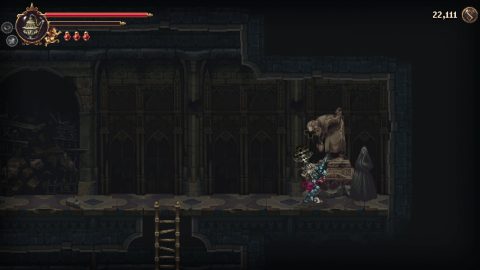
Return to the Shrine (S1) and go to the right. Continue to the right past the ladder. Go all the way to the right into the next room and break the wall on the right (2). You’ll reveal Sister #4.
Climb down the ladder, go to the left and drop down the stairs to the bottom. Take the exit to the left and ring the bell. Quickly jump up the platforms and climbing walls where you’ll find the prayer, Martinete of Forge and Thunder (3).

Exit and climb back up the staircases. Take a left when you can. There’s a cherub above but you can’t reach it yet. The Altar to the left can be reached. Drop down and ring the bell below. Then quickly jump up the platforms to the Altar (4).

Inside you’ll find 800 Tears. From here return to the bell, ring it and drop down to take the second lowest exit to the left.
Use the Statue (5) on the left to move the platform in the room to the left down. Climb up the ladder and take the exit to the left. Climb up and hit the glass mechanism to open the gates above. This gives you a shortcut back up to the shrine.
Climb down the ladder and take the right exit. Jump onto the platform you lowered and then up to the ledge with the chest. Inside you’ll find 1 Marks of Martyrdom (6).
Go back to the left, climb the ladder and take the left exit. Use the statue to lower the mirror.
Before you use the mirror drop down and climb down the ladder. Break the wall to the left for Lips of the Golden Mask Rosary Bead.
Climb back up and use the mirror to teleport through the gate. Climb down the ladder on the other side and take the exit to the left.
Continue to the left and use the mirrors to teleport through the gate.
Land on the platform and jump across to free Cherub 12/33 (8). Clear out the enemies in this room before activating the statue and running through the door. Use the mirrors to make it to the door in time.
Run to the right for Shrine (S2). Walk to the right to the dead tree and use the prayer, Chime of the Twisted One. Hidden Symbol #1 will be revealed.

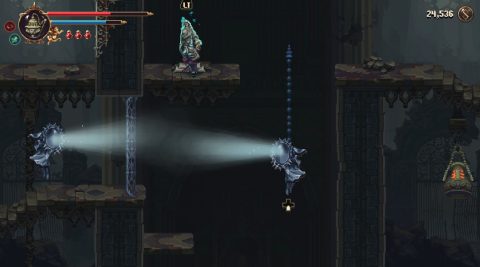
Take the exit to the right. Hit the bell and go through the door above to open up the shortcut. Go right again and use the bell. Climb up the platforms, use the mirror and smash the floor on the other side. There are more mirrors and bells.
Ring the bell and go through the lower door on the right. Use the mirror to teleport up and break the glass mechanism. This opens the door above. Before going through drop down and climb up the wall and ladder on the right. Take the exit to the right for 2000 Tears.
Break the glass mechanism to open up a shortcut. Go back and use the statue. Quickly use the mirrors to teleport across to the left and ride the statue up. Break the glass mechanisms to open up shortcuts and take the exit to the left.
Break down through the breakable floors and you’ll land in the area below.
Beneath Her Sacred Grounds
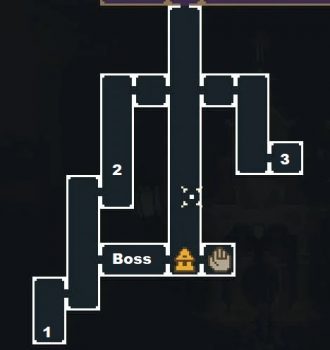
Make your way down the spiked room all the way to the bottom where you’ll find this areas only Shrine. To the right you’ll find the Portal Room so you an warp back to the City if you need to. To the left you’ll find Yerma waiting to help you out in the next boss fight.
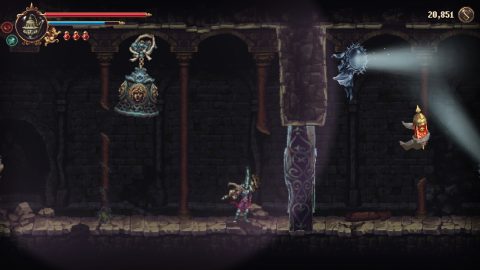
Afilaor Boss Fight
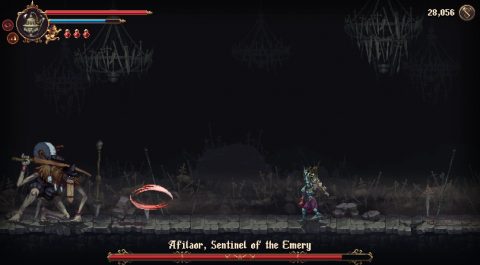
Afilaor has a few attacks and changes them slightly towards the end of the fight. He will spin around like a spinning top and charge towards you. Towards the end of the fight he’ll charge back and forth three times. You can slide past him without taking damage.
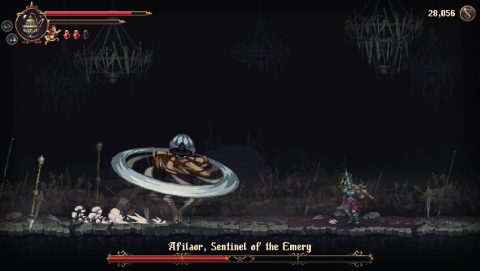
Afilaor can also jump to the background and rain down swords. Try to dodge out of the way. He can also perform a slice with his sword or a ground smash.
Lastly he can fire daggers around the arena. You’ll see a line where the daggers will fly so they’re easy to dodge.
Once Afilaor’s sword turn’s orange you know he’s almost defeated. After the battle you’ll be rewarded with 2 Marks of Martyrdom.
You’ll teleport to the Chapel of the Five Doves in a dream. Climb up and chat with the NPC. You’ll need to take out the five bosses to free the five doves. This is the first boss.
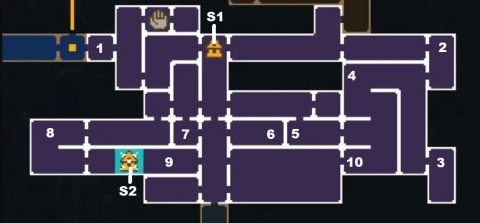
From the boss arena go to the left and drop down. Go left again and take the Passage of Ash ability that gives you a double-jump.
Start climbing up the rooms using your new ability. At (2) double-jump across to the left to free Cherub 13/33.

Keep climbing and take the exit to the right. Break the wall to the right and you’ll be back in the tall room with spikes. Take the exit across the other side to the right.
Take out the giant Fire Knight if you want, then continue to the right. Make your way down the room and jump across to the mirror. Use it to teleport above the breakable wall and smash down to break through. To the right (3) you’ll find an Upgrade for Ruego Al Alba.

Return to the tall room and climb down if you want the Marks of Martyrdom that you couldn’t reach the first time. Then climb all the way back up to Mother of Mothers.
Mother of Mothers
Take the first exit to the left. Use the mirrors to jump up and ring the bell. Drop down, climb up the platforms and slam down to break the wall. Behind it you’ll find the Immaculate Mother of Pearl Gouge.

Return to the City of the Blessed Name.
Next: Elevated Temples
Back: Choir of Thorns & Crown of Towers