
Part 7 – Basilica of Absent Faces
Back to Blasphemous 2
Crown of Towers
From the Portal Room in the Crown of Towers take the exit to the left. Jump up the platforms. and take the exit above to the right. You’ll find the Moving Merchant by a light bridge leading to a new area.

The Moving Merchant is selling the Debla of the Lights prayer. This is a useful and powerful prayer for some boss fights.
Run along the light bridge and you’ll enter the Basilica of Absent Faces.
Basilica of Absent Faces
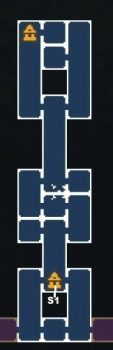
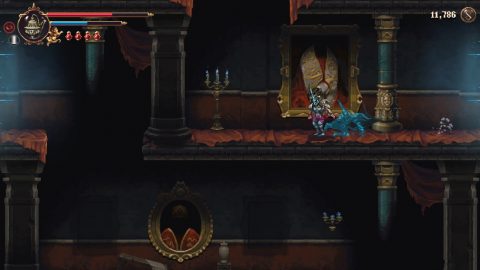
The path to the right is blocked off by a gate so the only way to go is up. Watch out for the paintings as some of them will come off the wall and attack.
Some of the rooms in the Basilica will wrap around. You’ll see the sparkles on either side of the screen showing you which sides connect.
Climb up and then take the exit to the right for Shrine (S1). First go to the right and drop down.
You can’t reach the Altar yet and the gate to the left is closed so take the exit to the right. Run across the light bridge and you’ll be back in the Crown of Towers. We’re picking up an important ability before continuing.
Crown of Towers

Smash down to break the breakable floor. Do it again to break the next floor and wall. Take the exit to the lower left.

Use the mirror to teleport past the gate and run to the left for the Mercy of the Wind ability (1). This ability lets you dash through the air. Jump up and dash through the blue chain to return to the previous room.
Make your way back across the light bridge to the Basilica.
Basilica of Absent Faces
Climb up to the Shrine (S1). Use your new aerial dash ability and the wrap around room effects to make your way up the room.
Take the exit first to the left. Dash through the blue chains and open the chest for the Scratched Face from the Canvas Rosary Bead (2).

Go back and take the exit to the right. Dash through the blue chains and use the statue. Quickly make your way up to the door before it slides shut. Take the top exit to the left and you’ll get trapped in the room. Kill the enemies and take the exit to the left.
In this room ring the bell a couple of times, wrap around to the other side and jump up the platforms.

Climb up as high as you can and smash through the breakable floor. Take the exit to the right. Climb up and wrap around to the right side. Drop down and take the exit to the right. Jump across the gaps and grab the Unfinished Lullaby (2).

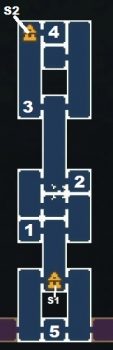
Jump back to the left and climb up to the top of the room. Take the exit to the top left (3).
It’s easier to clear out the enemies first, then ring the bell so you can climb up the platforms. Hit the bell a few times to keep all the platforms active. Use the mirror to reach Shrine (S2) up the top and break the glass to activate a platform that you can ride up next time.
Run to the right for the boss fight.
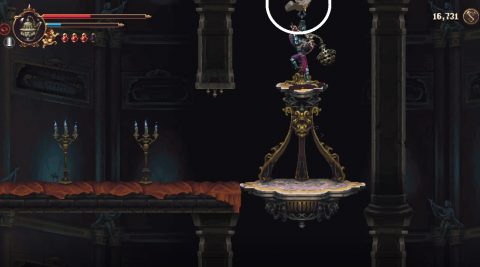
Benedicta Boss Fight
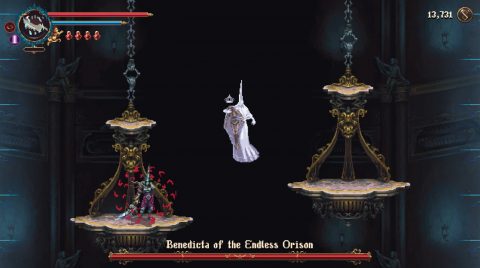
This boss fight takes place on two hanging platforms. I like to use Veredicto as the mace can still hit her when she travels under the platforms.
Benedicta has a few main attacks. During the lightning attacking she’ll pause briefly before sending out an arc of lightning in front of her. She’ll also release faces like marbles that will track towards you. Jump over them or use the sides of the room to switch to the other side.
For the third attack Benedicta will send out a spiked prism from on side of the screen to the other. These are fairly easy to dodge at first but later more and more of them will appear.

Once Benedicta is below half health she’ll break the chain on one of the platforms. Make sure you’re standing on the other one or the fight will be over.
You’ll need to use aerial dash and double-jump if you still want to wrap around the sides of the screen but I find it’s best to stay in the center.
After the battle you’ll be rewarded with 3 Marks of Martyrdom and the Key of Endless Orison. When you enter the dream climb up to the top and chat with the NPC. Another one of the doves will be released.
After the dream will be back at the bottom of the area (5) but a lift have appeared. Ride it back up to the top. Directly above it you’ll find Cherub 18/33 (4).
Return to the City.
City of the Blessed Name
Drop down through Profundo Lamento and take the lift down to the Sea of Ink. A bridge will have appeared that wasn’t there before, allowing you to get across.
Sea of Ink

Double-jump and aerial dash across the first gap and you’ll be at Shrine (S1). Continue across the platforms until you meet the boss of this area, Odon (1).
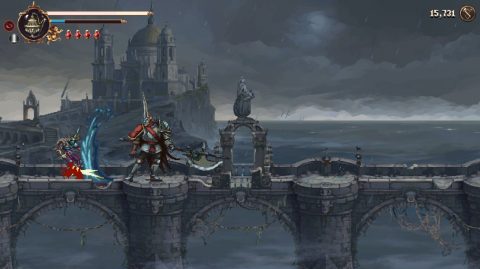
Odon likes to send out waves of water when he attacks. This can either be a regular swing attack or a jump and slam attack. He’ll also send out waves of water with spears that you’ll need to jump over. Luckily his attacks are fairly slow. You’ll have enough time to stand next to him and use a prayer like Debla of the Lights.
For this confrontation Odon is more like a mini boss and will run away once he’s taken too much damage. You’ll see him again later for a real boss fight.
Exit to the left and jump across the platforms. Near the exit of the Sea of Ink (2) you’ll find both Cherub 19/33 and Hidden Symbol #3.

Use the Debla prayer to free the Cherub, then cast the Chimes prayer to reveal the hidden symbol. Go to the left to enter the next area.
Next: Sunken Cathedral & Labyrinth of Tides
Back: Elevated Temples
