The Hall of Seasons I
Back to Angel of Darkness
Open the door and go through a short entrance with four receptacles in the walls. These are for the Crystals representing the four elements that you you’ll find in the chambers in this area.
The main room has four buttons in the center, each representing one of the elements, with many doors around the exterior. An Undead Knight guards this room. Each button takes you to a chamber associated with that element. If you can make your way through it you’ll find the crystal. You can complete the chambers in any order.
When you stand on a button three doors will open. Two of them, when you pull the Lever inside, will open a trapdoor that sends you down to the basement. The third will open the door leading to the chamber. The correct doorway is the one that has the same symbol over the Lever as the Button you stood on to open the doors.
Open the door and go through a short entrance with four receptacles in the walls. These are for the Crystals representing the four elements that you you’ll find in the chambers in this area.
The main room has four buttons in the center, each representing one of the elements, with many doors around the exterior. An Undead Knight guards this room. Each button takes you to a chamber associated with that element. If you can make your way through it you’ll find the crystal. You can complete the chambers in any order.
Neptune’s Hall (Water Symbol)
After stepping on the Water Symbol Button go through the left door and pull the Lever. Head through the door into Neptune’s Hall. When you enter the first room a Fire Knight will start hurling fireballs at you. You can dodge them or lure him close to the pit and knock him over the edge with one of your weapons to get rid of him permanently.

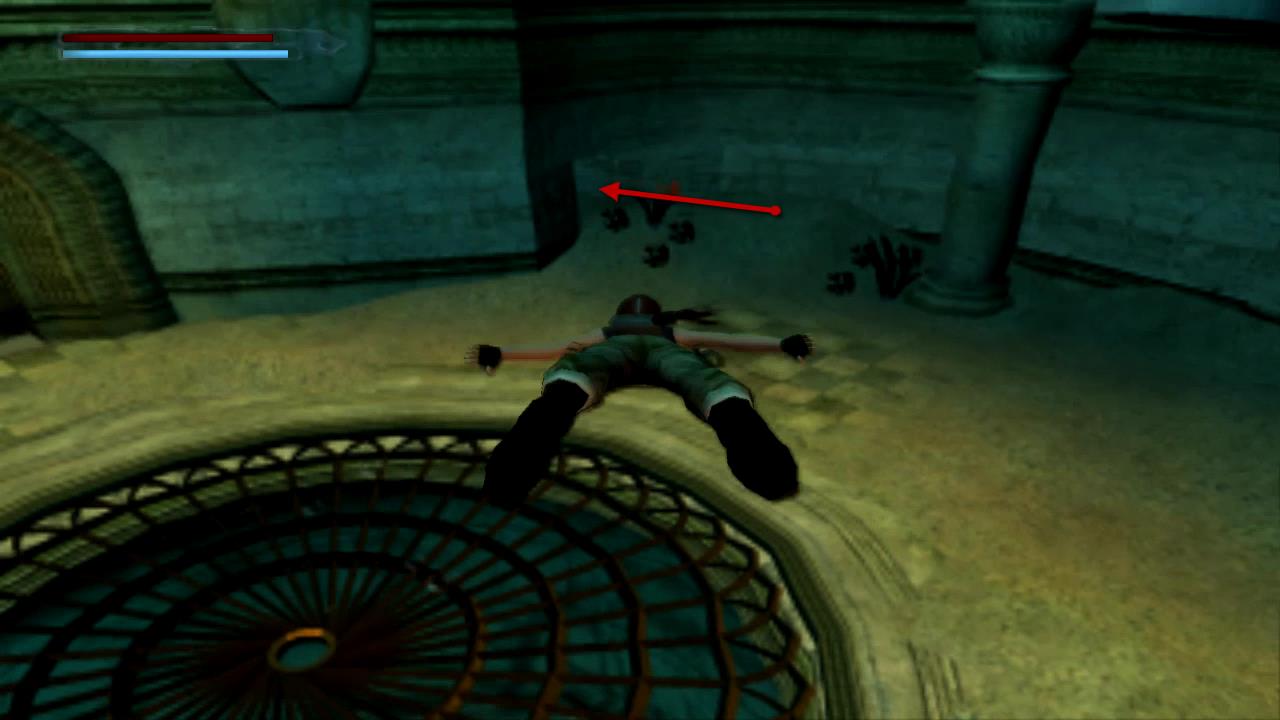
Search the corners of the room for 2 Boxes of V-Packer Shells. Enter the next room and drop into the water. Swim down as far as you can and then forwards into a small room. Pull the Lever to raise the water level and then swim back out the way you came. Swim all the way up to the hole you jumped into and then head back out to the room with the fire knight.
Now that the water level has been raised you can drop down the large hole without dying. Swim up to take a breath. Dive down and look for the small patch of seaweed on the floor. Just to the left of it is a small entrance.
Swim inside and pull the Lever to raise the water level once more. Swim up to take a breath. Now that the water has been raised three doors are accessible. The right door has a Vector Clip and the central door a Large Health Pack. Finally go through the left door and drop down the opening to a water filled tunnel.
Swim through the tunnel, picking up a Large Health Pack along the way. Continue forwards and swim down another hole. At the bottom is another Large Health Pack. Swim through the broken bars and up to take a breath.
Save your game because the next section can be a little tricky. Swim through the bars and continue forwards through the tunnel. Spikes will jab out from all sides. Try to avoid them or heal up if you get low on health. Swim through another two sets of broken bars, turn right at the t-junction and pull up for a breath.
Dive down, swim forwards and pick up the Vector Clip from the floor. Continue forwards and dive down to pick up the Water Crystal from the large underwater pedestal.
Quickly swim around to the side of the pedestal and pull the Lever to open the grating above and a door in the room above. Swim up through the grating to take a breath. Dive back down and swim through the door that just opened, below the carved face. Swim up through the hole in the roof and all the way up to the small hole you dropped down in the beginning. Run back out to the main room.
Wrath of the Beast (Earth Symbol)
After pressing the Earth Symbol Button enter through the middle door and turn right for a Vector Clip. Pull the Lever and go through to the Wrath of the Beast chamber.
When you enter the large statue collapses and most of the floor gives you. You’ll need to make your way across the chasm to the other side. First drop off the ledge to the right for Bandages. Climb back up and drop off the ledge to the left.
Walk forwards and take a standing jump to the next ledge further along. A part of the ledge will collapse. Turn right and run along the bridge, jumping over the gap to the other side.
Walk along the thin rock ledge on the right side. Lara will turn sideways so you can sidestep across. Walk onto the rock to the left which will slide down towards the left side. When it gets close to the left ledge jump across to it. Side flip to the right before this ledge collapses. Turn to the right and take a running jump to the ledge in the far left corner.
These ledges will also collapse so jump and climb up the next series of ledges until you’re back at the regular floor height. Turn to the right and run across the rock bridge, staying to the right side as the left side collapses first.

Take a running jump to the end before the whole bridge collapses. Pick up 2 Boxes of V-Packer Shells and the Earth Crystal. The floor will be rebuilt. When you step onto it 3 Fire Knights will spawn. You need to pull the 2 Levers, one on either side of the chamber while avoiding the fireballs from the knights.
If you do get set on fire there are streams of water on opposite ends of the chamber where you can cool off. The knights can’t be killed although you can knock them into the abyss in the center of the chamber. Once you’ve pulled the two levers head back through the gate to the main room.
The Sanctuary of Flame
Stand on the Fire Symbol Button to open the three doors to the Sanctuary of Flame. Go through the right door and pull the Lever to enter the chamber.
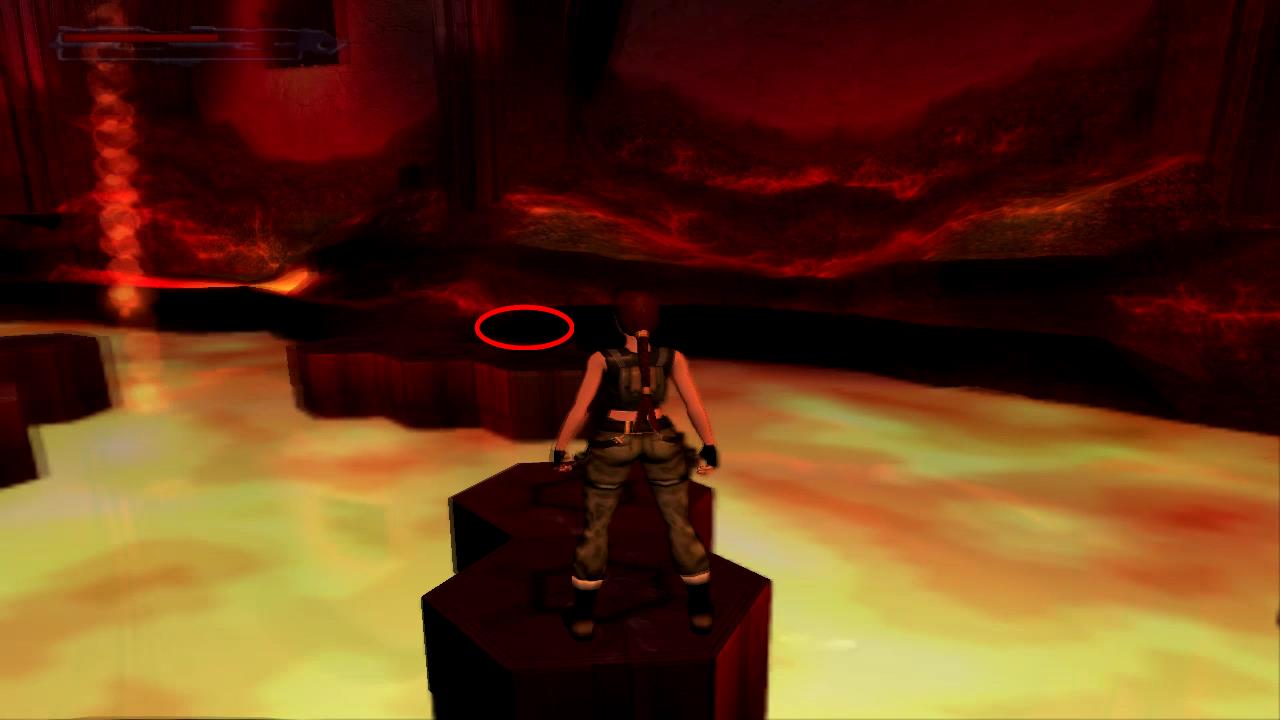
When you enter the chamber lava flows down the floor and the whole place begins to explode. Wait for the explosions to die down and walk down the stones, keeping to the left. Some of the stone pads will fall away when you stand on them so you’ll need to land on the stables pads to make it to the other side.
Take a standing jump over the three pads to the last one closest to the lava. Then a standing jump over the closest pad to the one behind it.

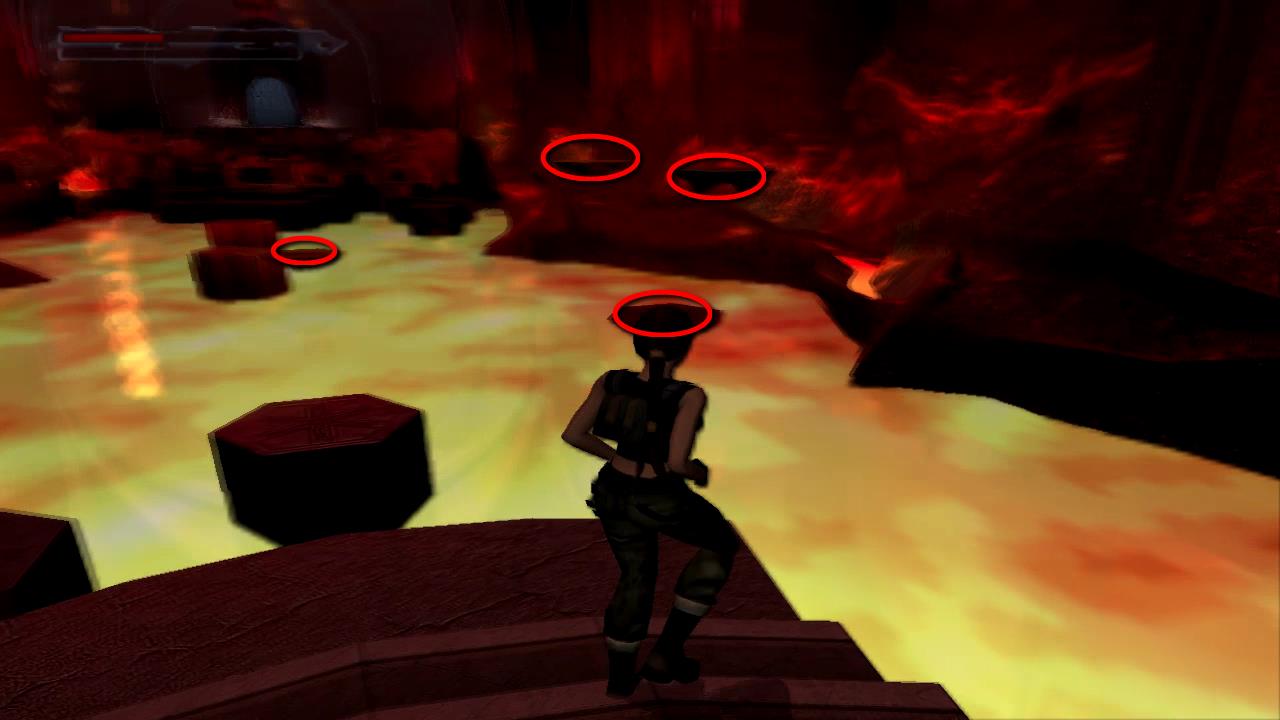
Walk to the pad to the right, turn left and take a standing jump to the two pads. Walk to the edge and take a standing jump to the three pads ahead. The closest one will give way so walk to the darker coloured ones. Stand at the back and take a running jump to the darkest colored pad at the back of the next group.
Walk to the left and take a standing jump to the base of the steps. You can get the crystal now but for a couple of extra pickups walk up the steps, turn right and take a standing jump from the edge onto the floating pad. Jump up to grab the next highest pad and then take a standing jump to grab the edge of the alcove. Pull up for Bandages and V-Packer Shells.
To get back stand at the back of the alcove and take a running jump back to the steps. Now you can run up and grab the Fire Crystal.
When you walk back to the lava pool the floor will change. Some pads will appear as you get close. Take a running jump to the first pad on the right, climb up to the next pad. Take a standing jump across to the third pad and a standing jump to the lower pad on the left.
Walk across the pads that appear in front of you. Take a standing jump to the pad on the right that begins to sink and quickly take another standing jump straight ahead towards the entrance. Take one more standing jump over the last bit of lava and run back through the gate to the main room.
The Breath of Hades
Stand on the Air Symbol Button and go through the right door. Pull the Lever to open the door into The Breath of Hades chamber. When you enter the chamber walk to the right and push the movable wall to reveal a secret chamber. Go inside for 2 Vector Clips and pull the Lever to lift up the logs for Lara to jump across.
The logs will sway as the dragon statues breath on them, making the jumps more difficult than they need to be. Stand a few steps back from the edge and jump to the first log on the right.
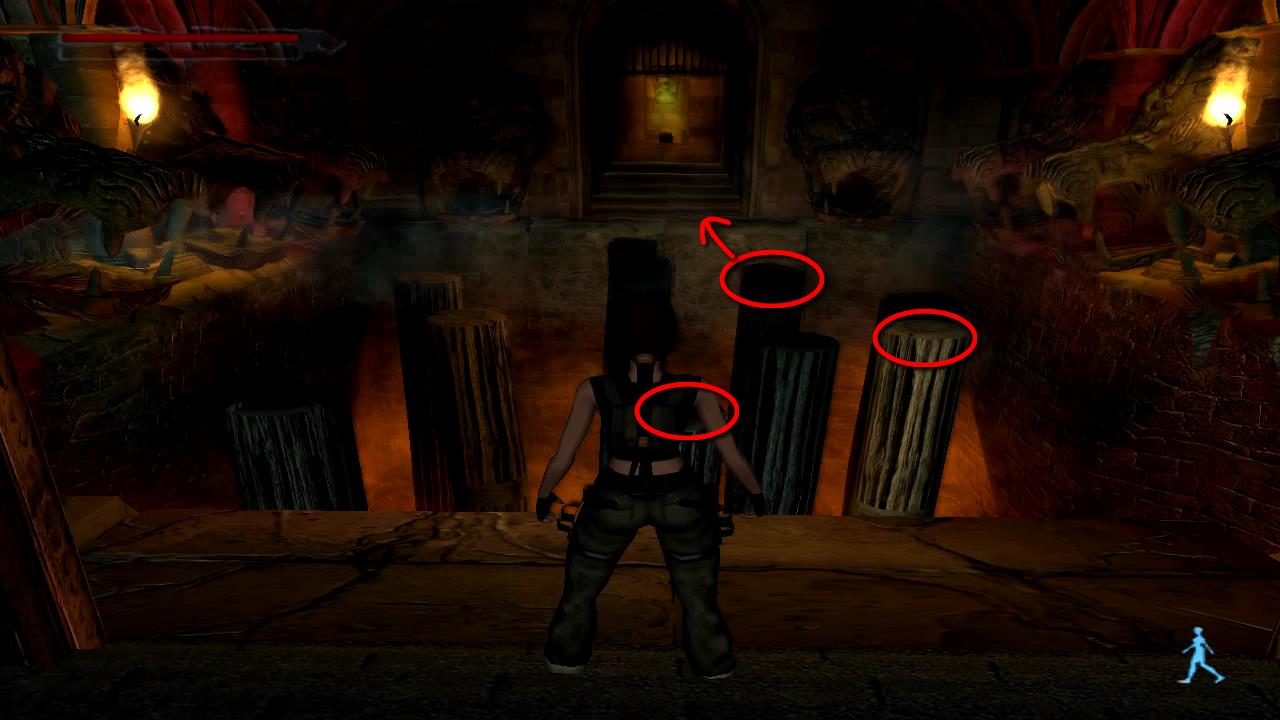
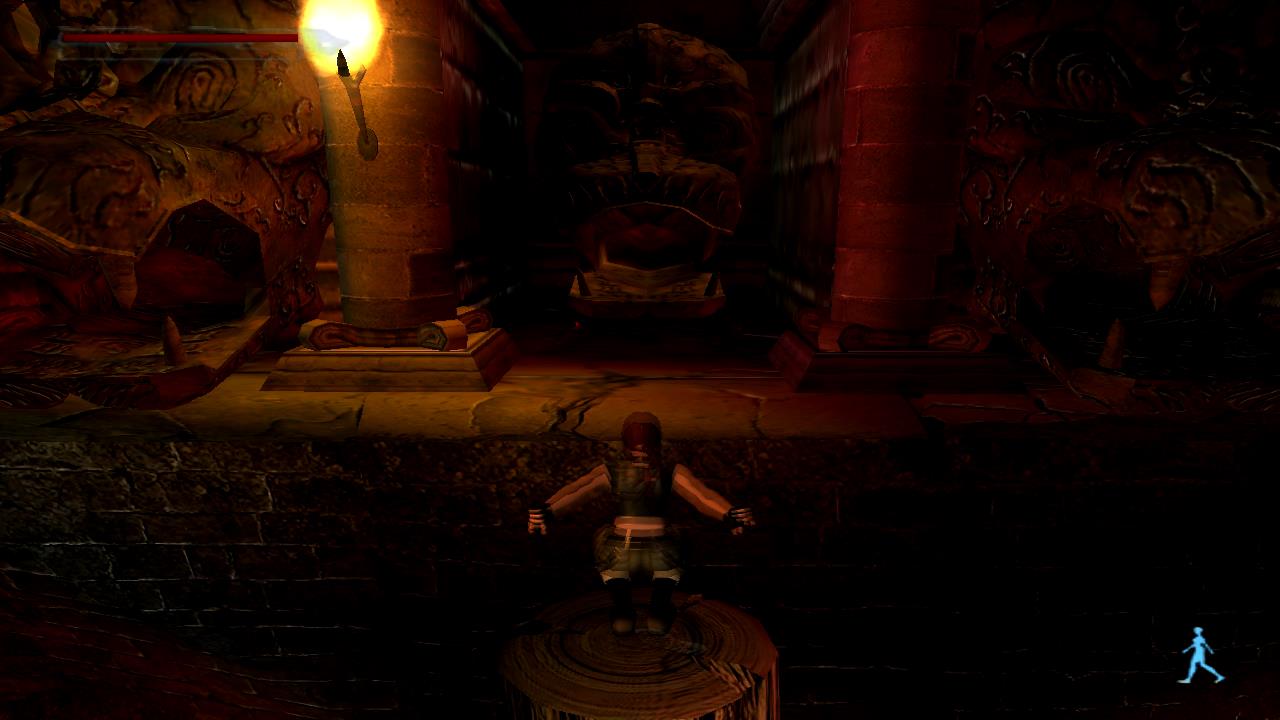
Take a standing jump over a log to the one behind it on the right, then over the next to the one in the far right corner. From here you should be able to jump to grab the ledge on the other side. Pull up and grab the Air Crystal.
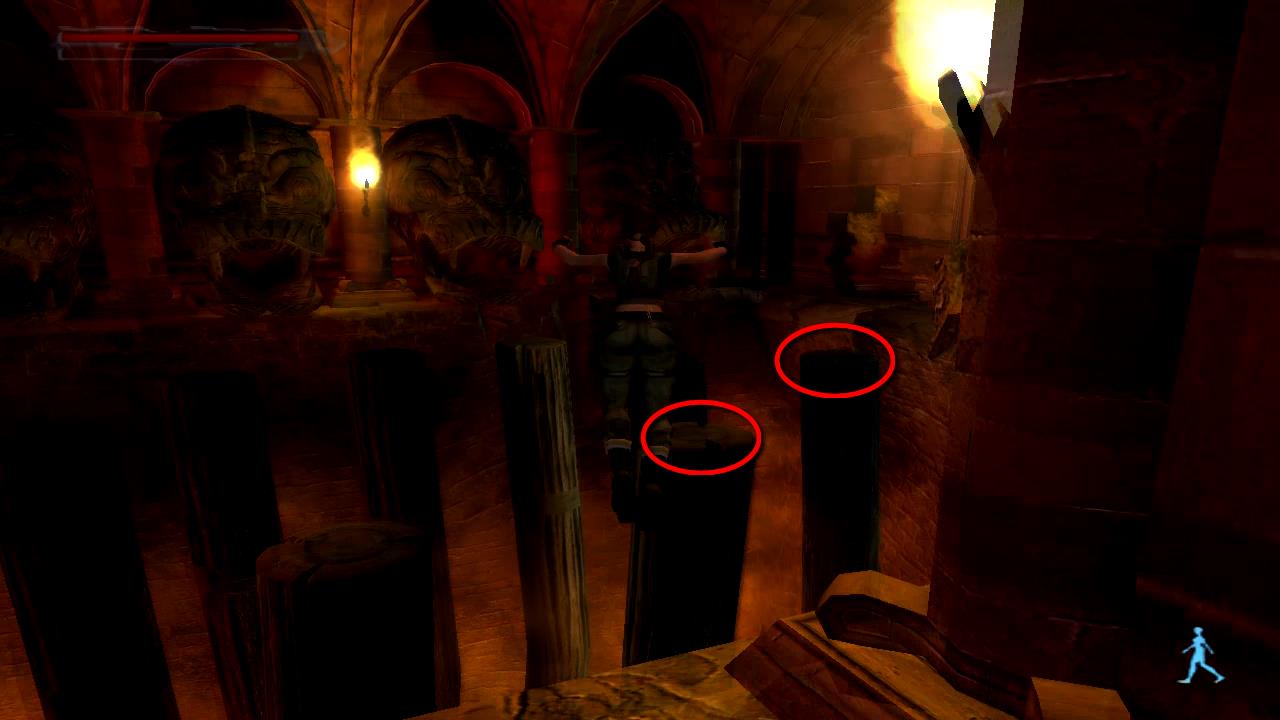
Turn back to face out over the chasm and walk to the left side. Turn to the right and jump to the first log closest to the edge. Jump again to the log on the right side. the dragon statue head will withdraw.
Jump into the alcove for a Large Health Pack and 2 Boxes of V-Packer Shells. From here stand close to the edge and take a standing jump onto the log off to the right, the next log closest to the entrance and then a jump back to the entrance.
Go back through the doorway to the main chamber. Now that you have all of the crystals go back to the entrance and place the crystals in the slots underneath the four paintings. This opens up a door in the Basement.
To get to the basement you’ll need to push one of the symbol buttons and then go through the wrong door. The trapdoor will open, dropping you into the basement. You can go through any trapdoor although I went through the left door of the Earth Button.
Back: Tomb of the Ancients Next: The Hall of Seasons II