Tomb of the Ancients
Back to Angel of Darkness
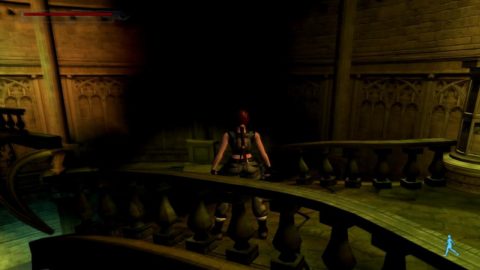
Run down the tunnel and drop down the hole in the floor to the wooden beam below. Drop down to the floor and walk out to the opening for a panoramic. You need to make your way down the shaft to the trapdoor in the floor below.
Hang off the edge and climb down to the ledge below. Turn around and take out one of the Bats and then take a standing jump to the wooden beam to the right. Take a standing jump into the tunnel and then drop down the hole. Drop down the ledges to the floor below and then head out across the broken bridge. Take a running jump to the other side of the bridge and then into the room beyond for Bandages. When you come back out you’ll be attacked by another Bat.
Take a running jump from the end of the bridge to grab the ledge on the wall to the right.
When you pull up you’ll be attacked by another Bat. Turn to the left and take a standing jump to grab the next ledge along. Drop off the edge and traverse around to the left, under the gargoyle statue, and drop down to the ledge on the other side.
Take 4 or 5 steps along this ledge and then hang off the edge. Climb all the way down to the sandy ledge below. Turn out to face across the gap and then climb onto the rock wall to the right. Climb around the corner to the left and drop down on the other side. Walk to the end of this ledge and take a standing jump to a wooden beam. Pull the Lever and stone ledges will come out of the wall.
You’ll need to use the stone ledges to get down to the floor below. Take standing jumps to the first and second ledges and then a standing jump to grab the third ledge. Pull up, take a standing jump to the fourth ledge and drop down on the near side to the ledge below. Take a standing jump to the next lowest ledge and then down to the floor.
An Undead Knight will chase you around but he’s quite slow so you shouldn’t have to worry about him. You can stun him with a few shots if he gets in the way.
Run around to the hole in the wall and crawl through. Pull the Lever to cause a different set of stone ledges to come out of the wall. Crawl back out. Run around the wall to the right and take a running jump to grab the first ledge. Pull up and take a standing jump to the second ledge and another to grab the third ledge. Jump up to grab the fourth ledge and take a standing jump from the end of the fourth to grab onto the fifth ledge. Take another standing jump to the sixth ledge. Turn around and make standing jumps up the ledges to the highest one.
Turn to face the wall and climb up into the alcove. Pull the Lever to open the trapdoor below. Save the game before trying to descend. One small tip when jumping from ledge to ledge is to jump into the wall above the next ledge. This way Lara won’t overshoot, she’ll stop when she hits the wall and drop down to the next lowest ledge.
When you’re on the sandy ground drop through the open trapdoor in the middle. Run down the corridor and follow the passage to the right. Kick open the door and Lara will gain the Lower-Body Strength Upgrade. Inside you’ll find the V-Packer Shotgun with 2 Boxes of Shotgun Shells.
Leave the room and head down the corridor to the right and kick open the next door. You’ll come to a trapped room. Pull the Lever to the right as soon as you enter the room to open the far door and also start up a series of traps. Run and jump over the spikes and head out the exit on the far side. Continue around to the left and open the next couple of doors to end the level.
Back: Archaeological Dig Next: The Hall of Seasons I


