The Dylarian Shipyards
Back to StarCraft: Brood War
The Dylarian Shipyards
Objectives:
Steal Battlecruisers
Defeat the Dominion Strike Force
For this mission you need to steal 18 Battlecruisers while they’re in drydock. There are four seperate areas and you’ll be given a number of units to complete each section, including Pilots which you’ll need to drive the Battlecruisers. If you lose Pilots you’ll be given replacements but there are only so many. Eventually you’ll run out.
First Section
Watch as the 3 Dropships fly over and drop 8 Marines, 4 Medics and 3 Pilots onto the platform. This section is really easy as the Medics will quickly heal up any Marines that take damage. Group them into a single unit and use them to destroy the Bunkers, including the Bunkers up the ramp. Send the 3 Pilots off to the Beacons around the edge of this platform to steal your first 3 Battlecruisers.
Second Section
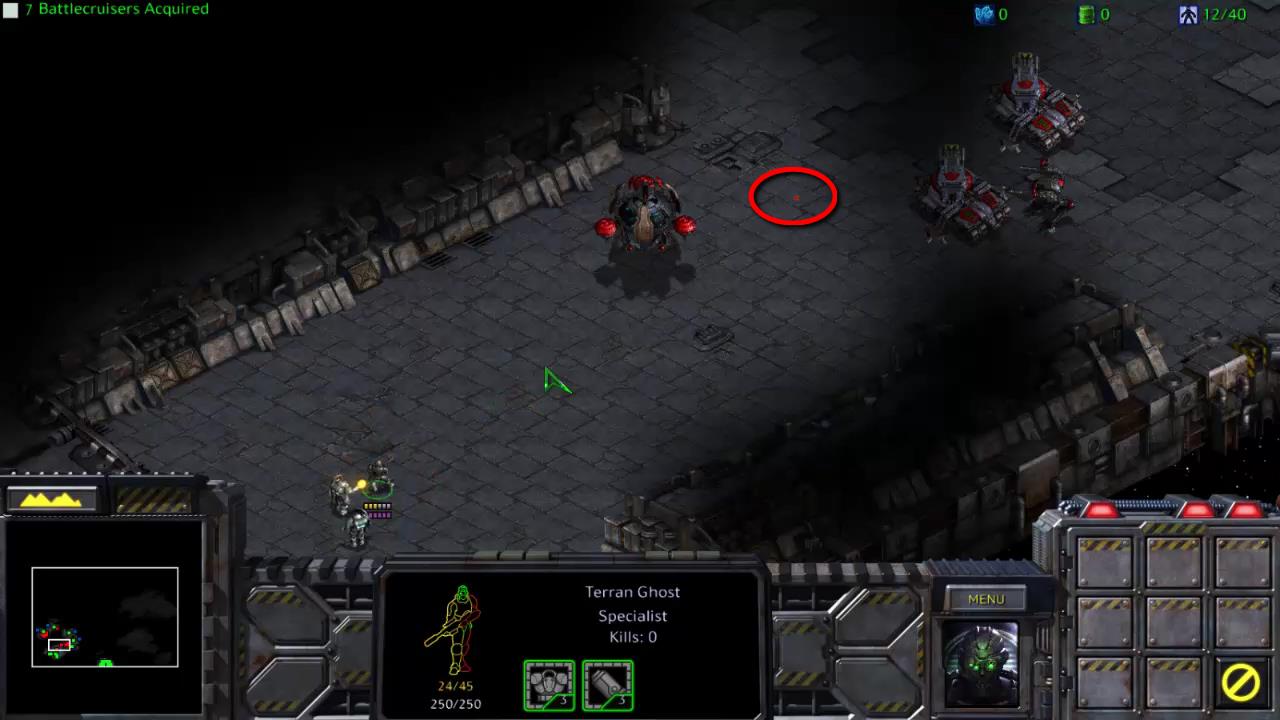
For this section you’re given 3 Medics, 3 Ghosts and 4 Pilots. This is a perfect opportunity to use the Medic’s Optical Flare ability to blind the enemy Seige Tanks. Once they’re blinded they will no longer be able to fire at you. Use the Optical Flare or the Ghost’s Lockdown ability on the remaining tanks before sending off the 4 Pilots to steal the Battlecruisers. You should have 7 Battlecruisers by the end of the second section.
Third Section
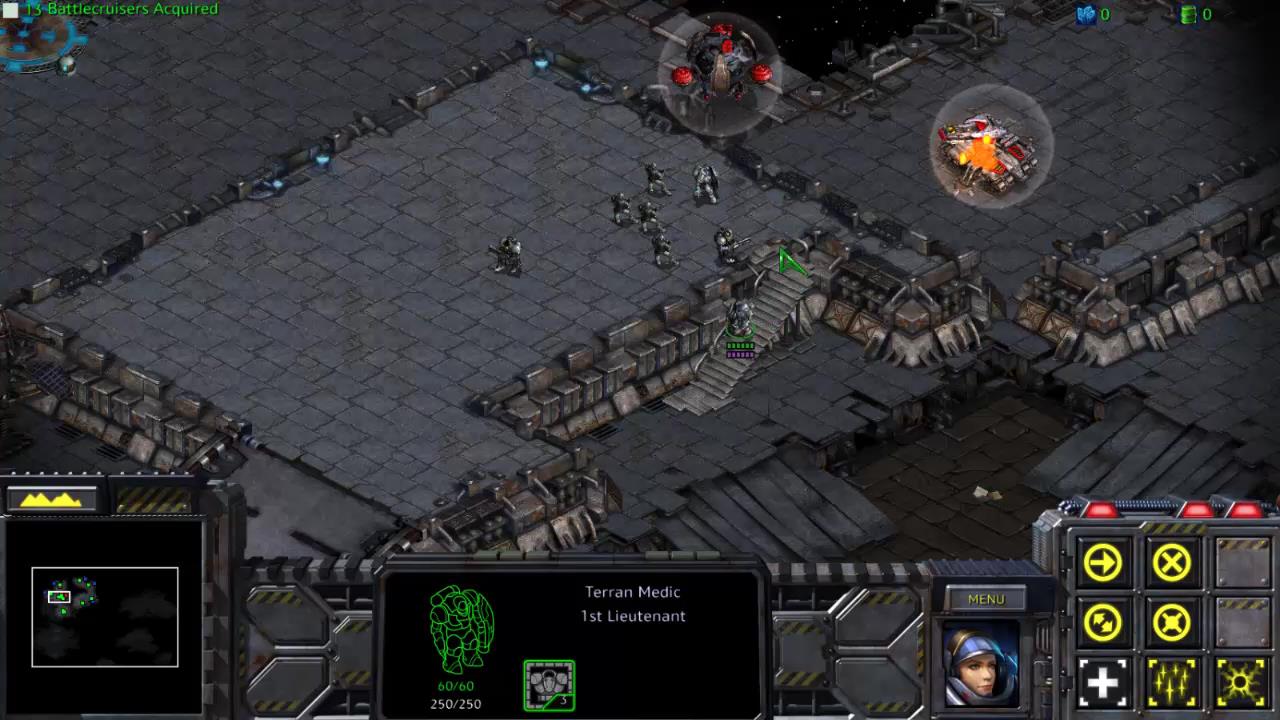
For the third section you’re given 2 Marines, 5 Medics, 4 Ghosts, 2 Goliaths and 5 Pilots. You also have 4 Nukes available!
Bring a Ghost and 2 Medics close enough to fire off a Nuke between the Science Vessel and the enemy Siege Tanks. If you drop it here it should destroy all the enemy vehicles. Unfortunately the Ghost will be just in range of one of the Seige Tanks. This is why you need to bring a couple of Medics along to heal up the Ghost while waiting for the Nuke to hit. You can also use Optical Flare on the Science Vessel to prevent it from seeing.
Now you should be free to send the first 2 Pilots to the Beacons to the east. Take your other units up the ramp. Bring a Ghost to Nuke the Bunkers and Seige Tanks on the raised platform and on the ground area just to the north. You should have one spare Nuke to clean up any remaining Marines.
Send your Goliaths around first to kill and Marines that have wandered off and then let your Pilots steal the remaining Battlecruisers on this section. You should have 12 Battlecruisers.
Fourth Section
For the last section you’ll be given 2 Marines, 6 Medics, 4 Ghosts, 2 Goliaths, 2 Siege Tanks and 6 Pilots. Your Siege Tanks will be immediately targeted by Ghosts for Lockdown. Use your Medics to cast Restoration on them and kill the enemy Ghosts.
Bring your tanks along the raised platform with your other units on the ground level next to them. Cast lockdown on the Goliath and then the Seige Tank in the lowered section. Your tanks in Seige mode should be able to reach it. Set up your tanks once more to destroy the Bunker at the end of the raised platform. The first Beacon should be free for one of the Pilots to steal the next Battlecruiser.
Move your troops up and lockdown all enemy vehicles. You should be able to destroy them without taking much or any damage.
Continue around the map in this manner until all the Beacons are free and you’ve stolen the last Battlecruiser. You should have 18 by now.
The Strike Force
Once you’ve taken the last Battlecruiser you’ll receive a message that a large fleet of Dominion ships is headed your way. The most effective way to manage your fleet is to put 2 Battlecruisers into each group and label them from 1 to 9. This will make it easy to Yamato Cannon the enemy Battlecruisers. It won’t be enough to kill them but they will be almost destroyed. Once all the enemy Battlecruisers have been destroyed you will win the mission.

Back: First Strike Next: Ruins of Tarsonis