Level 17: The Lost Library
The Lost Library
Secrets: 3
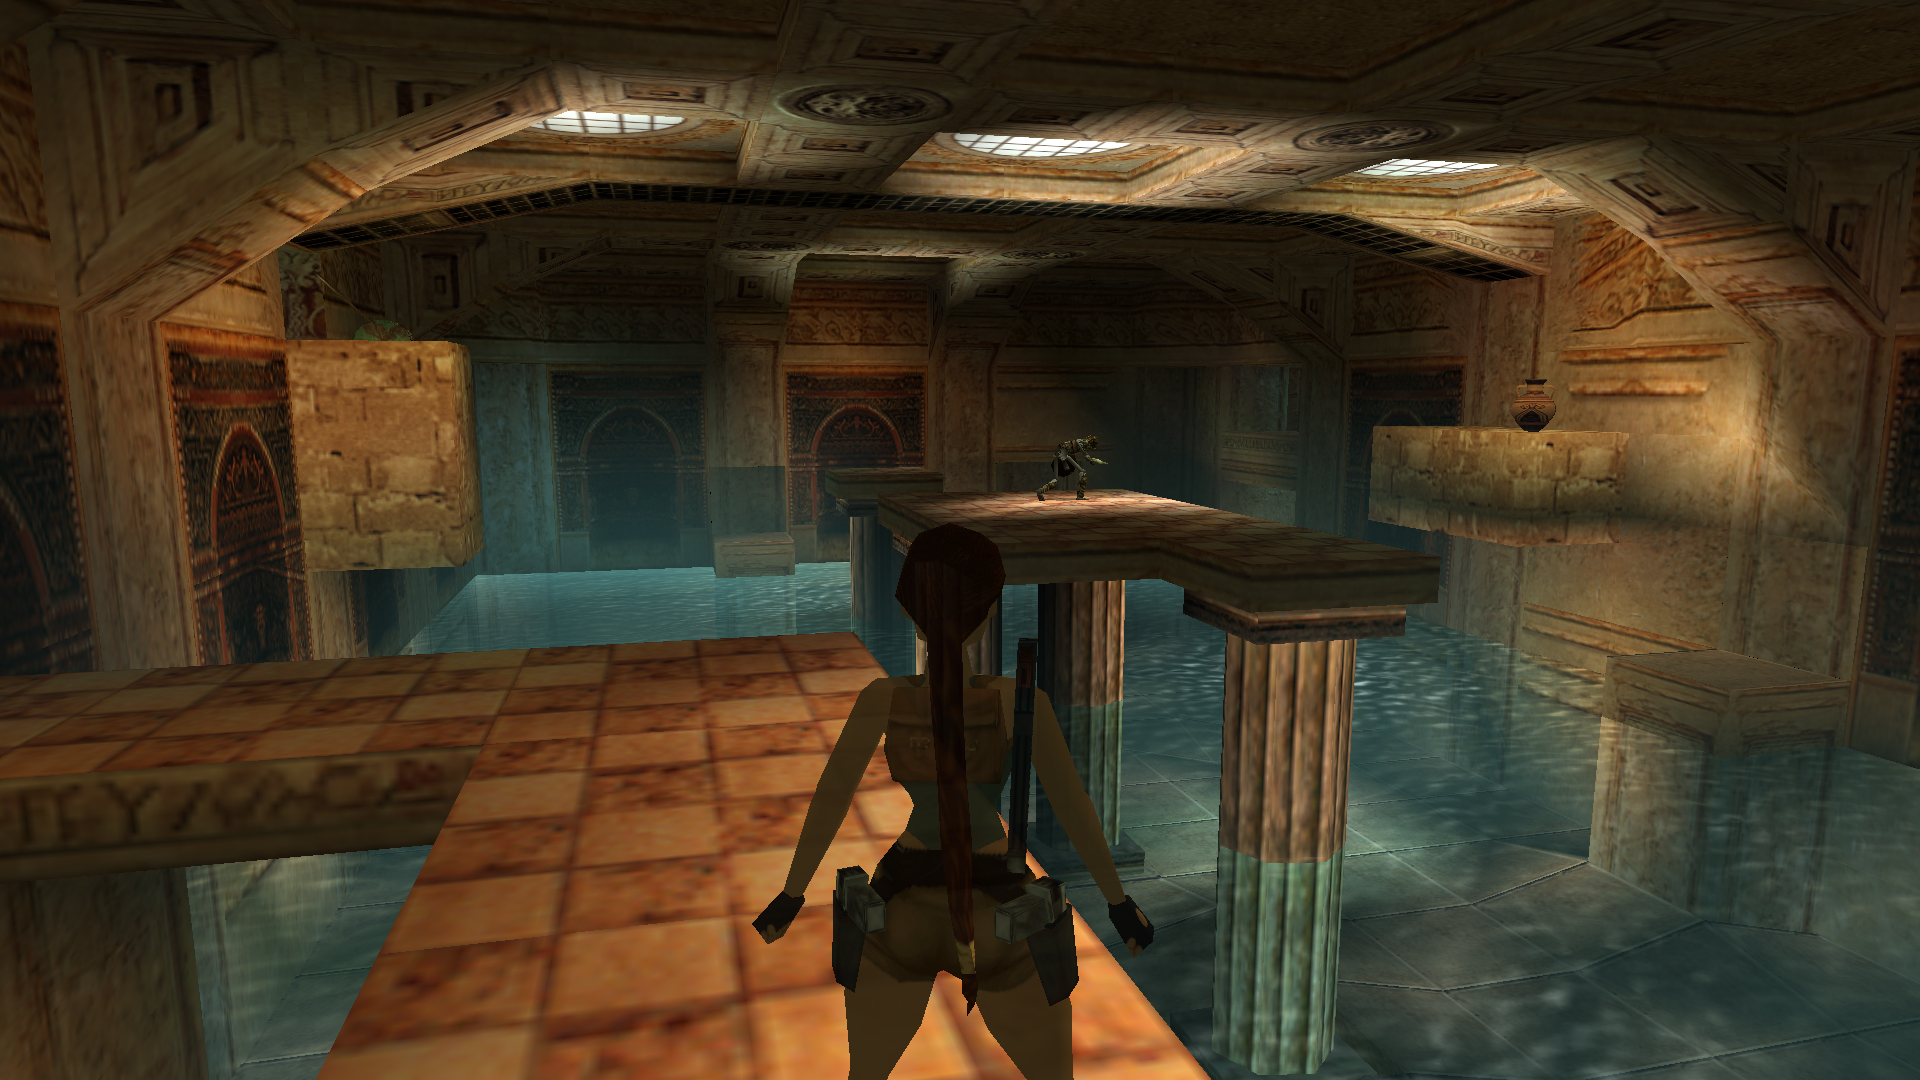
Crawl through the crawlway to the right and drop down the other side. Run around either side to the large two-storyed room with a large blue door at the back. It’s possible to explore this level in a different area but we’ll start with the first blue door on the left on the ground floor.
You don’t need to enter this room although you’ll find a Small Medipak and Uzi Clips inside a jar. If you continue forwards to a room with banners you’ll be attacked by 2 Mechanical Men. They can only be damaged by hitting the blue diamond in their chest. A shotgun works well but will still require quite a few rounds to take down a single one of them. There’s a Fire Circle Scroll on the pedestal but you can’t pick it up due to a bug. It only offers a hint and isn’t essential for the game. Make your way back to the main hall and open the second door on the left.
Enter the passage and either slide down the Pole to the bottom or hop backwards over the edge and tap action. Let go of the action button before Lara grabs onto the edge. Lara will lean forwards and land on the ledge beneath her. If you do it this way you’ll be able to avoid the spinning blades and grab all the loot on the way down.
On the first ledge break the jar for a Small Medipak. The second ledge down has a Large Medipak and Shotgun Shells. Drop down to the floor and run around the passage to another Pole. You don’t need to climb up this one, just jump up to the edge and pull up while avoiding the spinning blade.
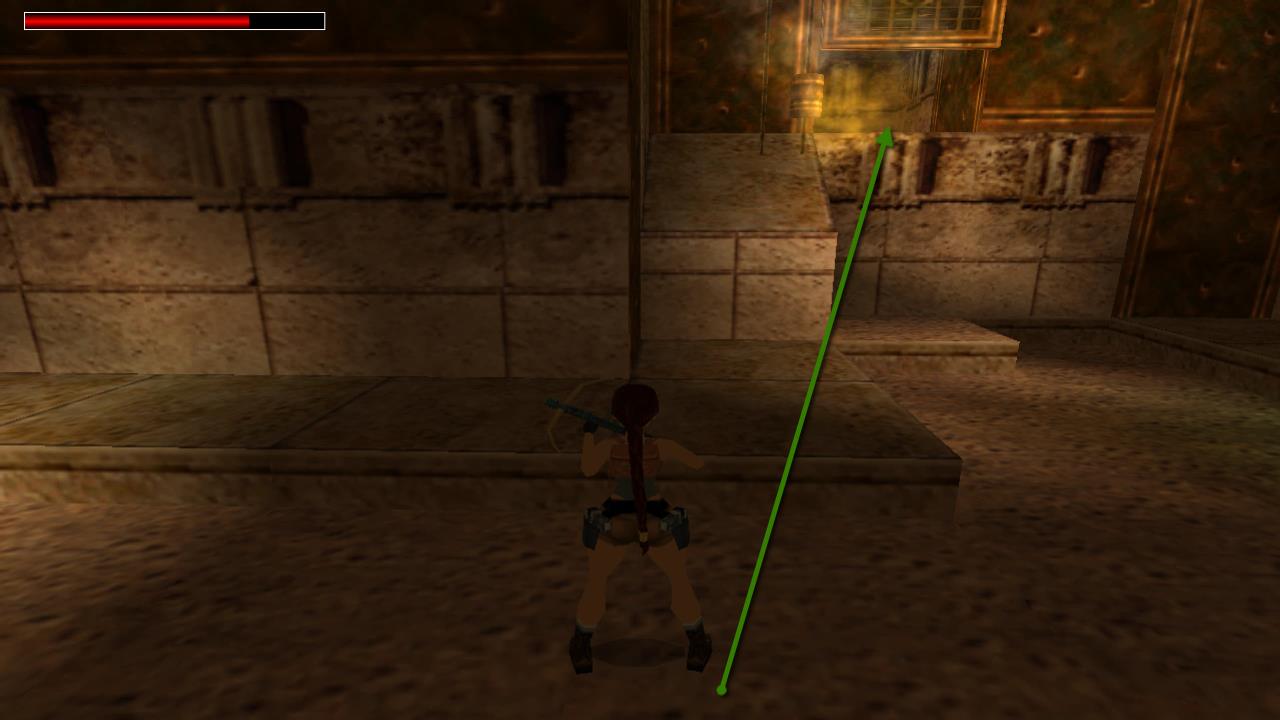
Go up the steps to the room with the two large gears. A Mechanical Man will run out at you. Kill him and then use the Crowbar to get the Golden Star from the column. Turn around and jump to the back of the gear that’s now on the right (left gear as you enter this room from the pole). Climb backwards down the ladder to the bottom.

Drop down the steps and pick up the Revolver Ammo, Small Medipak and Uzi Clips for Secret #1. Climb back up the ladder to the gear room and then up the ladder on the side of the column on the left.
Enter the passage on the left and run down the steps. Slide down the pole and enter the room ahead with guns drawn as you’ll be attacked by 2 Mechanical Men. There’s a gate on the left that will need a gem to open.
Head through the arch on the left and climb down the hole. Crawl through the passage and enter the room where you’ll get a cut-scene of a Mechanical Horserider. Aim for the blue diamond and dodge out of the way of the horse when it gets close. You may want to use wideshot shells for this fight. After a few hits the Mechanical Man will fall off and continue attacking. Once he’s been killed he’ll drop the Horseman’s Gem.
You may be a bit disorientated after the fight but take the other exit to a room with a pulley system. Use an explosive arrow to destroy it and a secret door will open up to the right of it.
Enter the small passage for Secret #2 where you’ll find a Large Medipak, Shotgun Shells and Uzi Clips. Run back to the first large room where you fought the 2 Mechanical Men and use the Horseman’s Gem on the receptacle to open the gate. Go inside and pull the Rope Chain to open an underwater gate.
Climb back up the wooden pole and drop back down to the gear room. Head towards the back of the gear room and take the passage in either the right or left corner. You’ll have to dodge past 3 swinging chains before entering another room with a gear. Open the hatch in the ground and dive into the water. Head through the passages to a central room where there’s an air pocket at the top next to the grate at the top. Swim out another passage to arrive at a small room where you can walk out of the water. Use the Crowbar to grab the 2 Golden Stars on the wall.
Swim back the way you came, pull out of the water, and make your way back past the swinging chains to the gear room. Continue back the way you came and drop down the hole with the Pole and spinning blade.
Run back to the first Pole and quickly climb up, trying to avoid the blades. Backflip onto the first ledge to heal up and then climb up again. Continue until you reach the top. Make your way back to the main hall and this time go through the left door on the other side of the room (right side as you enter this hall).
Follow the passage around to the Planetarium. You’ll need to place the planets in the right locations. The first planet is off to the right and has a blue band around it. The other planets can be accessed by using the Golden Stars in the receptacles and opening the doors.
The planets need to be placed in the following order, grey band – first orbit, green band – second orbit, pink band – third orbit, yellow band – outer orbit. Once you have them in the right place blue lightning will crackle between them and the door under the golden circle will open. Run through this door and blow up the jars along the way for a Large Medipak and Shotgun Shells (Wide).
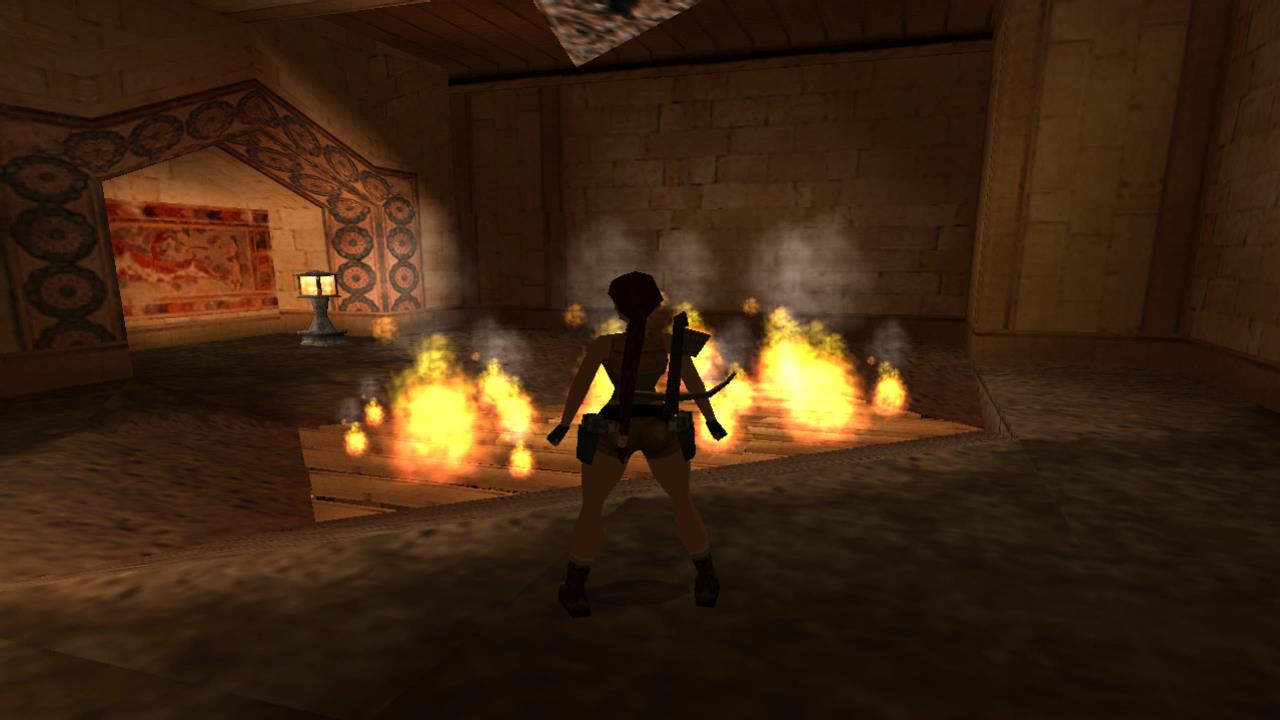
The blue door next to the second jar leads back to the Main Hall. Open it now because you’ll want to come back this way later. Continue along the passage to the Fire Circle Room.

This room is circled with burners. Pulling a lever behind a burner will alter that burner as well as the other two connected via the pentagram. The solution to the fire circle puzzle is to pull the first Lever as you enter. Then walk around anti-clockwise and pull all of the Levers as you go. Avoid the raised platform on the right side of the room as this will reset the puzzle.
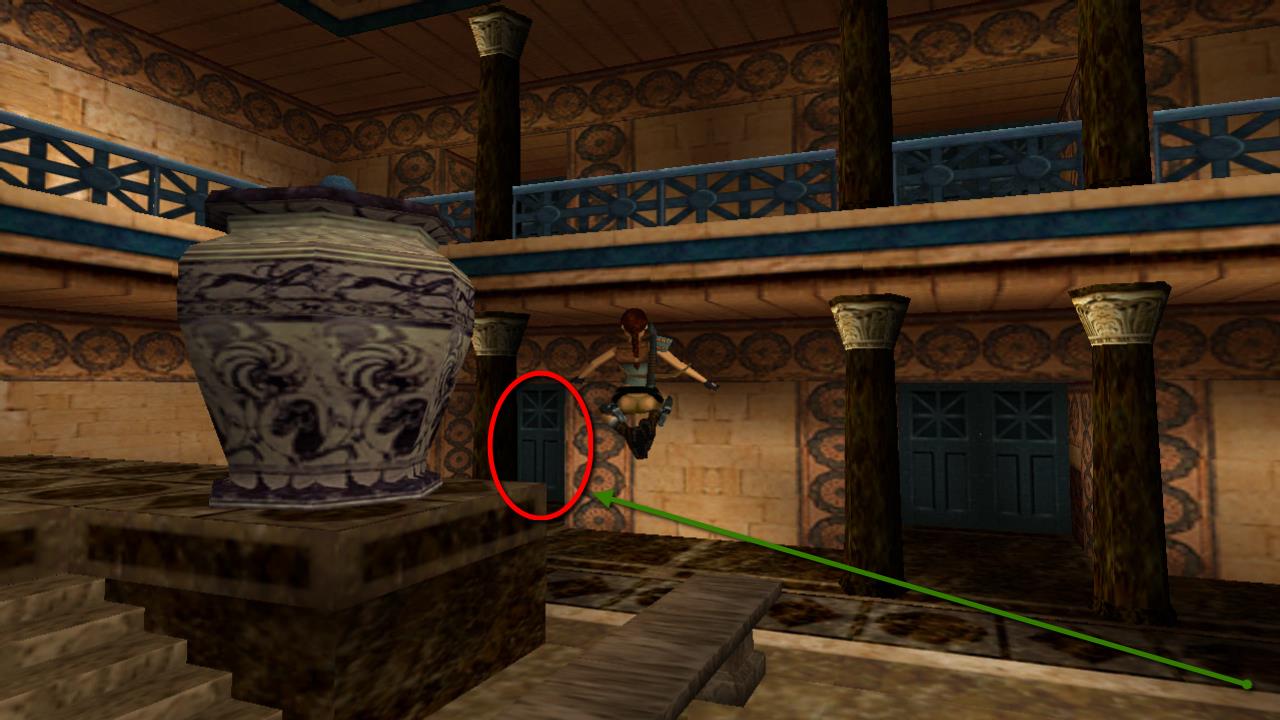
Once all of the burners are lit two blocks will raise up in the center. Climb up them and then climb up through the hole in the roof. Run up the steps, past the fountain and into a Scroll Room. You can climb the ladder to the balcony and shoot a jar for a Small Medipak, otherwise do a u-turn and take the other exit from this room to a larger Scroll Room. Run down the steps on the left and open the blue doors back to the Main Hall. Now you’ll be on the top level.
You can open the other doors on this level while you’re here as you can’t open them from the other side. Avoid the left door on the right side (upper level) for now as this contains a Fire Elemental. Take the first door on the right side (upper level).
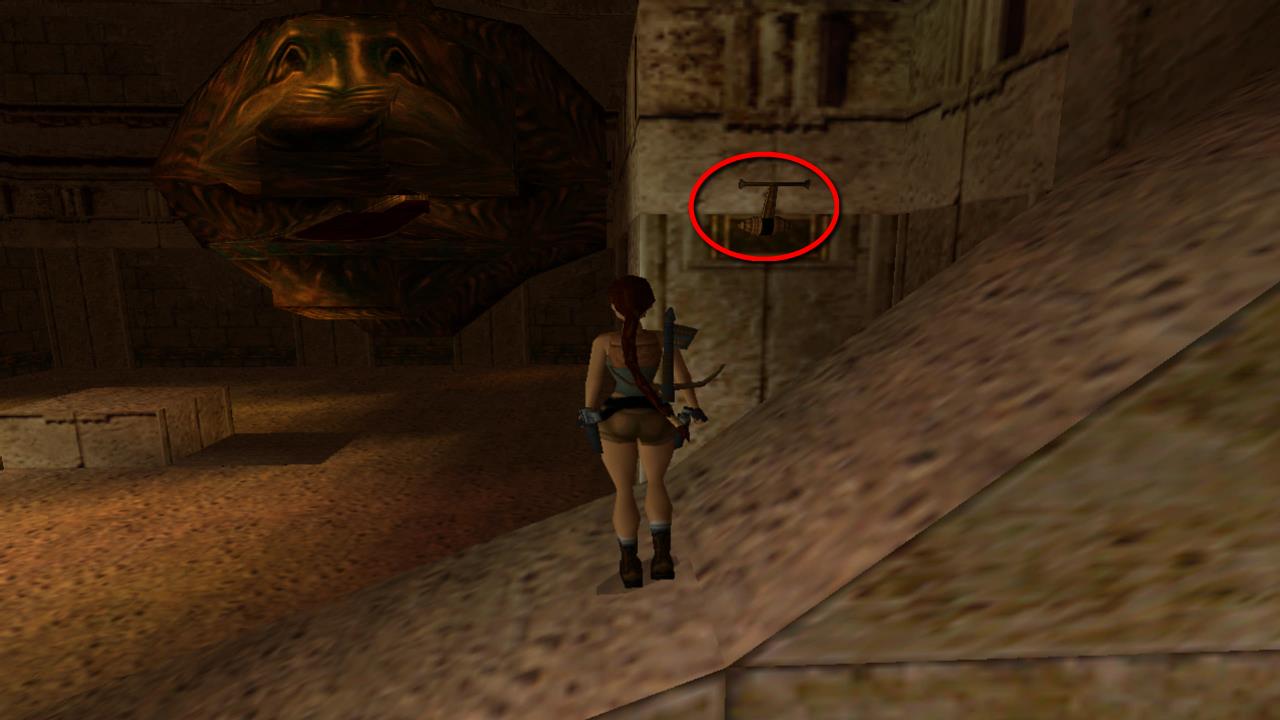
Slide down the ramp and take a jump to grab onto the ladder in front of you near to the end of the ramp. Climb up to the top. You’ll be on the top of one of the lion’s heads. Turn to the right and take a running jump to the ledge for Secret #3 for a Large Medipak and Arrows.
Drop down to the ground. You may be attacked by a Skeleton and a second boulder may roll down the ramp so be prepared to dodge. The first boulder was already activated when you picked up the secret. Climb halfway up the ramp and jump to grab the Switch on the left.
This raises a block near to the center of the room. Climb to the top of it and then jump across to grab the raised ledge on the same side of the room as the switch. Climb into the passage above and make your way around to the opening overlooking the lion’s head. Take a running jump to the top of the lion’s head. You’ll need to land on the right side near to the wall where it’s flat or you’ll slide back down.
Pull the Rope Chain to open this lion’s mouth and slide down the front of the lion’s head backwards. Grab onto the edge of the nose and drop down and grab again to grab onto the mouth. Make sure you have pressed the crawl button and climb inside. If you’re not crawling you’ll slide back down to the floor. You can reach the mouth again by jumping from the blocks in the center of the room.
Once inside the lion’s mouth climb up the Pole and backflip into the room above. There are two gates that both open automatically as you get close. Go through the gate on the right and pick up the Pharos Pillar from the pedestal. You can open the hatch in the floor here that leads to a pool of water. You’ll need this if you accidentally trigger the Fire Elementals by trying to explore the rest of the room.
Go back to the room with the Pole and go through the other gate. Pick up the Torch on the floor and stand on one of the grates in the room to the left to light a burner. Light the Torch with the burner and continue down the passage. A gate opens up ahead automatically. Throw the Torch onto the wooden planks on the floor to burn them down.
Drop down the hole into another Scroll Room and pick up the Musical Scroll that Lara looks at as you get close. There’s Shotgun Shells in a jar here. Climb up into the passage next to the jar and open the blue doors back into the Main Hall.
Go through the right door on the left side (ground level). Follow this back to the Fire Scroll Room and climb up through the hole in the roof. Head through the Scroll Room and back out to the top level of the Main Hall. Go through the right door on the left side of the hall. Shoot the jar along the way for some Uzi Clips.
Continue around to the Music Room and place the Musical Scroll on the stone music stand next to the harp. Lara will play a tune which opens a secret passage. Head through the secret passage to a balcony and pull the Rope Chain to open the large blue doors. Jump down to the ground level and run through the large blue doors to end the level.
Next: Hall of Demetrius (Level 18)
Back: Tomb Raider 4