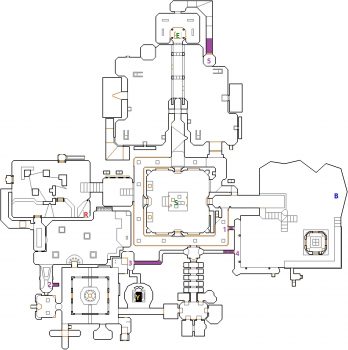
Level 18: Mill
Back to Final Doom
Mill
From the Star you’ll be on a central platfrom facing east. Drop down and go through the small tunnel to find a Backpack. Come back out and go through the east door.
Take the first right and open the different textured panel on the left wall. This is Secret 1 and leads out to the large eastern room. To get back to the Start clear out the upper walkway as you run down to the south. Open the door at the end of the walkway and go through the teleporter. You’ll be taken back to the central platform.
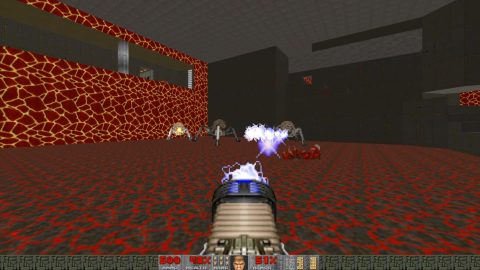
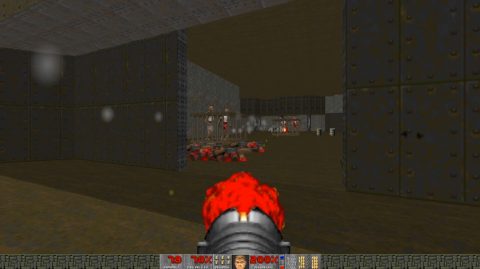
Again drop down and go through the eastern door. Continue to the east and start clearing out all the enemies in this large room. Focus on the Pain Elementals and then drop down to take out the Arachnotrons.
To get to the Blue Key you’ll need to climb up the steps and make your way along the ledge. Hit the Green Button at the end. This opens the doors to the round building.
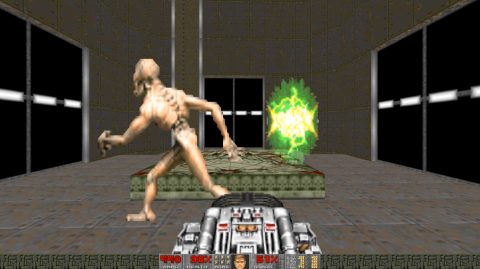
Drop down and enter the round building. Press the Switch to lower down a slow lift. While you’re waiting an Arch Vile will teleport into the room so get ready with the BFG.
The lift is a teleporter so step onto it to be taken to the pillar with the Blue Key. Drop down and head back to the main building. Make your way around the outer corridors to the stairs on the western side.
Walk down the stairs and take out the Revenants in the caged room to the left. Enter the room but watch out for the 3 Barons of Hell hiding behind the large pillars.
Once the room is clear pick up the loot and then open the door to the right (north). Get ready with a BFG to kill the Arch Vile. Flip the Switch and then flip the next Switch down the corridor to the right. Come back out and pick up the Red Key.
The room on the eastern edge will be open revealing a Baron of Hell and another Switch. Flip the Switch to open the door behind the Blue Door to the south.
Go through the Blue Door and the next door to a room with cages and barrels. Run to the end of the room and flip the Switch hanging down from the roof. This will lift up Revenants inside the cages. Quickly leave the room and turn around to take them out from a safe distance.
As you enter the room turn to the right and kill the Mancubus. Flip the Switch behind him and then turn to the right while standing a few meters back from the Switch. Drop down to the left (east) and go through the fake wall for Secret 2 with a Megasphere.
Head back out through the Blue Door and back to the central corridors. Walk around to the Red Door on the southern side and go through.
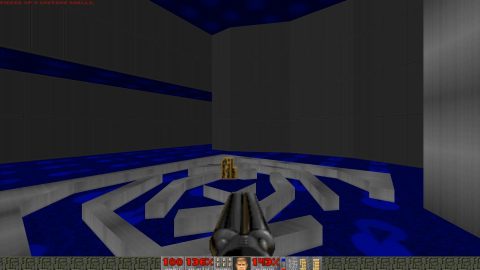
Run down the corridor to a room with swampy water and Button. Press the Button to lower the lifts and release a Demon. You may want to explore all the lifts but you the one you need to take to progress is the lift directly to the east.
Walk down the blue corridor and turn to the right to see the Yellow Key on a structure. You can’t reach it yet so continue down the blue corridor.
The next area is a puzzle. You need to hit the four Switches in the smaller rooms to remove the blocks around the four switches in the central room. Each of the Switches will be guarded by Barons of Hell. In one of the rooms you’ll need to shoot the face in the corner of the room to activate the lift to the Switch.
Once you’ve found all the Switches go through the Blue Door to the central rooms and hit all the Switches around the central pillar. The platform around the Yellow Key should be lowered so you can pick it up.
For Secret 3 head back to the lift in the north west corner and ride it up. Open the panel on the wall with the computer electronics for a hidden corridor. This is Secret 3. Follow it along, taking out the Lost Souls along the way, until you can drop down for the Soul Sphere.
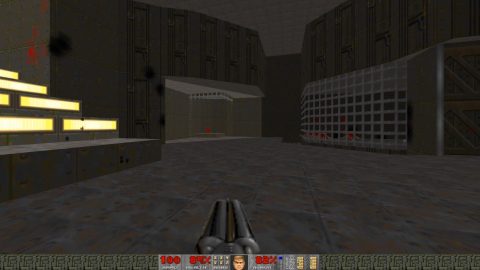
Now that you have the Yellow Key head to the eastern corridor and ride the short lift up. Follow the corridor to the north and open the Yellow Door. Inside you’ll find a very large room with no enemies inside.
To provoke the enemies to attack you’ll need to find the computer panel on the north wall of the western side. Quickly head back to the eastern side and press the Switch inside the alcove to the south. This will spawn in the Cyberdemon.
To make this section a bit easier quickly retrace your steps and go to the eastern corridor. Open Secret 1 out to the walkway around the large room and open the panel just to the south. This is Secret 4. Follow the corridor along to a lift that lowers down the Invulnerability.
Run back to the northern room and take out all the enemies as quickly as you can.

The final secret, Secret 5 can be found to the north of the western side of the room with the Soul Sphere. Open the wall behind it and go up the stairs for Invisibility.
Once you’ve finished picking up the loot head to the Exit in the middle between the two sides of the room.
Back: Level 17: Processing Area Next: Level 19: Shipping/Respawning