Level 5: Hangar
Back to Final Doom
Hangar
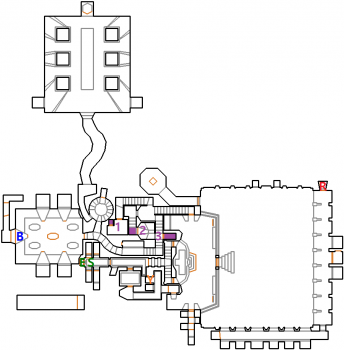
You Start right next to the Exit but you’ll need to find the Red Key before you can get to it. Move close to the panels with the monitors to the north and the panel to the south will open up. Move to the south and the next one will open up. Repeat until the door to the east is open.
The door to the south leads to a room with the Blue Door. You’ll come back here later but there are a couple of small Health Packs if you need them.
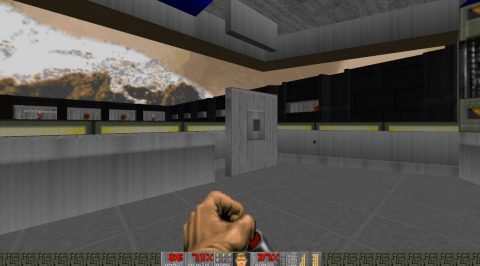
Continue to the east until you come to a room on multiple levels. Take out the Imps and head down the steps. The walls will open leaving you exposed to the Chaingunners in the outer courtyard. Quickly run to the Green Button on the left and press it to close all the walls.
Open the brown panel on the south side to find a small corridor with a Health Pack. When you grab it a few enemies appear from the sides. Take them out and go back to the main room.
Press the Green Button on the other side to open a small room with a Demon, Imp and Invisibility Sphere. Now that you’re invisible you may want to open the central door to the courtyard and fire a few rockets to clear out some of the Chaingunners.
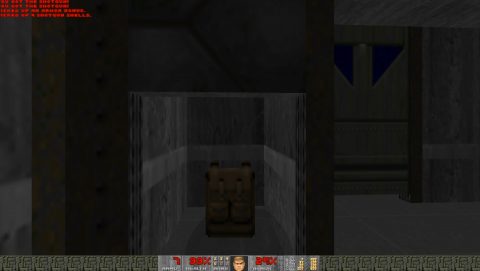
Open the brown panel to the north. These inner corridors can be a little tricky to navigate. First take the stairs down on the right and open the door at the end with the blue triangles. Open the odd-colored wall on the east side for Secret 1 with a Backpack.
Head back and take the stairs up. Enter the first room on the right. Take out the Shotgun Guy and then open the lighter coloured wall. This is Secret 2. Inside you’ll find a staircase with an Imp and the Chaingunner that looks down on you from the entrance to this area.
Head back to the corridor and open the darker colored wall opposite. This is Secret 3 with Green Armor and Shotgun Shells.
Continue following the corridor to the south and west. The spiral staircase to the north has a Cacodemon and the room to the west has Chaingunners. When you enter the room to the west an alcove will open up behind you with 2 Chaingunners.
Press the Green Button in the alcove and quickly drop down the spiral staircase for a Computer Area Map. You’ll only have a few seconds to grab it.
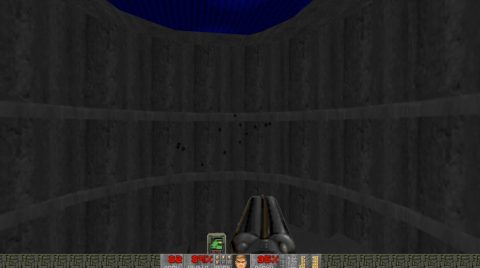
At the bottom of the staircase continue along the passage that leads to the north. Run towards the Soul Sphere and then back again. This will trigger 2 Barons of Hell.
Take them out and then grab the Soul Sphere. When you do 4 Revenants will be released from side alcoves. You may want to run back to the curved passage for safety while you take them out.
Make your way back up the spiral staircase and into the room to the west. Press on the grey sides to lower the platforms with the loot. To get the Blue Key press on the grey panel in front of it. Run backwards onto the lowered platform and the platform with the Blue Key will lower so you can pick it up.
Open the blue wall behind the platform and clear out the enemies. When you return to the main room more Chaingunners will have appeared from side rooms on either side.
With the blue key in hand return to the room with the walls that open up to the courtyard. Many more enemies will have spawned in so take them out and make your way back to the starting corridor.
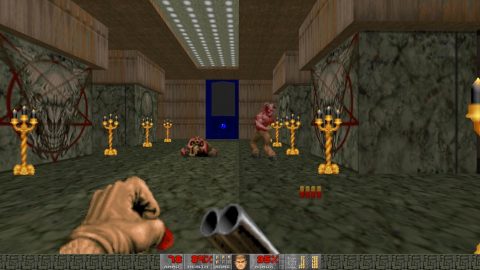
Open the door to the south and go through the Blue Door. Clear out the enemies and grab the Yellow Key.
Head back to the room with the walls that open up to the courtyard. They should be open now. Take out any remaining Chaingunners and drop down.
Open the Yellow Door on the north side and take the teleporter up to the outer ledges. Head to the north for the Red Key.
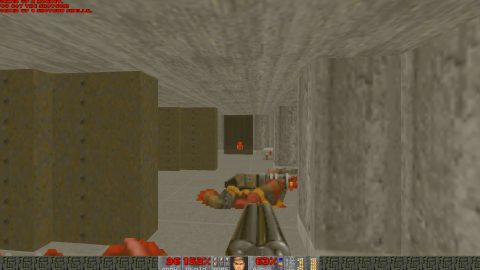
Head around to the other side off the ledge for the Blue Armor. The wall in the center on the east side can be opened. This releases 2 Cacodemons from rooms to the north and south.
Drop down to the courtyard to face another 3 Barons of Hell. Once they’ve been taken care of make your way back to the starting corridor and open the Red Door to the Exit.
Back: Level 4: Wormhole Next: Level 6: Open Season